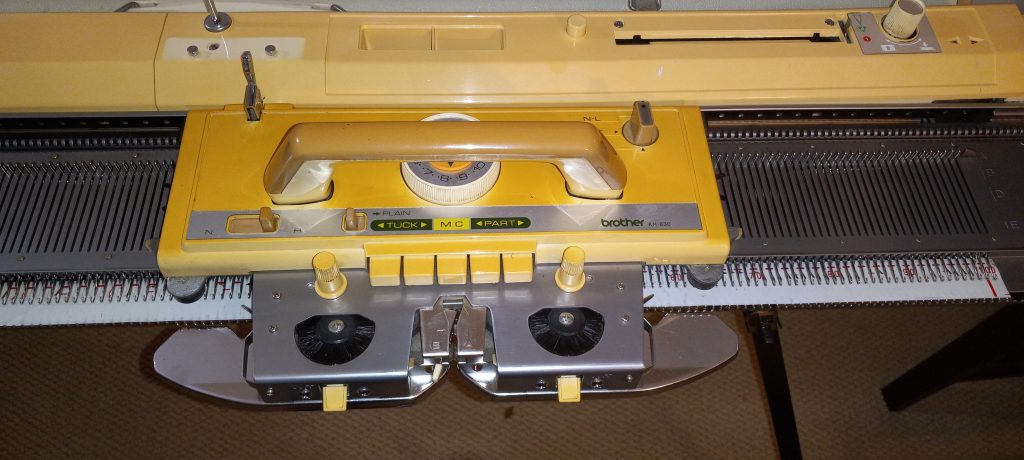
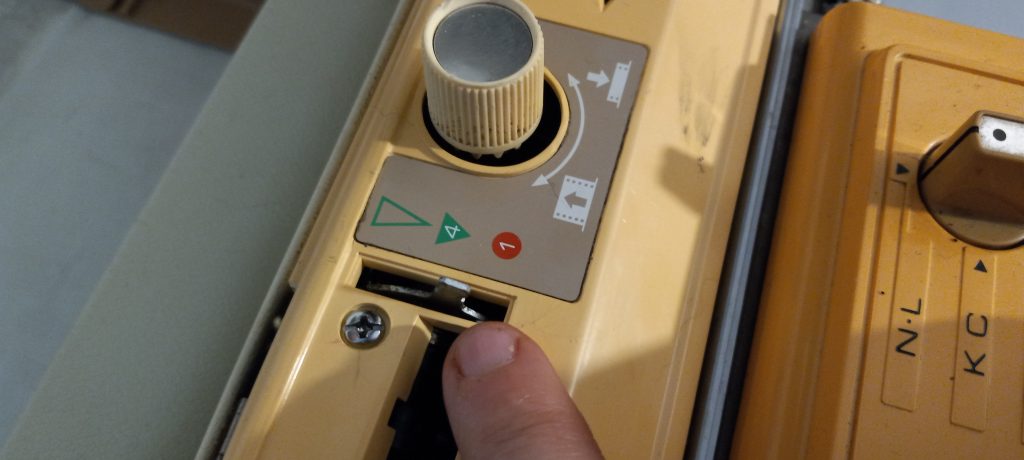
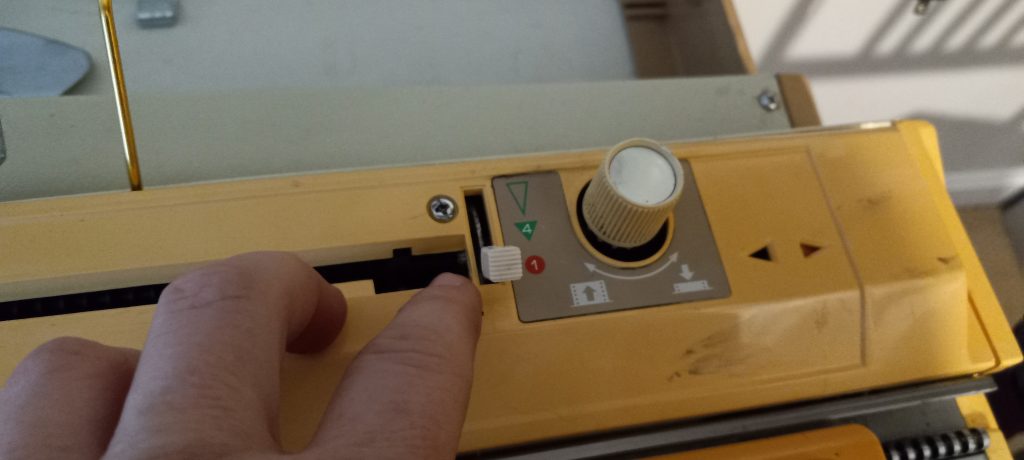
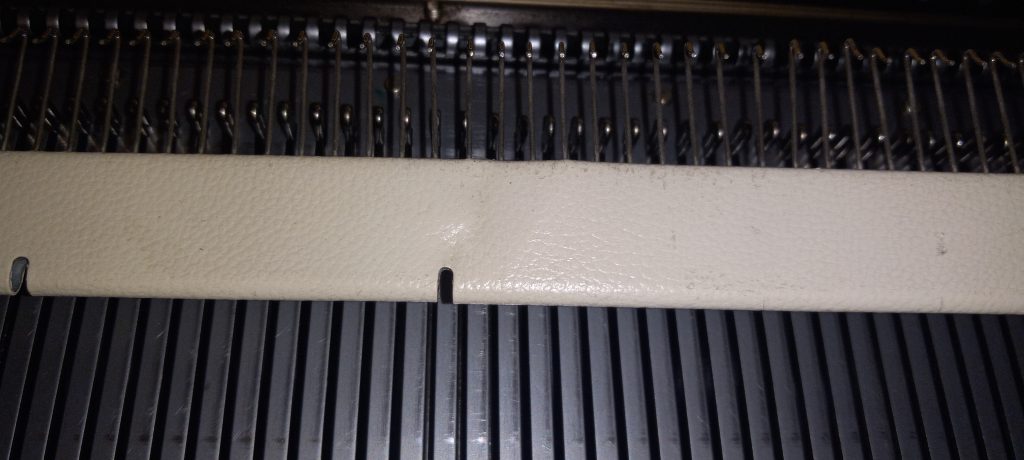
Brother KH800 and KH801 knitting machines have unique designs for needle selection: they accept 12-stitch punchcards that are positioned flat on the special panel on the machine (called “card presser”).
Brother KH800 pattern center with the 12-hole card pressure in the middle.
If your machine came with original punchcards, you are super lucky! If you did not get the punchcards, or you want to make more cards for your own custom patterns, it is very easy to do.
Below are step-by-step instructions. You can also watch a video I made with these steps.
You need to cut a piece of paper, 20.5 x 6.5 cm (8 x 2.5 inches). Regular printer paper will work. Or print this file which shows blank cards for KH800. Another option is to print a standard set of cards (from the file downloaded here) and then punch the holes using the steps I will describe below.
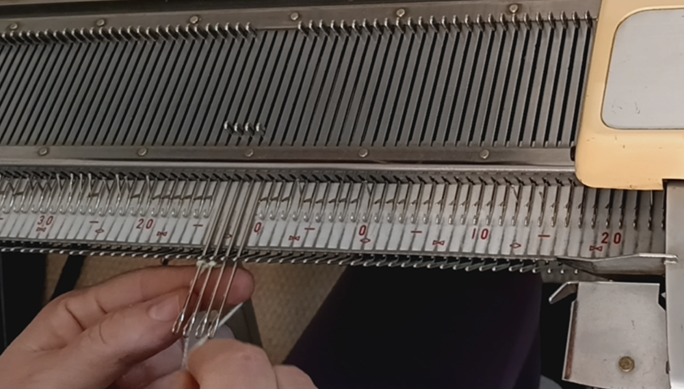
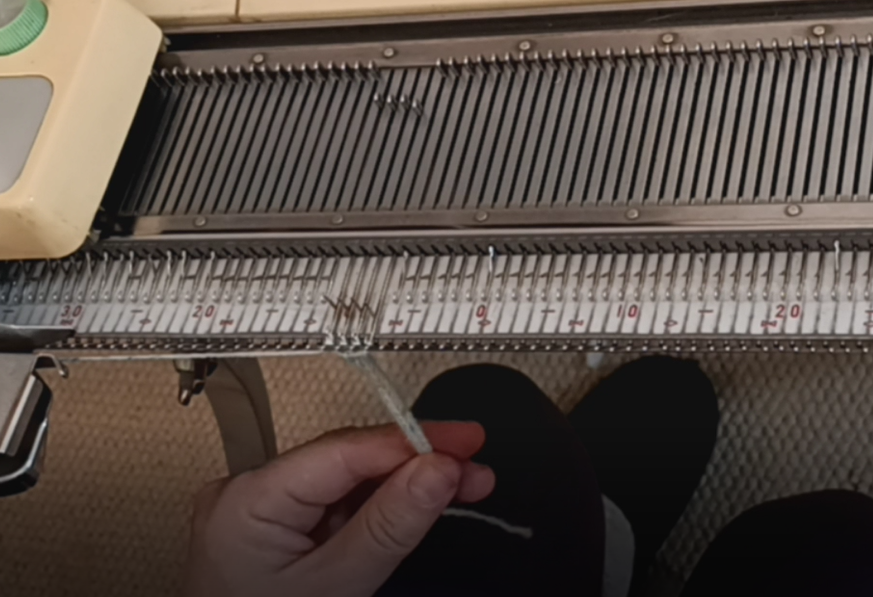
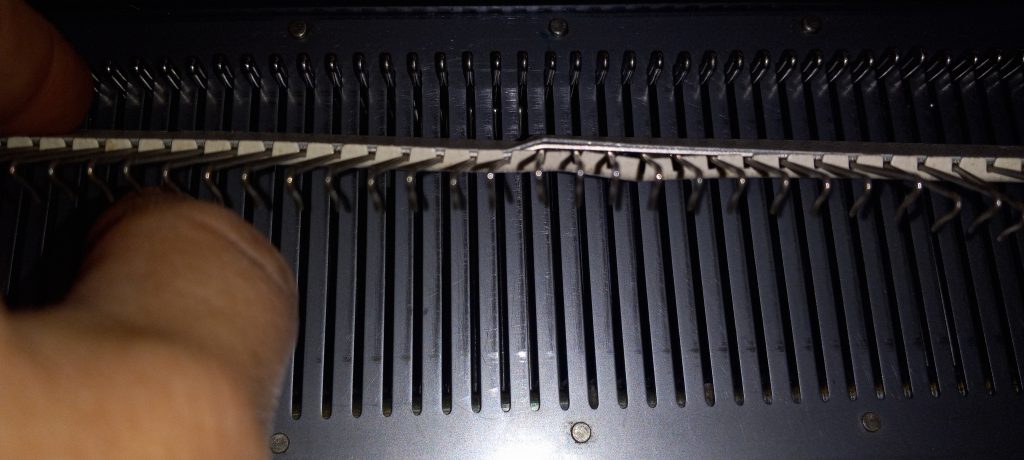
Insert the cut-out punch card into the pattern card cassette holder. The manual describes all the steps of inserting the card really well. The only difference from the manual is that you will have to push the paper through the setting pins.
If your machine comes with a special puncher, you are again lucky. You can now use it to punch your pattern through the holes. If your machine did not come with it, you can use a marker with a relatively thick end. Ideally, find a marker that no longer draws (dried up or broken) so it does not draw on the machine.
Continue punching holes according to your desired pattern.
The holes do not have to be fully complete: they just need to be open enough for the patterning rods to go through upon activation.
Watch in the second half of my video how I tested and ensured that the rods indeed went through.
Happy punching and Happy knitting!
Also, read or watch about the patterning mechanism of Brother KH800/801.
If you own a Brother flat-bed knitting machines, like pushbutton KH551, KH585, KH588 and KH710, or Brother punchcard machine like KH830, KH840, KH860, KH890, etc., or even electronic models, like Brother KH910, KH930, KH940, KH950, KH965, and even KH970, you can make cords on these machines in just quick 5 minutes or less.
The steps are outlined below. Or, if you are a visual learner or some terms in this article are not quite clear, watch this video.
1. Move the carriage to the right-hand side of the needle bed and press the right-hand side PART button.
2. Move to the most forward position 3-4 needles and perform an e-wrap cast-on with the short end of the yarn being on the left side. This post does not go into details into e-wrap cast-on, so if you are unsure how to do it, there are a lot of online resources on it.
3. Thread the long piece of the yarn through the carriage as usual.
4. Move the carriage from left to right while pulling the short end of the yarn down. After the first tow is knitted, if you prefer, attach the claw weight to the formed stitches. Or, pull the knitted fabric down by a free hand.
5. Continue knitting with the carriage moving it side to side while pulling the formed cord with the free hand.
6. When a desired cord length is achieved, cast off with your desired method. Tie a knot on each end and fasten the knot by sewing several stitches over the know with the yarn left on each end.
The cord can be used for hoods, hats, neck warmers, or for decorations.
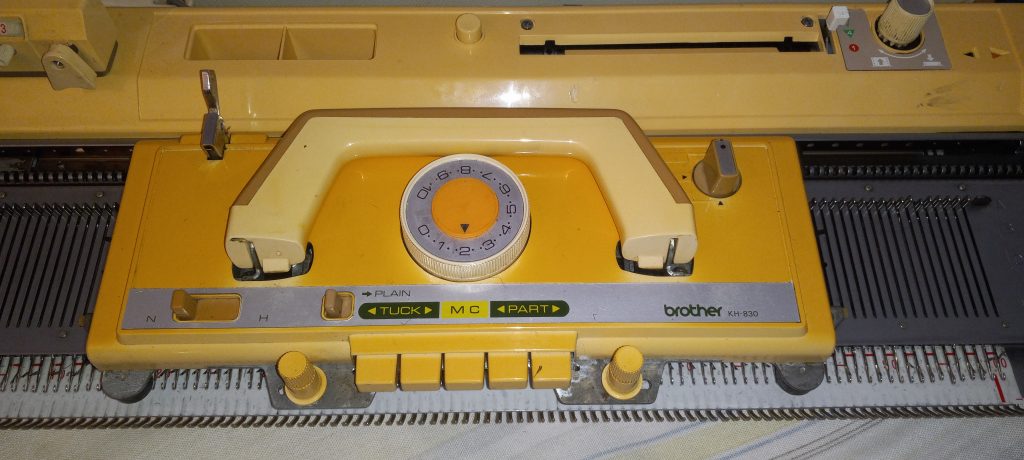
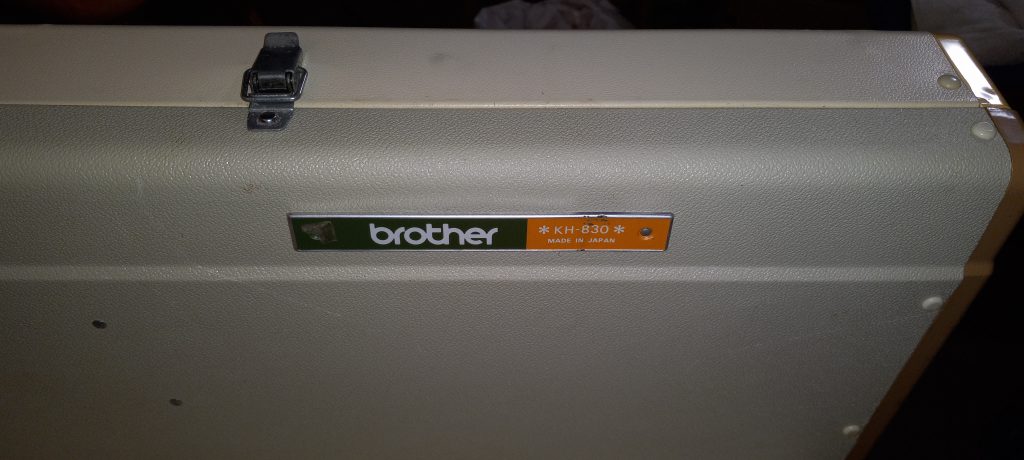
Brother KH830 is a knitting machine with 200 needles, positioned 4.5 mm apart. This machine is capable of automatic patterning and needle selection performed using a punchcard reading mechanism.
The post below is dedicated to this specific machine. To read details (including the pros and cons of the Brother KH830 model in general, refer to a blog article dedicated to this model.
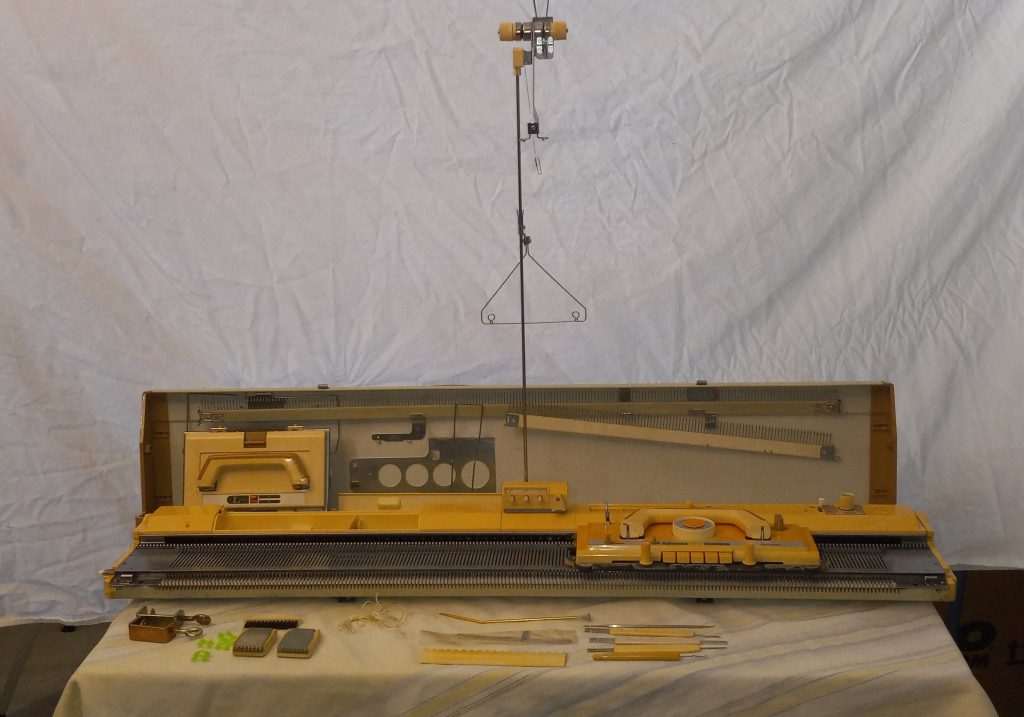
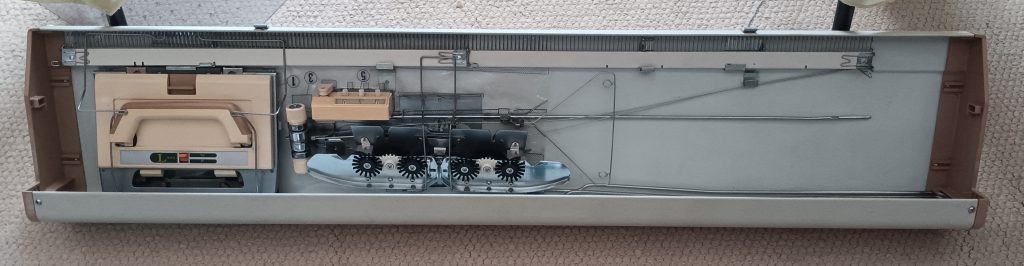
Brother KH830 knitting machine tested by me in January 2024 comes with all major assesories: tension mast, cast-on combs, lace carriage, row counter, and extension rails.
All major assesories fit nicely into the lid. I did not knit lace during my tests by all knobs and levers move freely on the lace carriage.
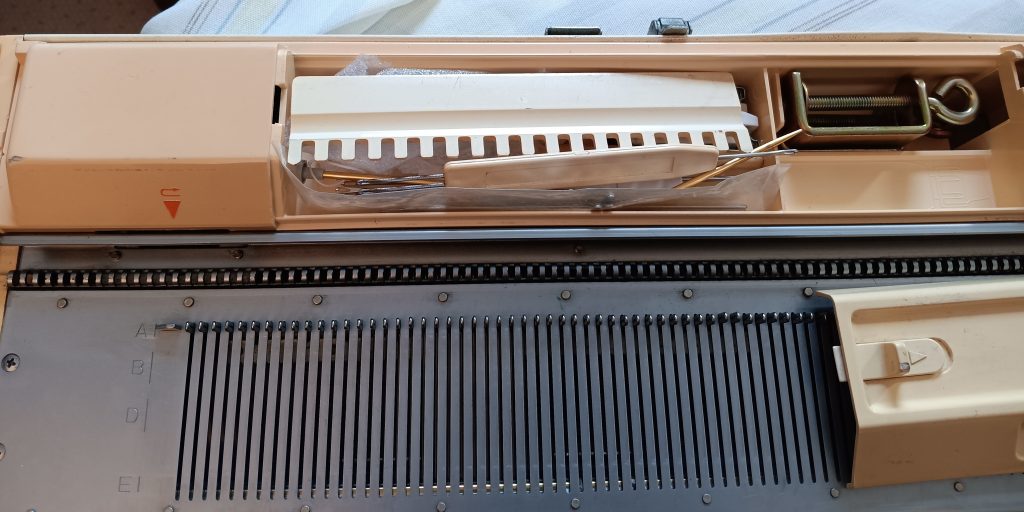
Almost all minor assesories are included as well.
The minor assesories that will not be included are:
Hard copy of the manual but it can be found online for free.
Tapestry needle (any needle will work).
Wax and wax container
Oil (the one that came with the machine was too old). Use Hoppe’s Elite Gun Oil from Amazon instead.
The rod for the card reader was missing. So, I used a hand-knitting needle instead and it worked fine: all the tests shown in my video were performed with my custom-made card-reader rod.
All tools and minor assesories fit into the built-in storage box.
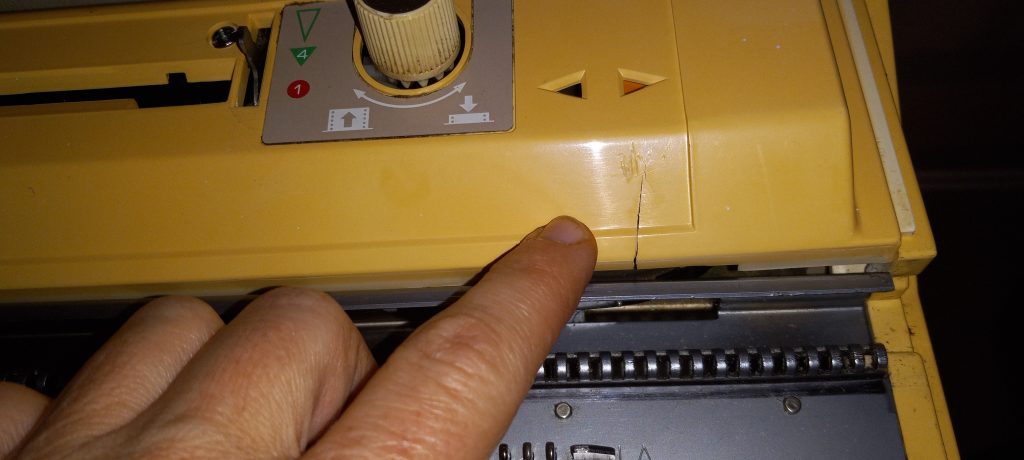
Additionally, I included brand new (new stock) claw weights because the old ones had bent teeth. The little knob for the card reader was cracked, So I replaced it with the freshly 3d printed one.
I cleaned the machine, replaced the sponge in the retaining bar, and cleaned and inspected all needles.
To test the machine’s functions, I knitted on a full bed using tuck-, slip- and fair isle patterning (see the video of these tests). I knit on a full bed while testing my machines because I want to make sure all needles knit and form stitches correctly (without sticky latches and without forming tuck stitches). In the test video, you will see how I identified two flawed needles. I ran this test until I could obtain a knitted panel without any tucked or mispatterned stitches.
This model already has built-in (or preinstalled by the previous owner) Garter carriage bars.
The following paragraphs list minor flaws I identified:
The card needs to be guided into the card reader with a bit more attention than usual. Because if you don’t pay attention, it might get inserted a bit crooked and mess up your patterning. So, carefully line up with the whole and then watch if the card goes in smoothly. If the card is lopsided in one direction, pull gently to straighten.
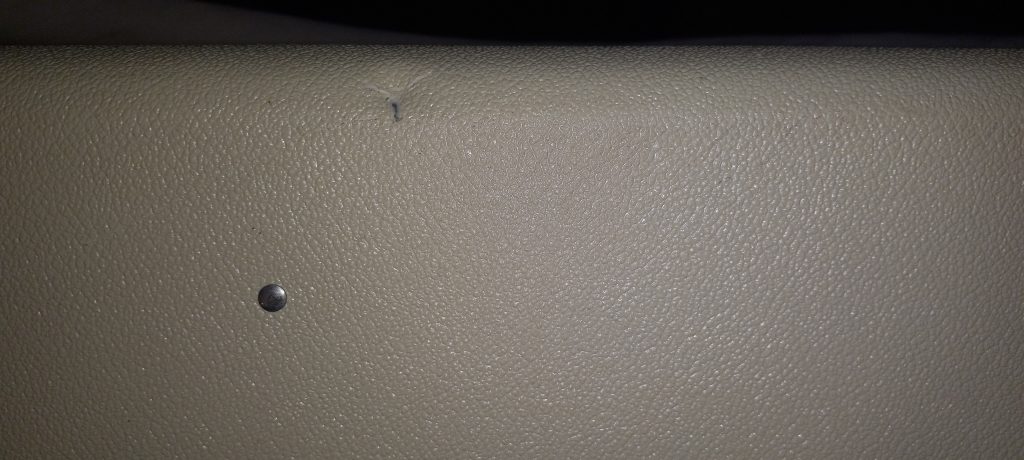
There is a minor crack on the plastic panel to the right of the card reading mechanism. There is also a minor scuff (in front) and a microcrack (to the left) of the punchcard reading mechanism. Those did not affect knitting.
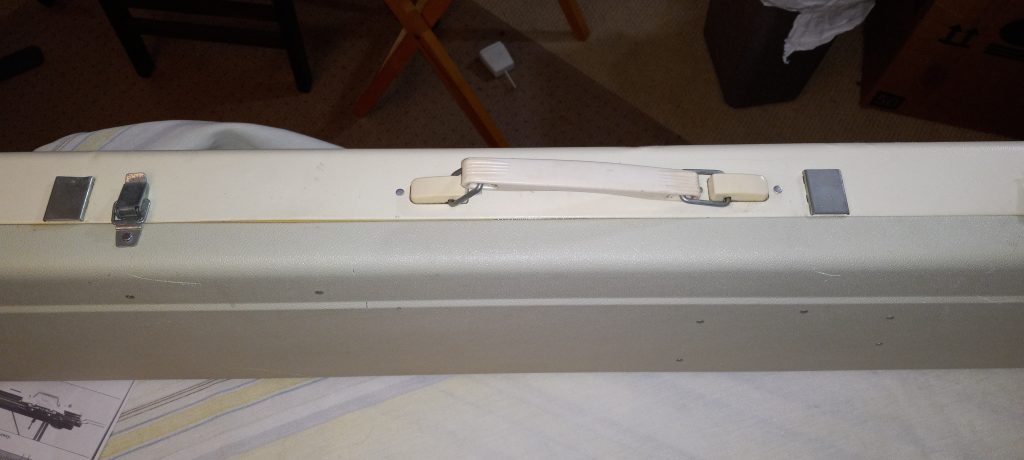
There are a couple of minor scuffs on the front panel and on the case as well. The pictures below show the most noticeable out of all of them.
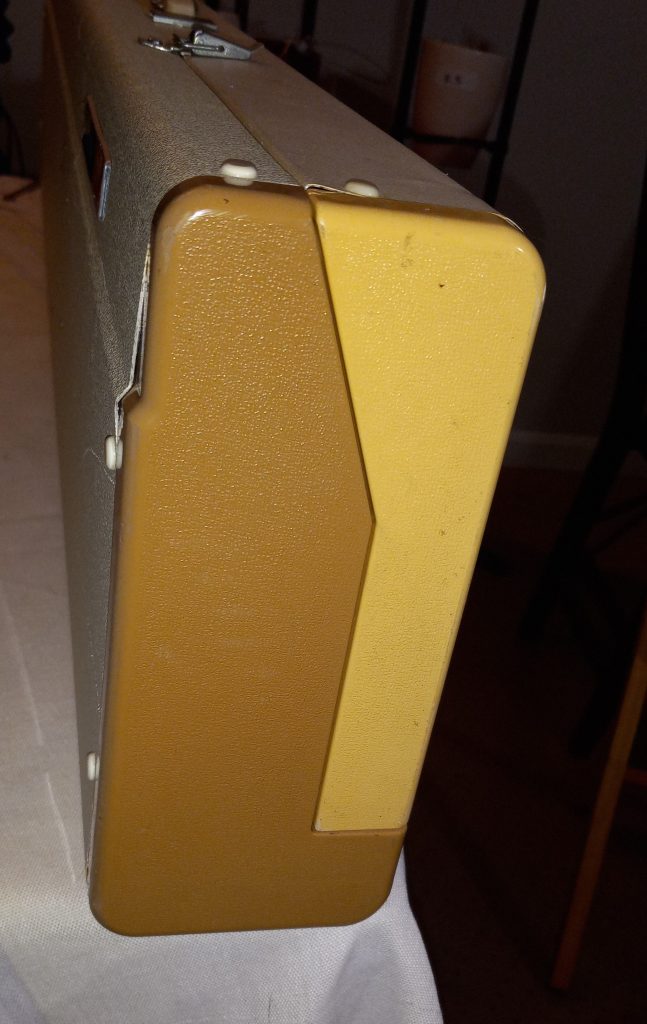
The end caps of the bottom and top parts mismatch in color (the machine came to me this way) but the case still closes well without any problems. There are only some minor gaps probably due to the age of this machine.
One of the cast-on combs has minor bents but it does not prevent them from being used effectively (for all my tests I used those combs shown below).
The carriage has some minor rust or wear/tear rust spots. (These spots are pretty typical for these vintage machines.) I treated them with protective oil. I did not observe any static while knitting or any other problems.
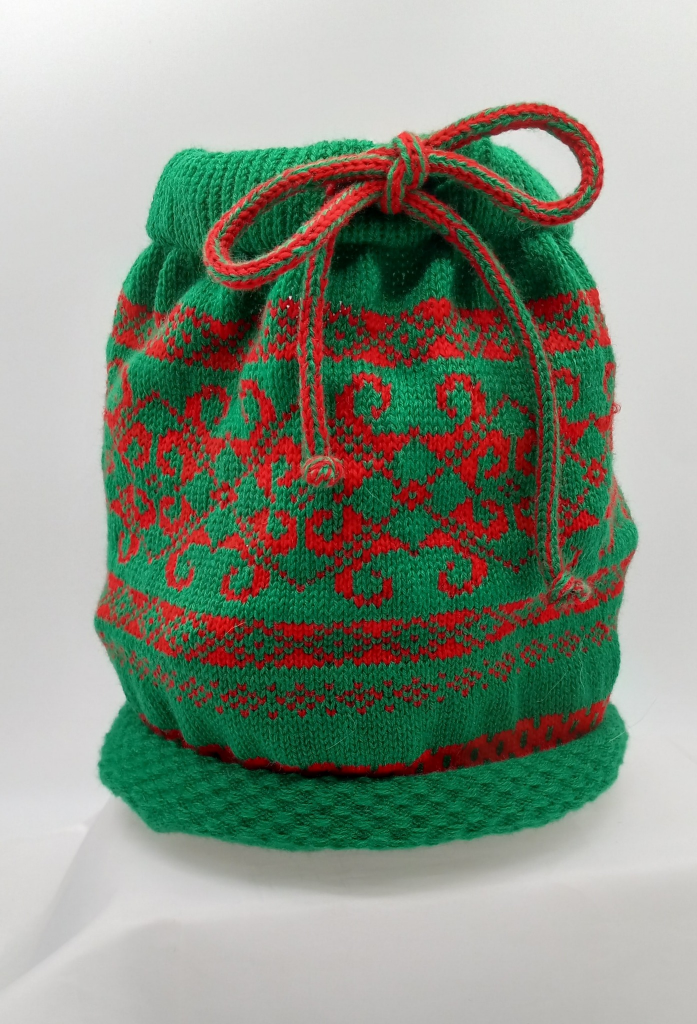
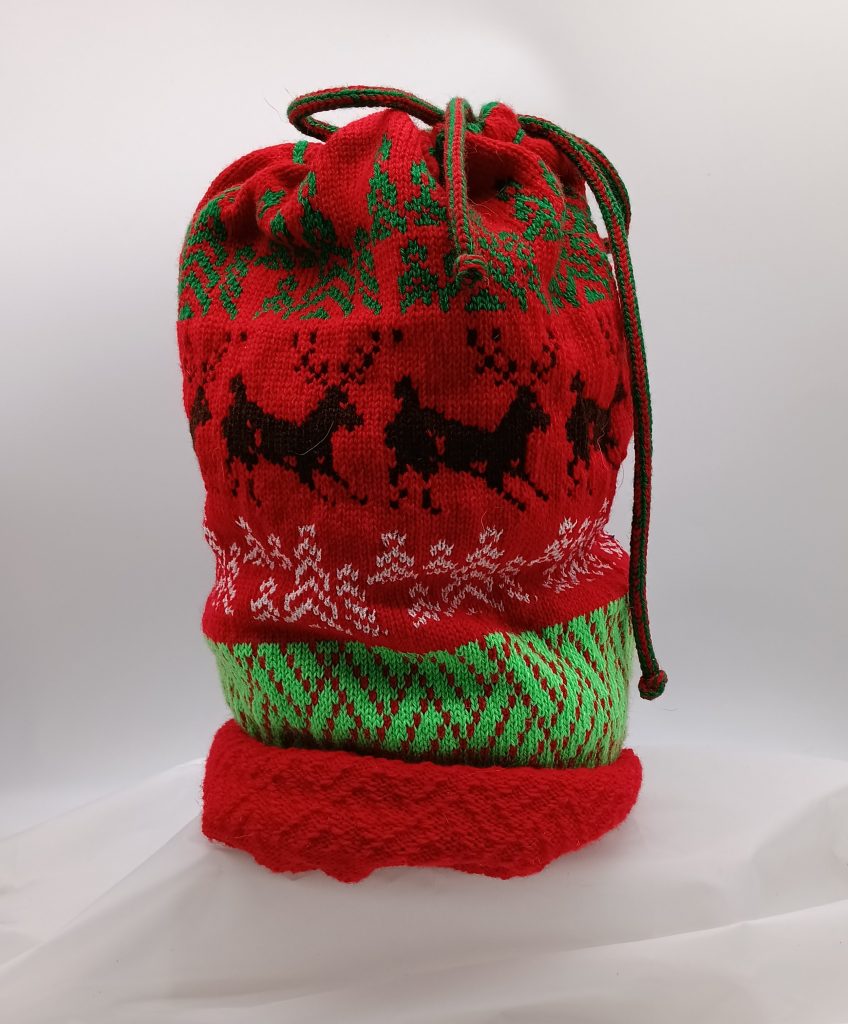
Despite these minor flaws, this machine worked great. I knitted the Christmas-themed bag that I will use next year to put presents in 🙂 I hope you soon will be able to make something even more beautiful.
… this article is constantly being updated depending on the questions my customers ask me. So, check frequently.
LAST UPDATE: March 22, 2026
My customers often ask me: what machine will I recommend for a beginner, for a fiber artist, for an experienced hand-knitter, to start a small craft business, or to experiment with stitches and techniques?
There are several things to consider. For example:
You are a hand-knitter (or crocheter) with a large stash of yarn and fiber, or your stitches are not even, or the small finger movements are no longer feasible for you;
or you have never hand-knitted before and just want to explore what machine-knitting is.
If you know how to hand-knit, then the next question is: what do you want to do with this machine? Design cloth, make new fabrics, make custom patterns, or simply knit through your yarn stash? Do you want to make blankets and throws and if yes, how wide? Also, ask yourself: do I just want to knit for friends and family or to sell? The next series of questions is how much patterning you would like your machine to do. And of course, you need to have a clear picture of what your budget is and how comfortable you would feel with servicing a new-to-you machine.
Here are some of the things to consider for the options mentioned above.
If you are considering getting a machine to go through your stash quicker, check what is the thickness of the yarn you have the most. If sport-weight and below, you will be able to go through your stash with the standard-gauge knitting machine. If thicker – then you should consider getting bulky and mid-gauge knitting machines. Fine-gauge knitting machines create wonderful, profesionally-looking fabrics, but they are not recommended for knitters who are just starting to explore machine knitting.
Overall, good entry-level knitting machines are circular plastic ones (like Addi or Sentro), and plastic flat-bed mid-gauge, like Brother KX350 or Silver Reed LK-series. These will take worsted yarns or double-threaded thinner yarn (available in craft stores for hand knitting) and will create lots of great hats, scarves, vests, and simple sweaters.
If you are a hand-knitter transitioning that just wants to make sure all stitches are even, the panels are knitted faster but you are not quite ready to give up the satisfaction from hand manipulation stitches (like creating cables, lace, etc.), consider standard-, bulky, and/or mid-gauge knitting machines with only manual/basic patterning capabilities.
If you want to create a lot of intricate patterns and designs, you will need to consider machines that can pattern with less annual needle selection and stitch manipulation. Namely, the needles would move to the patterning positions with some button pressing and the type of stitches will form in a predetermined way. The highest technology for such performance is electronic knitting machines. Those not only have several hundred built-in patterns but can also accept custom patterns from external sources. You can create those patterns yourself. Knitters can still do all the same manual stitch manipulations on electronic machines as on basic knitting machines (just turn off the electronics and select needles by hand). Read separate posts on how to choose Brother and/or Studio/Silver Reed/Singer electronic machines. Also, let’s not forget that Passap also made electronic machines for hobbyists and small shops.
If you are not super technology-savvy and could settle for less intricate patterns, consider machines with punchcard-reading capabilities. They come in bulk and standard gauges. The repetition pattern is typically 12-24 stitches. There are so many various designs circulating on premade punchcards. You can also punch your own cards (doable but quite a tedious process). Some drawbacks are somewhat finicky punchcard reading mechanisms, that sometimes cause troubles. Also, punching custom-punchcards is somewhat a tedious process but doable with enough patience and practice. On a punchcard machine, knitters can still do all the same manipulation and stitches as on manual/basic machines if the punchcard reader is not activated.
If even this seems too much to manage, consider push-button or turn-knob machines. These machines offer 4- to 8-stitch repeat patterns. With some hand manipulations, patterns with more stitch repetitions can be accomplished. Despite being the oldest patterning technology in machine knitting, these machines are robust (almost all metal), and offer endless possibilities. I only saw standard- and fine-gauge turn-knob and push-button machines. I put couple of articles together on pros and cons of pushbutton, turn-knob, punchcard and electronic knitting machines.
A lot of fiber artists like pushbutton machines a lot because they feel more control over the stitch manipulation and needle selection, yet it is still not completely manual. However, sometimes it is hard to accessorize these machines with attachments (knit-leader, ribber, color changer) due to their vintage nature.
Now, about picking a machine depending on your desired projects. If you know for sure that you want to knit sweaters or garments, you should probably get a machine with a built-in knit leader (aka charting device) or a machine that can be attached to one. Some older models of knitting machines cannot be accessorized with knit leaders, so keep that in mind. There are only a couple of models of Brother Machines with built-in knit leaders (most popular ones are Brother KH881, KH891), while Singer/Silver Reed/Empisal KNitmaster/Stuio were more prolific in that sense. Check out a full list.
If you want to knit beanies: do you want them to be seamless (then get a circular machine, which are very affordable) or don’t you mind seams (flat bed is ok in this case)? Or what about socks? Circular sock machines are pretty expensive. Plastic circular machines are be used as well, but socks do not come out as nice looking. There are patterns for flat-bed machines for socks with and without seams and their looks are different as well depening on the technique.
If you want to knit colored patterns (jacquard or fair-isle) with more than two colors, your desired machines should probably be compatible with color changers unless you are willing to manually changing color, which is a rewarding but tedious process. Also, do you want to knit double jacquard, no floats in the back? Then you will need your machine to be compatible with a ribber. Some ribbers have an automatic option to allow knitters to know double-jacquard semi-automatically (read on Brother KR850 ribbers). Some still require hand manipulations, but much easier than if you did not have a ribber.
If you want to knit blankets that create knits mostly resembling handknitting, get a machine with the most stitches in a row like a mid-gauge manual SK160 or electronic SK860, but, boy, they are pricey and hard to find. Standard-gauge machines will knit wide enough panels but it will look like machine knitting. If you want to knit custom patterns, or for production, consider electronic machines as they can be fitted with many additional accessories later. Additionally, for blankets, knitters often get a couple of plastic bed machines, like HK100 and KX350, and combine the beds (it is very easy to do – just remove the connecting plates and then reconnect the plastic parts of the bed onto the first bed) to get a double length.
With regards to the manufacturer, very popular machines for beginners are Brother (also branded under Knit King and other names) and Silver Reed (also branded under Singer and Studio names). The parts for these machines are still available in the new and used markets, which is a huge advantage. There are other wonderful knitting machine makers, including Toyota, Corona, Passap, etc.
A lot also depends on your budget. Plastic flatbeds are typically less expensive. Brother machines in general are a bit more expensive than Silver Reed, but it all depends on the dealer or the marketplace where you are looking. Additionally, the more patterning capability diversity the machines have, the more expensive it is (because it is more desirable). Thus, electronic machines typically cost more than manual or pushbutton. Additionally, bulky machines are more expensive than standard-gauge machines. Mid- and fine-gauge are the most expensive because not so many of them were on the market to begin with and they are highly desirable. As you can now guess, the most expensive machines are electronic bulky and mid-gauge machines. All these machines have their pros and cons, about which you can read in my Knitting Machine Encyclopedia.
You need to think about what kind of stitches and fabric you want to knit. Lace? – make sure your machine comes with a lace carriage. Garter stitches? – Make sure your machine is compatible with Garter carriages (only standard-gauge Brother knitting machines model numbers KH8xx and up). Fair Isle? – better if you can use at least two yarns at a time. Or make sure your machine is compatible with a color changer. The same principle applies to weaving.
Also, would you like to knit both purl- and knit-stitches? A ribbing attachment does a good job doing that so choose a machine that can be matched with a ribber. Ribbers for electronic and punchcard machines are somewhat easier to find than ribbers for pushbutton and turn knob machines but they are still doable. Another nice attachment that can knit purl stitches, is a Garter carriage but it is only available for Brother knitting machines.
Also, consider your physical limitations. Can you lift a 20+ pound knitting machine? If yes, then metal flat beds are indeed for you. If not, you should consider getting a plastic flat or circular bed knitting machine. The latter ones are also great if you cannot live without knitting and want to travel with your machine.
Last but not least, consider how much you want to grow with your new hobby of machine knitting. (I know – sometimes we don’t know what we don’t know but we know ourselves). For example, do you think you might outgrow the basic functions of your machine quickly and will want to purchase add-on accessories (ribbers, color changes, etc.)? If so, consider getting machines for which these accessories exist and are easy to find. For example, some basic vintage machines never had ribbers or color changers manufactured for them. Some push-button Brother machines and some turn-knob Silver Reeds had ribbers but those are hard to find. So, settle on punchcard-reading machines.
But I do not recommend buying a machine with all accessories at once (Unless you came across a super deal in a local garage sale where the machine is included with all accessories). You might feel overwhelmed, and intimidated and might regret spending all that money at once. need to buy all gadgets at once. For example, if you can’t get a hold of a machine with built-in knit leader, but a machine with a built-in knit leader landed on your radar, you should go for is and get a stand-alone knit leader later while you are learning a new-to-you machine, including shaping (stitch transfer for decreases, patterning, gauging, switching, etc.)
Overall, I would suggest just to trust your gut, your budget and your skills. For example, if you are not tech-savvy, electronic machines might not be the right choice for you. Or you will only be limited to the built-in patterns (but there are plenty of those). If you are having issues with hands, do not get machines where patterning is activated with a ratchet tool (Brother push-button machines, some Toyota machines and a 12-stitch punchcard Brother KH800 model).
To sum up and not considering factors like maintenance and availability of the spare parts: if you are just exploring and want to get rid of your hand-knitting yarn stash, get a simple machine, like Addi or mid-gauge plastic bed (like KX350 or LK100). If you are exploring but with specific projects in mind, get machines that can pattern more automatically and can grow with you.
I wish all of you good luck with discovering your dream knitting machine and starting your new adventure of machine knitting. Shoot me a comment on what machine you decided to get and why.
The table below lists the lengths and widths of various knitting machines I measured myself. Use this table as a reference to ensure you purchase the correct retaining bar for your machine.
… this article is in constant progress as I learn about various knitting machines and their retaining bars.
Almost all knitting machines and ribbers have retaining bars. Some machines have retaining bars with a sponge attached to them. Some machines (the majority of plastic flatbed machines) have only a long and narrow sponge (without the metal holder). Ribbers come with either a “retaining bar+sponge” assemble or only with the plastic retaining bar (no sponge strip).
The main role of these retaining bars is to hold the needles in place and to prevent it from bouncing up and down when knitting.
Below are the situations when you want and need to remove (and inspect in many cases) the retaining bar:
When you just purchased your machine (especially used and NOT recently serviced), the first thing you need to do is to remove your retaining bar and inspect it. I made a short video on how to do it because I have been asked about it so many times by my customers.
When you need to replace faulty needles.
When you need to clean your machine.
When you notice your knitting machine mispatterning without any good reason.
Hopefully, you purchased your knitting machine new or recently serviced. In this case, the sponge should be 1-2 cm above the metal edge of the retaining bar.
But in most cases, this is not the case. Thus, it is possible that when you remove the retaining bar, you will see a disintegrated sponge. I’ve seen some spongy strips being just a gooey mess. The old sponge needs to be removed as soon as possible (since it often corrodes the needles) and replaced.
There are two ways to approach this replacement.
First approach: just replace the spongy strip
If you decide to replace the sponge, you will need to remove all this goo. I first use a flat-head screwdriver to scrape all the residue out of the retaining bar canal. Then, I use “Goo Gone” to remove the rest of the residue. I typically do it outside because it is a very messy process. I pour a thin layer of “Goo Gone” liquid into the retaining bar and wait for hours. Then I scrape the remains of the old sponge again with the screwdriver. Lastly, I wash the retaining bar with soap and water, wipe it really well and let it dry (or blow dry it). You can purchase just the sponge in my store.
I sometimes read in forums that some thrifty machine knitters get a simple weather stripping and use them as sponge strips. Well, those have different dentistry and sometimes do not have a silky ribbon on one side. Also, they are not suited to be exposed to oils and might decompose rapidly leaving a sticky (potentially unremovable) residue inside your machine.
I read that experienced machine knitters use different ways to attach the spongy strip to the retaining bar. (By the way, the width of the spongy strip is not as critical and it can be a little bit narrower than the channel of the retaining bar but not by much). I tried different glues and my current choice is hot glue. Some machine knitters use wood glue. I apply the glue to the metal part of the retaining bar and attach the strip to the metal by the sponge side (not the silky ribbon side). I then tape the ends if the sponge to the plastic ends. I like using medical tape. Only one layer of the tape is enough to secure the ends of the sponge. More layers will only get stuck when you insert the newly refurbished retaining bar back into the machine. To avoid stripping this tape, push it down on the ends of the retaining bar while inserting it into the machine.
Second approach: buy a new retaining bar
Or if you do not feel like dealing with all this mess, you can purchase a retaining bar with a sponge already in it. Before you order a new retaining bar, make sure you measure the dimensions of your old bar: its width and its length.
Most commonly used by machine knitters Brother, Studio/Silver Reed/Singer, and Toyota knitting machines have somewhat similar retaining bars but there are some differences depending on the model and the gauge of the machine.
For the retaining bars for these machines, there are three different lengths (41, 43, and 47 inches) and two different widths (0.375 and 0.5 inches). This is why it is important to measure your old retaining bar to ensure that you are getting the retaining bar suitable for your machine. Most JUKI, Toyota, Silger/Silver Reed/Studio, Artisan knitting machines use 0.375-inch wide retaining bars. The lengths are either 41 or 43 inches (depending on the model).
I’ve read stories on FaceBook groups, where the new machine knitters were puzzled by the fact that they JUST replaced the sponge bar and the needles do not move, advance, or retract the way they are supposed to. I especially see I happen to be the owner of 8-push button Brother knitting machines. There is somewhere out there some incorrect information on the retaining bar for these machines. 4-push-button machines use a 0.375-inch wide retaining bar and the 8-pushbutton machines use a 0.25-inch wide retaining bar. (I’ve refurbished over a dozen pushbutton machines and I know the difference first-hand).
Brother ribbers use plastic retaining bars without sponges. When (re) inserting the retaining bar into the Brother ribbers, the concave surface (the “channel”) should face you.
There are machines with unique retaining bars – I will update the blog soon when I learn more. I am also putting a table on machines (and models) and retaining bar compatibility. Stay tuned!
In the meantime, enjoy your adventure in retaining/sponge bar replacement!
PS. I measured several dozens of retaining bars with my calipers. Even though the “official” measurement is 0.375 and 0.5 inches, mine are measured as 0.40-0.41 and 0.44-0.46 inches respectively. This inaccuracy in inches makes me like the mm scale (aka metric) a bit better. So the narrower retaining bars are 10.0-10.5 mm while the wider are 11-12 mm wide. Who knew that just 1 mm would make such a difference but it does! I had an incorrect bar installed on my KH581 8-pushbutton machine and the needles would not go back from E to B (or A) position!!!
Brother KX350 knitting machine is a plastic flat needlebed machine with 130 needles, positioned 7 mm apart. The article below is dedicated to the machine I serviced and tested in January 2024. If you want to know the pros and cons of the Brother KX350 knitting machine mode, read my Knitting Machine Encyclopedia.
On this machine, I cleaned and inspected all needles. I cleaned the needle bed and the carriage. I inserted a new needle-retaining sponge.
The machine will come with all assesories shown in the manual.
The tapestry needle will be plastic. The oil in the bottle that came with this machine still looks good (transparent and not yellow), so it will be included as well but there is only half a bottle left. I recommend purchasing Hoppe’s Elite Gun Oil
However, the hard copy of the manual will not be included but it is available online for free.
To ensure that all functions of the carriage work well, I first knitted a swatch (with a pretty thick yarn – two strands of 50 g/150 m (1.76 oz/109 yards) per skein- all went well (watch the vidhttps://youtu.be/ANFTFSCiwqseo).
After a successful swatch (knitted with a relatively thick yarn), I proceeded (with the same yarn) on a full bed (all needles) to test whether all needles formed nice stitches without unprompted tucking. All tests went well – watch a video of my tests.
All levers, knobs, and buttons move freely on the carriage (it is demonstrated in my full video). I also knitted using the HOLD and PART functions of the carriage.
When I test my machines, I like to learn something new in terms of knitting, come up with a new design or test a new feature of the machine.
So, this time, I came up with my own pattern for a large dog sweater and I knitted it. I used the partial knitting function, HOLD position functions, mock ribbing, and cast-off. The picture below shows my (unfortunately, unhappy) model who will be wearing her new sweater. There are a couple of design flaws that I will be improving but while the next beta version is in progress, this one will keep my dog belly warm. Check out this booklet for lots of other patterns possible to make on this machine.
A couple of imperfections of this machine:
There are really no flaws. However, I wanted to mention that no original box came with this machine but it will come well-packed for shipping.
No hard copy of the manual is a bummer but this machine is easy to use and straightforward and with the hints provided by the manual online, new knitters should have no problems starting using KX350.
Overall, Brother KX350 is not only a perfect machine for beginning machine knitters, but for experienced knitters too: KX350 takes thick yarn and can be a quick tool to test a pattern (like I did with the dog sweater).
Just a quick note on the differences between Brother knitting machines under the model numbers KH965, KH965e, and KH965i. The reason there is a lot of discrepancies and misunderstandings about the additional “i” in the model number is that these machines are very scarce and because the functionality seems to be . They are very desirable and those that are still available on the used market are still in great shape.
First, about “e” :
Even if Brother KH965e indeed exists, it would simply mean an anniversary edition since “e” stands for “eleganza” (the latest anniversary edition model to the best of my knowledge is KH950E). This machine would be identical to the functionality of the KH965 knitting machine but the color combination of the carriage, end caps, and control panel might be different (like in the case of KH930/930e and KR850/850e setups). However, I’ve seen only the KH260/KH260e, KR850/850e and KH930/KH930e combinations. Brother KH965 was released to the market significantly later (by about 5 years), so there will be no even for an “anniversary edition”. If you’ve seen the KH965e model and want to prove me wrong, shoot me a message.
Now about “i”:
The differences between the KH965 and KH965i models of electronic brother knitting machines are subtle and might vary depending on which market the machine was made for.
Some think that “i” in KH965i stands for “intarsia”. However, both KH965 and KH965i have built-in intarsia knitting capabilities according to the instructions (as well as their a bit older analogs, KH930 and KH940).
I researched pictures of a lot of pictures of various KH965(i) machines and all of them have the intarsia option. … which kind of makes sense because KH965(i) is an updated version of KH930/KH940, which also had this option.
Some think that “i” might stand for is “interactive” or “interface” and the difference is that KH965i has a compartment to insert the PPD disk, however, KH965 has the same disk port (and the manuals for these machines both mention the compartment and disk port). So, basically, KH965i can accept files from external sources without any modifications to the machine.
Knitters who prefer a more advanced way or pattern transfer use a special cable instead of the PPD disk. This cable is inserted into the slot for the disk for file transfer through special software.
The KH965i model has also the capability of inserting the cable into the machine itself (originally assumed to be for the FB 100 disk drive and file transfer). And this is one of the main differences between KH965 and KH965i.
Another critical difference is the settings on the selection dial on the carriage. Brother KH965 does not have a KCII setting…
…unlike Brother KH965i.
However, KH965 released to the Japanese markets (Topical-5) noticeably has also 4 positions on the selection dial, which probably implies KCI and KCII settings (Sorry – I would be more sure but I don’t read Japanese).
Thus, it seems that even if your KH965 does not have “i” next to its name, it might still have functionalities of the KH965i machine.
Thus, to identify whether you have a KH965 or KH965i, look for:
KCII option on the selection cam on the carriage (or four different options on that dial)
A port on the back panel of the machine.
All other functionalities of the KH965 and KH965i are the same (namely, memory, functions of the buttons on the panel, etc).
I really hope you are a lucky knitter who has Brother KH965(i) in their collection!
All machines and large accessories (ribbers, color changers, carriages, and knit leaders) are shipped insured. I take very detailed pictures while I pack for insurance purposes. Often, shipping companies like to blame packers for the damage they cause saying that the damage occurred due to insufficient packaging material used.
Well, I shipped several dozen machines and I know how to pack them well. However, damage still happens because machines and ribbers are heavy and the package can be dropped.
Therefore, when you sign off on your package or the package shows up at your door, please, take a picture of how it was delivered. Then inspect the package and take pictures, especially if you see some dents, large scratches, rips, or holes on the outside of the package. If you don’t see any signs of damage on the box itself, please take a general shot picture preferably from 4 different angles.
While unpacking the machine, please, take pictures as well. If you see obvious signs of damage, take pictures of that place from several angles.
You do not need to send me the pictures right away. Wait until you check if the machine is working or not, unless the damage is obvious or structural.
Please, do not discard the packaging materials and the box until the operation of the machine is fully confirmed (just in case something needs to be sent back, etc.), or until we sort out the insurance claim in the case of the damage.
These are all the precautions we need to take in case we’ll need to file an insurance claim. They are very picky.
In most cases, everything gets delivered fine because I pack my machines really well. Ribbers are especially robust than some others during travels.
Please fill out the form below to acknowledge that you understand these instructions and will follow them. Please, write “I read the instructions and I understand them,” followed by your name.
Brother KH551 is a standard gauge knitting machine with 4-pushbutton-based patterning mechanism. This blog is dedicated to one specific machine I serviced. If you want to know more about the Brother KH551 knitting machine model, refer to my Knitting Machine Encyclopedia article.
The machine (including carriage and all needles) was cleaned and serviced. All levers and the buttons on the carriage were checked and they moved and worked without problems. These levers were also tested while knitting. All needles were also checked while knitting on a full bed. No faulty needles were detected.
The 15 needles on each side (30 total) came from my refurbished stack. Thus, when I was knitting on the full bed, I was inspecting the edges especially closely to make sure all these refurbished needles worked well. Also, because of such a high number of refurbished needles, I am including the set of 5 spare needles (instead of usual 3).
The machine comes with all major assesories.
Several missing minor assesories are:
A hard copy of the manual is not included but can be found online.
Sinker plate yarn hangers, left and right. It can honestly be replaced with a regular paper clip (just unbent them to a desired shape). The manual describes their usage on p. 18. manual
The tool storage box is not included
Oil is not included also but I recommend Hoppe’s Elite Gun Oil.
Additionally, the small cast-on comb is not all metal – I pulled it out from my own stash.
On the full bed, I knitted stockinet, tuck, slip and hold patterns (see the video of tests – all went well). Butterfly stitch is my favorite on this machine.
Now about flaws and imperfections:
I had to replace the push-buttons but I did not have a part for the button marked #1. So, I replaced it with the button marked as #4 but it is of different shade of white. If you want, you can put a sticker on it with “#1” (I prefer not to put stickers on machines since it damages and stains the vintage plastic).
Despite being vintage, this machine will still serve your craft needs for many years especially if regularly serviced.