… this post is constantly in progress. I’ll update with pictures when I can.
If you are one of those lucky people who inherited a knitting machine, got one passed down from your grandmother’s attic, or got a set for free, you can ignore this post. Just know: we are all already jealous, no matter how small or big your inheritance is.
If you are looking for a machine on Marketplace, below are a couple of things to look for. None of these are deal breakers, depending on the price, on what you need, whether or not you are ready for a project machine…
Look that the carriage is present. You cannot knit without the carriage.
Look that the sinker plate (sometimes called fabric presser) is present. You will not be able to knit without it either.
Look for other major accessories: tension mast, cast-on combs (for Brother machine), needle transfer tools, etc. You will be able to knit without them, but those are nice to have. Even on the used market, you are looking at an additional $100 or so of investment if the tension mast and the cast-on combs are not present.
Look for pictures of needles moved from A to D position: make sure there is no rust or very little rust. Very often, a decomposed retaining bar that was sitting for a long time in the machine will rust the needles at the point of contact. However, believe it or not, this rust might be ok to fix. If the needles are rusted beyond that point, then there is a very big chance there is rust inside the needlebed, which might pose more serious problems down the road.
Importance of demonstrating knitting on the machine:
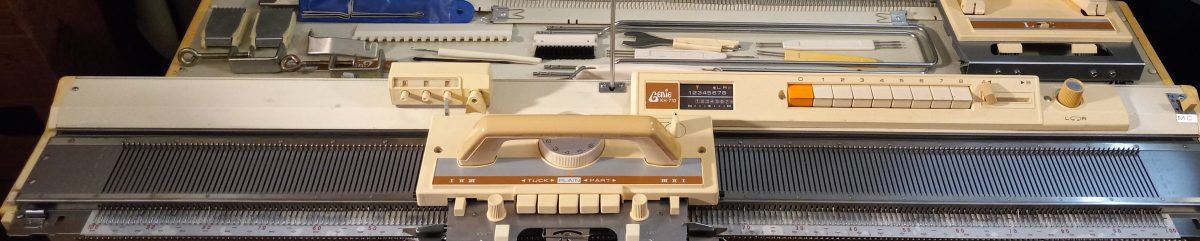
The pictures below are applicable to most 8-push-button knitting machines.
Showing which screws go on top
Showing screws around the pattern center
The look of partially disassembled pattern center
Position of the “foot”. Also, a small screw hole is shown in the middle. Well, it is not for a screw. Not sure what for. But nothing goes in there. I see this small hole on many machines. Side screws and needlebed screwsThe image shows the position of the “feet”: the wide opening faces the “teeth).Inside the pushbutton mechanism. Check out the video, in which I show how to (re) insert the buttons and the staples.Position of the guiding plate. It goes against the wall of the pushbutton mechanism. Long staples go through it, and this is how the buttons are retracted. Wiggly staples do not go through this guiding plate. View of the pushbutton from below.Partially inserted pushbuttons. The sponge strip is replaced with a fresh one.Same as above but a different view angle.Same as above: different view angle.The picture shows that I propped the selecting plates assembly with a tool to keep it out of the way while I was inserting the pushbuttons.
If the LC is not selecting needles correctly, check:
The sponge strip in the retaining bar. It needs to be pristine.
If the machine is electronic, check the magnet on the back
if none of the above work, take the cover off the lace carriage and inspect the internal mechanisms. There are several service manuals available online for Brother lace carriages.
Lace carriage is stuck on the bed: If your carriage LC has a release button, press it and lift the carriage. Wiggle it a bit to release the needles that are stuck during the transfer of the stitch. Do it gently so no needles break or become bent during the process. If no release button, keep on jiggling until it lets go. Actually, before even putting the LC onto the bed, make sure ALL buttons and levers on it move freely.
… constantly in progress. Last updated: April 2026
Despite being one of the prettiest, tuck-stitch is the most finicky stitch in my opinion. So, below couple of tips for everybody on how to make it less painful to knit beautiful tuck-stitch patterns.
Make sure the tuck brushes or wheels (if your machine/sinker plate/carriage are equipped with those) are pushed forward. It is possible to form nice tuck stitches without them, but it is way better WITH them.
Tension should be set on lower numbers; it will also depend on your yarn. Swatch, swatch, swatch before using tuck for a garment to discover the right combination of tension and yarn.
Poorly formed tuck stitches could be because of the static (yarn is prone to static, the air in the room is dry, there is minor rust in the machine or carriage, insufficient oiling): a dryer sheet on the nedlebed, attach wax to the tension mast, spray your yarn with anti-static.
Tuck needs even weight across the knitting. If the stitches did not come off completely from the needles (due to yet not established tension, sticky yarn or static, etc. …), just inspect the row and push them down by hand. See a demo of what I mean by that in this video at the 7th minute.
Sometimes I move the carriage a bit slower when knitting tuck to check if all stitches rolled off the needle heads correctly. If you see that some stitches did not slide off the needle heads, do it manually. This might happen if the yarn is textured, the needle heads are not as smooth, due to static, or insufficient weight.
The carriage is moved too quickly or too slowly.
Needle heads are not smooth enough: oil them, polish them or replace
Latches for tuck-stitch need to be ideal: not bent or sticky latches. Thus, check the needles especially thoroughly if you see mis-patterning or poorly formed stitches.
Always remember that tuck-stitch takes twice as many rows to form. Thus, pay attention to it when calculating your gauges and yarn consumption.
KnitKing, Defendi and, most famous, Brother machines accepting 24-stitch cards, bulky and standard, for automatic needle selection, and, thus, patterning, can be quite finicky, especially if you inherited the machine that has not been recently serviced. There is myriad of reasons; some are simple, some are more complex. Below is my attempt to identify and summarize them.
The bullets below are NOT listed in their troubleshooting order.
old sponge in the retaining bar: replace
carriage is not seated properly: Brother carriages have a small lip; make sure it is “hugging” the needlebed (and not sitting on top of it).
old grease in the carriage, which causes some of the levers be stuck. See my demo on how to check for stuck flippers.
Problems with sinker plate: it might manifest itself by expected needle selection when ONLY the carriage is used but when the sinker plate is attached, the needles are selected incorrectly. More on this here.
The timing belt was reattached incorrectly. A small demo of correct attachment is here.
The timing belt and the rotating shaft are misaligned (shown here).
The relative position of the patterning pins and square brackets is incorrect. See examples of correct and incorrect positions here. Watch how fix an incorrect installation.
The advice below applies to Defendi, KnitKing, and Brother knitting machines accepting 24-stitch cards, bulky and standard-gauge.
I came across this problem right after I spent hours cleaning the insights of the machine, aligning the timing belt, all pins and plates, and removing old grease. I was very confident that the insides and alignment of the machine was in excellent shape. In fact, when I was passing the carriage back and forth, fast and slowly, while card #1 was inserted, every other needle was selected in each pass like a clock.
However, when I attached the sinker plate, some of the needles started being selected incorrectly (watch a video of what I mean). I was very puzzled because this was the first time I ever experienced something like this.
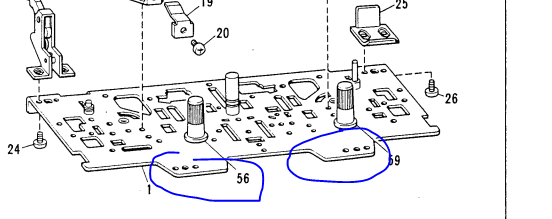
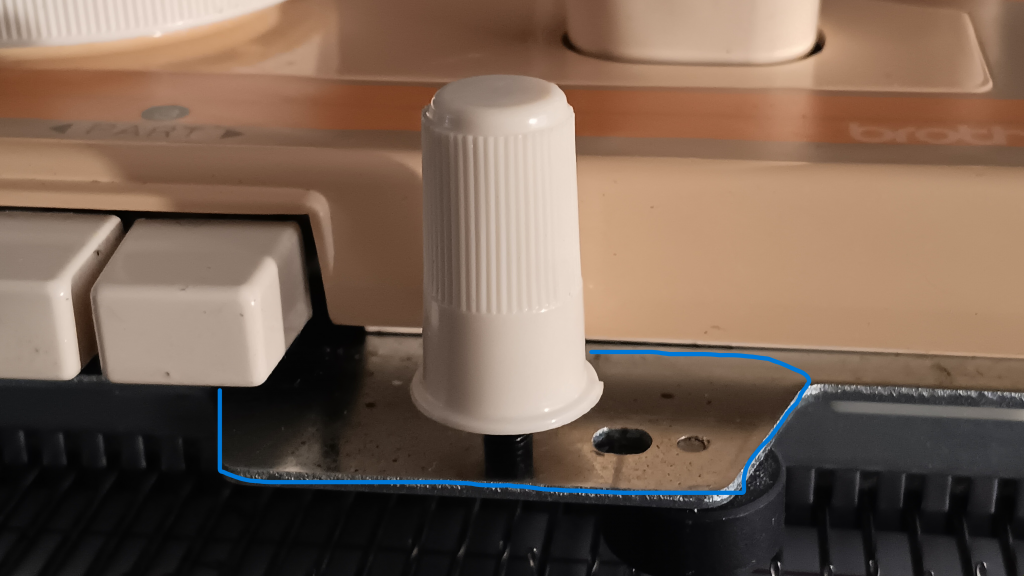
One of the most probable causes is a sinker plate alignment (on the carriage itself). So watch closely how the sinker plate goes onto the carriage. If both sides slide in easily without any (even minor) drop-in. The misalignment can be due to a bent versus just damaged sinker plate. I noticed that if I loosen up the sinker plate, it does NOT mispattern. So, after lots of staring and measuring, I noticed that the carriage plate underneath the thumb nuts was a bit bent on one side. I straightened it and the sinker plate was attaching more evenly and mispatterning disappeaed.
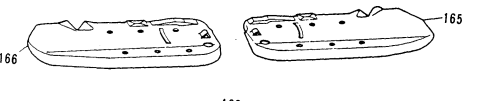
On another occasion, I noticed that the left and right sections of the sinker plate assembly were not symmetrical. One was slightly above the other. There was a small bend in one. I straightened it and adjusted the screws to make both parts symmetrical relative to each other.
I will be collecting pictures of sinker plate misalignments (but it would still be hard to cover all angles). So in the meantime, just stare at your sinker plate and watch for any asymmetries, weird angles, loose sections, etc. It helps if you have another (good/non-faulty one) sinker plate for comparison.
It is very easy to make horizontal button holes for small buttons when knitting projects using garter carriages. This blog is a text version of the video posted on the same subject.
First, decide the position of the button holes. Pick two stitches (in my demo, I decided to pick two sets of two stitches where I knew the machine needles, not the carriage’s, would knit). Move the left stitch out of these two to the stitch to the left of it and the right stitch to the right of it. Push the freed needles back to B position.
Knit one row with your usual pattern. The needles that were empty, now have yarn hooked on them (no stitch formed). Using a double eyelet tool, take the yarn off one hook, twist it, and then put back into a needle. You just formed a loop. Do it for the remainin needles in the button hole.
… in progress as I am still learning and discovering …
I’ve spent the last two weeks fixing, disassembling, servicing, and cleaning all kinds of Garter carriages. I went through a mix of emotions: from the agony of trying to identify the problem to fix to make the garter carriage work to complete awe watching the garter carriage knit a whole baby blanket just after I pressed all the necessary buttons.
In fact, it was so relaxing to watch Garter Carriage knit that my family would find me drinking coffee in front of it (instead of TV or a FaceBook page). Check out my pages with my projects, advice/notes, and patterns.
While being enthralled, I knitted swatches, hats, custom patterns, multicolor (just stripes, not using a true 2-color GC), blankets on all 200 needles…. So, below are my observations and notes.
Garter carriage is a bulky (meaning, big) carriage, but unlike a main machine carriage, it knits on its own but slowly. Garter carriages are temperamental. In fact, VERY! So below I am compiling a list of commonly appearing questions, my observations, and knowledge (acquired by making a LOT of mistakes).
The garter carriage moves too slowly.
If you want you GC to move faster, adjust the dial on its power supply. Right (“H”) is to increase the speed. If this does not change the speed, it is very likely that either the motor is malfunctioning or there is gunk in the carriage preventing it from moving faster.
The garter carriage stopped and is not moving.
The service manual describes some of the possible reasons:
Check if the power supply is actually working. My carriage stopped working literally in the middle of a project, and i could not figure out what was going on until I decided to try a different power supply. Well, the previous power supply decided to die without a warning.
The motor is not running. There are several reasons for that: bad motor, incorrect connection to the electrical outlet, yarn sensor is down, your row counter is at zero, a knot in the yarn feeder… Refer to the service manual for more detailed information.
What might cause garter carriage to randomly drop stitches?
bad (bent needle): it might have a sticky latch, be bent, misaligned or stuffed with lint. Check this first.
yarn is too thick. Solution: decrease tesion (increase the number on the dial) or switch the yarn. I was able to use yarns on garter carriage that a regular standard-gauge machine cant. BUt there is always a limit.
problematic yarn: fuzzy, or with boucle, or staticky, or stretchy yarn, or simply yarn that does not want to knit on the garter carriage (it happened to me; I put it in a bag and marked “GC cannot knit”).
check sponge bar: the spongy part needs to be about 1 cm above the metal sides. also: is it still spongy? is it even across the length of the retaining bar?
gate pegs might be bent or out of line. Check gate pegs from different angles.
clean the brushes from fluff and dust.
insufficient or too much weight
Overall, Garter carriages are quite temperamental.
Why does my garter carriage turn in the wrong place?
There are actually a lot of reasons for that, and they depend on the situation.
old grease and gunk. Solution: open up your carriage and clean it up.
if you recently disassembled your garter carriage, check if the turning cams are installed correctly
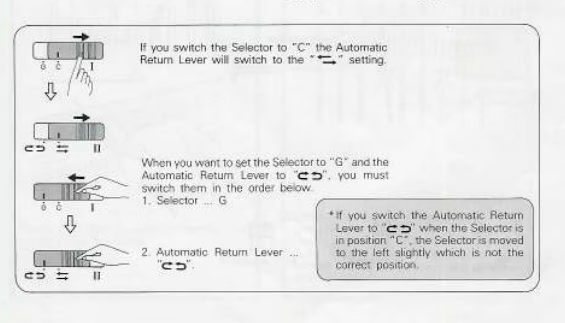
check the manual: it says for the automatic “turn” function, the slider needs to be moved to “G” first otherwise it causes problems.
make sure your needlebed DOES NOT miss any needles. It will trigger the turning cams incorrectly.
Are extension rails necessary?
It depends on the width of what you are knitting and also on your comfort level. It also depends on your machine. For example, the needlbed of the Brother KH930 is pretty wide (beyond where the needles are nested). In addition, the end cap on the right-hand side is wide too. So, even if you are moving the garter carriage past the sensor (to activate the “GC ON” light on the machine), rails are not necessarily. Thus, even if you are knitting on the full bed (like shown in this video), rails are not all that necessary.
What are good yarns to use with the garter carriage?
Garter carriages can handle yarns thicker than the standard machines can. Mostly because it knits one stitch at a time and pulls the yarn to form one stitch at a time. A couple of examples: For example, I made a wonderful blanket with “we love yarn” (400 g/1312 m; 100 g/328 m) per ball) which is considered pretty thick for standard-gauge machines. This yarn creates beautiful texture and is machine washable at 104 F. I made a blanket with the cream yarn with tension 9 for the border and 10 for the main body. One skein of Mega Ball was enough. Two-color garter carriages will need thinner yarns (for both feeders). But in both cases, knitters need to experiment with yarns and tensions. The golden rule: if the machine struggles, increase the number on the tension dial (which loosens the tension). Still struggling: the yarn is not compatible with your garter carriage.
Do I need to remove the ribber bracket to use the GC on my machine?
Just the brackets should not affect GC functioning. However, some believe that the best angle for GC to work properly is when the machine is flat. Thus, use the flat table clamps, not the S-curved ones (those that we use to attach our machines to ribbers).
Do I need to use cast-on comb?
Yes and no. Some knitters like to hang the cast-on comb on the 3rd or further rows. Some knit without it. I found that with thicker yarns and for two-color carriage, cast-on combs benefit me. Again: try and see for yourself.
Why are GC needles so expensive?
Simple answer: supply and demand.
My garter carriage is mispatterning.
Again, there are several reasons, including a gunked-up machine. But also:
you forgot to activate the GC light on the machine (if your machine is electronic)
The carriage is very easy to remove from the needlebed if it is jammed
manual and pattern cards are available online for free
sturdy end caps
excellent for those who like the satisfaction of manual stitch manipulations
excellent for beginners
it is significantly faster to perform needle selection than manually and than the Brother pushbutton knitting machines (which involves the lever movement every time the needles need to be brought forward)
no ratchet tool is required to move the needles forward (like in Brother push-button machines)
needle selection pattern versus turn knob combinations is show on the front panel: no need to constantly refer to the manual
ribbers were available to convert the machines into double-beds
CONS:
bunch of knobs, buttons and levers might at first seem confusing
vintage row counter if mispalced is hard to find
somewhat limited patterning capabilities: manual needle selection is needed for complex patterns and patterns with more than 8 needle repetitions
colored fair isle requires manual yarn manipulation (the knitter will need to lay the yarn onto the needles with open latches; might seem tedious on larger projects, but makes it easy to knit single motif patterns)
limited number of add-ons: only ribber (no knit leaders, no color changers, no lace carriages, etc).
If you are new to machine knitting on flatbed machines and you just got a machine, consider the beginner-friendly projects I recommend to all my students and customers. These projects can be done on any machine with any gauge. Also, if you are unsure how to choose a knitting machine, check out an article I put together.
…stay tuned for more insights as I test other turn-knob knitting machines.
Knitting machines with punchcard capabilities have carriages with drums that glide on the back rail and also assist in needle selection when they are passed over a punchcard reading mechanism pegs.
Well, since these patterning drums are such a prominent feature (which also makes these machines stand out from Brother punchcard knitting machines), a lot of cons and pros are associated with them.
PROS:
needle selection is localized to drums/carriages, thus fewer (theoretically) things can go wrong;
Drums assist the carriage in sliding on the needle bed
I find knitting tuck-stitch on these machines is much less problematic than on Brother machines.
Patterned knitting occurs starting with the first passage of the carriage.
CONS:
Yarn and debris can’t tangle around these drums
These drums often freeze up when the machine is not in use for a prolonged time due to solidified old grease/oil.
Here are my other observations/feedback so far:
Pegs on the drums pass the needles to either B position or C position.
When the patterning dial is in the fair isle position, the mani yarn goes onto the needles in C position.
I see blog posts stating that some of the clanking noise might be due to the static in the yarn. To solve this issue, attach wax to the tension mast so the yarn passes through it.
But some knitters experience that noise even when there is no yarn in the carriage. Sometimes, if the carriage was not recently serviced or the sponge in the retaining bar is old, you might hear some clanking noise. I am discussing this issue (as well as how to address/minimize it) in my video.
When the ribber connecting arm is attached (from SRP50 ribber – maybe others, still researching), the carriage cam dial does not turn from L to Stockinet freely. You will need to disconnect the connecting arm, and the problem will be solved.