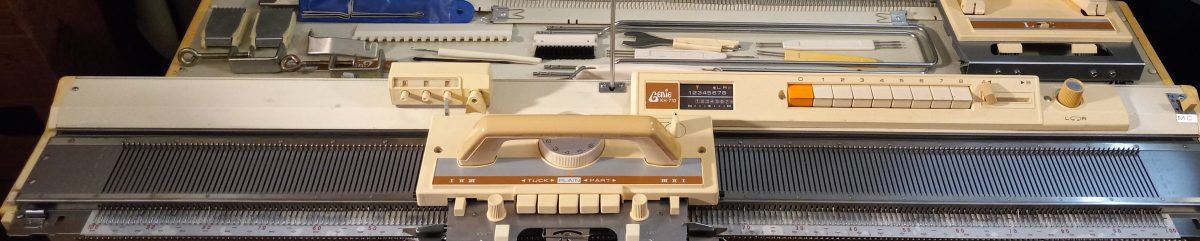
Brother Profile KH552 for Paige, July 2026

Brother Profile 552 knitting machine is the first machine on the market with an 8-push-button needle selection mechanism. Read more about its pros and cons in my Knitting Machine Encyclopedia. The post below is dedicated to a specific Brother 552 machine serviced and tested in my shop.

I deep-cleaned this machine using my standard procedure. In addition, I deep-cleaned the pushbutton mechanism. I removed the old sponge strip and replaced it with a new one (it will not be visible). The new sponge bar helps the buttons spring back faster/better. I also oiled the selecting plates, which also helps the pushbutton retract more reliably (which is demonstrated in the video).

The machine knitted wonderfully during my tests on the full bed (read here why tests on the full bed are so important to me; not just knitting a swatch). In this video, I show stockinette, slip- and tuck- stitches with 3 different yarns (but all a bit thinner than the sock yarn). All needles formed wonderful stitches. I will include a little bit of the first (blue) yarn with the setup. During those tests, I showed the functioning of the A/B and L/R knobs in the pattern center.

The description of the slip “zig-zag” pattern in the manual is not accurate. I am including a printed copy of that pattern as well. An accurate schematic for the zig-zag slip-stitch pattern is actually in the manual for the Brother KH587. It is in Spanish, but the schematics are self-explanatory. This manual has a lot more patterns than any other.

The setup will include almost all original parts: claw weights, ratchet tool, transfer tool, table clamps, carriage, cleaning brush, crochet hook, carriage lock, carriage screw-on handle, row counter, cast-on combs, wax in a container, sinker plate, and toolbox (although it might be from KH585/KH588 since it has designated spots for two carriage handles: one for the main carriage and one for the lace, but KH552 does not come with a lace carriage).

Replacement parts are:

  • Needle selection rulers: a slightly different set as shown in the manual
  • Tension mast (in great condition from a Brother machine but not the original one for the Brother Profile 552)
  • Replacement needles are new stock;
  • Cast-on thead is very likely not original; it is wound up on a bobbin.

Accessories that WILL NOT BE included:

  • Oil bottle; to lubricate my machines, I use Hoppe’s gun oil (Amazon has it).
  • “Accessories Kit” and “plastic case for spare needles” are just covers for the accessories. They were missing. Typically, those are so old and fragile that they are useless anyway.
  • Hard copy of the manual. There is a copy online that claims to be a manual for KH552; however, it is for KH588 (it shows the list of accessories for KH588). For reference: check out an online copy for KH585 (this is the one I used, as shown in the video, but the zig-zag pattern is not accurate).

BTW: Another useful free online brochure for pushbutton machines with patterns is a Baby’s book.

The accessories marked in blue below are for the KH588 machine and do not come with the Brother Profile 552 setup.

The machine’s look is in great shape as well, especially considering its age.

There are a couple of minor imperfections (read below):

  • There is a minor dent on the front panel
  • The lid had a couple of rusty areas, which I covered with Rust-Oleum.
  • Due to the machine being so old, or potentially because the tension mast is a bit bigger than the original one, you might see a case that is not fully closed. The crack is smaller when the pressure is applied, which makes me think that it is either the enlarged tension mast or simply the way all the components are packed inside (sometimes it is a pain to solve the puzzle of how all these pieces should lie perfectly inside for the lid to close the exact intended way).
  • Carriage had a rought/discolored spot on the back; I covered it with Rustoleum. Other than that one spot, the carriage is in great shape. I did not experience any static issues (which sometimes happen due to the rust in the components).
  • The claw weights are in good shape but have these minor cracks. Typically, something like this does not affect their functioning. I wanted to supply the machine with as many original tools as possible. But if you’d rather have new white claw weights, let me know, and I will replace them.
  • Cast-on combs are in great shape as well; however, the long cast-on has a small bend. I used that comb during all the tests shown in that video and did not have any problems. The small cast-on comb had some rust-like discoloration on the metal ends, so I applied a layer of Rustoleum as well.

Other useful things to know:

Just a small comment that a “hole” below between the clamp “feet” is NOT missing a screw. I checked with pictures of other machines and with another one of mine, and all of those do not have any screws in that area. I am not sure what the purpose of that hole is. Hmm…

Despite these minor imperfections, the case is actually in very good shape.

I am very confident in this machine, as I spent a lot of time cleaning, servicing, and ensuring it works properly.

Pictures from repairs of the Brother Profile 552.

The pictures below are applicable to most 8-push-button knitting machines.

Showing which screws go on top
Showing screws around the pattern center
The look of partially disassembled pattern center
Position of the “foot”. Also, a small screw hole is shown in the middle. Well, it is not for a screw. Not sure what for. But nothing goes in there. I see this small hole on many machines.
Side screws and needlebed screws
Inside the pushbutton mechanism. Check out the video, in which I show how to (re) insert the buttons and the staples.
Position of the guiding plate. It goes against the wall of the pushbutton mechanism. Long staples go through it, and this is how the buttons are retracted. Wiggly staples do not go through this guiding plate.
View of the pushbutton from below.
Partially inserted pushbuttons. The sponge strip is replaced with a fresh one.
Same as above but a different view angle.
Same as above: different view angle.
The picture shows that I propped the selecting plates assembly with a tool to keep it out of the way while I was inserting the pushbuttons.

Retaining bar vs knitting machine model chart

In progress. LAST UPDATED: June 2026

The table below lists the lengths and widths of various knitting machines I measured myself. Use this table as a reference to ensure you purchase the correct retaining bar for your knitting machine.


Model number
Retaining bar parameters
materialsponge strip?length, inch/cmwidth, inch/mm
Brother/Defendi/Empisal/ Jones/KnitKing
Brother KH500, KH531, KH551metalyes41/1040.375/10-10.5
Brother KH110, KH120, KH552, KH582, KH585, KH588, KH710, KH800, KH801, KH820, KH830, KH840, KH860, KH864, KH890, KH891, KH910, KH970metalyes41/1040.5/11-11.5
Brother KH230 machine, KR230 ribbermetalyes43/1090.5/11-11.5
Brother KH260, KH270metalyes47/1190.5/11-11.5
Brother KR810, KR830, KR850 ribbersplasticno41/104
Brother KR260 ribbermetalyes
Brother KR230 ribbermetalyes43/1090.5/11-11.5

JUKI
2500metalyes43/1090.75/11.0-11.5
Riccar/Silver/Empisal Knitmaster/Studio/Silver Reed/Singer
Silver Reed SK120metalyes43/1095 mm/0.2 inch
Silver Reed 260, 280, 321, 322, 323, 324, 326, 327,328,329,350, 500, 560, 580, 600, 700 840
SK270, 370, 830
metalyes41/1040.75/11.0-11.5
Silver Reed SK150.151, 155, 160, 860, 890, HK100metalyes43/1090.75/11.0-11.5
Toyota

About retaining bars in knitting machines and ribbers.

… this article is in constant progress as I learn about various knitting machines and their retaining bars. By the way, a chart on which machine uses what kind of retaining bar can be found here. Read how to deal with a stuck retaining bar at the end of this blog post.

Almost all knitting machines and ribbers have retaining bars. Some machines have retaining bars with a sponge attached to them. Some machines (the majority of plastic flatbed machines) have only a long and narrow sponge (without the metal holder). Ribbers come with either a “retaining bar+sponge” assembly or only with the plastic retaining bar (no sponge strip).

The main role of these retaining bars is to hold the needles in place and to prevent them from bouncing up and down when knitting.

Below are the situations when you want and need to remove (and inspect in many cases) the retaining bar:

  1. When you just purchased your machine (especially used and NOT recently serviced), the first thing you need to do is to remove your retaining bar and inspect it. I made a short video on how to do it because I have been asked about it so many times by my customers.
  2. When you need to replace faulty needles.
  3. When you need to clean your machine.
  4. When you notice your knitting machine mispatterning without any good reason.

Hopefully, you purchased your knitting machine new or recently serviced. In this case, the sponge should be 1-2 cm above the metal edge of the retaining bar.

But in most cases, this is not the case. Thus, it is possible that when you remove the retaining bar, you will see a disintegrated sponge. I’ve seen some spongy strips being just a gooey mess. The old sponge needs to be removed as soon as possible (since it often corrodes the needles) and replaced.

There are two ways to approach this replacement.

First approach: just replace the spongy strip

If you decide to replace the sponge, you will need to remove all this goo. I first use a flat-head screwdriver to scrape all the residue out of the retaining bar canal. Typically, the old sponge residue remains in the retaining bar channels. So, to remove those, I then use “Goo Gone” to remove the rest of the residue. I typically do it outside because it is a very messy process. I pour a thin layer of “Goo Gone” liquid into the retaining bar and wait for a couple of hours. Then I scrape the remains of the old sponge again with the screwdriver. Repeat the “Goo Gone” application if needed. Lastly, I wash the retaining bar with soap and water, wipe it really well, and let it dry (or blow-dry it). You can purchase just the sponge in my store or on Amazon.

I sometimes read in forums that some thrifty machine knitters get simple weather stripping and use them as sponge strips. Well, those have different densities and sometimes do not have a silky ribbon on one side. Also, they are not suited to be exposed to oils and might decompose rapidly, leaving a sticky (potentially unremovable) residue inside your machine.

I read that experienced machine knitters use different ways to attach the spongy strip to the retaining bar. (By the way, the width of the spongy strip is not as critical, and it can be a little bit narrower than the channel of the retaining bar, but not by much). I tried different glues, and my current choice is hot glue. Some machine knitters use wood glue. I apply the glue to the metal part of the retaining bar and attach the strip to the metal by the sponge side (not the silky ribbon side). I then tape the ends of the sponge to the plastic ends. I like using medical tape. Only one layer of the tape is enough to secure the ends of the sponge. More layers will only get stuck when you insert the newly refurbished retaining bar back into the machine. Insert a small section at a time and push the needles gently down. To avoid stripping this tape, push it down on the ends of the retaining bar while inserting it into the machine.

You will see some sellers offer plastic ends for retaining bars. There are several problems with those:

  • To insert them on top of your new sponge strip, you will very likely have to widen the metal section of the retaining bar where the ends snap into, and then clip the metal again around the plastic ends. Since you will very likely have to do this procedure often (twice a year), this process deteriorates the metal retaining bar, making it eventually unusable.
  • Sometimes the plastic ends do not snap into place easily and pop out of the retaining bar.
  • Removing the old plastic ends to insert the sponge strip along the whole length of the retaining bar can also damage the ends of the metal retaining bar.

Second approach: buy a new retaining bar

Or if you do not feel like dealing with all this mess, you can purchase a retaining bar with a sponge already in it. Before you order a new retaining bar, make sure you measure the dimensions of your old bar: its width and its length.

Most commonly used by machine knitters Brother, Studio/Silver Reed/Singer, and Toyota knitting machines have somewhat similar retaining bars but there are some differences depending on the model and the gauge of the machine.

For the retaining bars for these machines, there are three different lengths (41, 43, and 47 inches) and two different widths (0.375 and 0.5 inches). This is why it is important to measure your old retaining bar to ensure that you are getting a retaining bar suitable for your machine. Most JUKI, Toyota, Silger/Silver Reed/Studio, Artisan knitting machines use 0.375-inch wide retaining bars. The lengths are either 41 or 43 inches (depending on the model).

I’ve read stories on Facebook groups, where the new machine knitters were puzzled by the fact that they JUST replaced the sponge bar and the needles do not move, advance, or retract the way they are supposed to. I especially see I happen to be the owner of 8 push-button Brother knitting machines. There is somewhere out there some incorrect information on the retaining bar for these machines. 4-push-button machines use a 0.375-inch wide retaining bar, and the 8-push-button machines use a 0.25-inch wide retaining bar. (I’ve refurbished over a dozen push-button machines and I know the difference first-hand).

Brother ribbers use plastic retaining bars without sponges. When (re) inserting the retaining bar into the Brother ribbers, the concave surface (the “channel”) should face you.

There are machines and ribbers with unique retaining bars (like Silver Reed SK120 and SK121 models, Brother KR321 ribber) – I will keep updating the blog as I am learning more. I am also putting a table on machines (and models) and retaining bar compatibility.

In the meantime, enjoy your adventure in retaining/sponge bar replacement!

PS. I measured several dozen retaining bars with my calipers. Even though the “official” measurement is 0.375 and 0.5 inches, mine are measured as 0.40-0.41 and 0.44-0.46 inches, respectively. This inaccuracy in inches makes me like the mm scale (aka metric) a bit better. So the narrower retaining bars are 10.0-10.5 mm, while the wider ones are 11-12 mm wide. Who knew that just 1 mm would make such a difference, but it does! I had an incorrect bar installed on my KH581 8-pushbutton machine, and the needles would not go back from E to B (or A) position!!!

Sometimes the retaining bar gets stuck. Possible reasons are:

  • it was inserted incorrectly originally: e.g., with the metal side touching the needles, or misaligned with the channel or even bypassed the channel.
  • sponge strip disintegrated and the old goo got stuck to the needles;
  • sponge strip goo rusted the needles and they are grabbing onto the old sponge strip;

Solutions when the retaining bar is stuck inside the machine:

  • try to use pliers to pull the retaining bar out;
  • if not much is visible to grab, remove the end cap;
  • try to do the two previous ones from a different end of the needle bed;
  • try to push the needles to E position and try the previous bullet points again

Brother (Genie) KH710 for Larissa

This would be my 10th push-button machine cleaned, serviced and tested for customers. I love push button machines for their reliability, resiliency, simplicity and hard work.

Brother KH710 (aka Genie) is a metal-flat bed knitting machine with 200 needles, 4.5 mm apart from each other. This distance (4.5 mm) makes this machine a standard gauge.

Brother (Genie) KH 710 is an 8-push button machine with a full pattern center that makes needle selection much easier and more automatic. The pattern center consists of the slide display, 8 push buttons to select the needles, one push button to deselect all selected needles, A-B lever to select the needles according to either pushed (position A) or unpushed (position B) buttons and a L/R sliding knobs which enables knitters to slide the needle selection by the corresponding number of positions. I know it might now make any sense now but refer to the manual – it explains everything very well.

The machine is in excellent shape including needles and there are absolutely no signs of rust. I still cleaned and inspected the needles. Additionally, all the needles were tested on a full bed to make sure all latches function properly. (In my video, you will see that one needle started mispatterning, which I identified by the tucked stitches first but then by its bent latch. This needle was replaced and the swatch- and the full-bed-tests were performed again to make sure all needles function properly).

A completely new sponge was attached. I reused the retaining bar. Because the sponge is still very puffy, it is somewhat resistant to go into the retaining bar channel. The ends of the retaining bar need to be pushed down when inserting it to make sure the tape does not come off.

The machine comes with all major accessories.

The minor ones not included are:

  • Cast-on thread: any smooth strong yarn will do (not too thick though)
  • Wax – the one that came with the machine was too old and just crumbled
  • Oil – the one that came with the machine was too old and yellow so I discarded it. A good oil for knitting machines is gun oil available on Amazon.
  • A toolbox and a toolbox lid will not be included. They did not come with the machine. The toolbox is to store the tools right on top of the bed when the machine is put away. The way the toolbox sits on the main bed and clings to it is convenient for storage. However, I find that I do not use the tool box when the machine is out because it is hard to easily get the tools out of it. All the tools will be packed carefully for transport.
  • A hard copy of the manual will not be provided but an electronic copy can be found here.

The machine was tested on a full bed and everything works great. I knitted hold-stitch pattern (butterfly pattern), tuck-stitch pattern and stockinet. The lace carriage was not tested but all the buttons move freely. It is not a complex carriage and it is very unlikely it will not work. The fabric I knitted during these tests was converted to these two cowls/neck warmers:

A general recommendation: tuck-stitch requires somewhat higher tension than stockinet on the same machine with the same yarn. However, for slightly thicker yarns (even sport weight) it might be a problem because on higher tensions the machine might choke up). This is why I tested the tuck-stitch with 1×1 needle selection using two different yarns: a thicker one (green) and a thinner one (power pink color). I was able to knit a nicer tuck-stitch using the thinner yarn.

However, with the cast-on on every other needle (also shown in my video), even yarns slightly thicker than sport weight can be used.

A couple minor flaws and hiccups that came up during tests are:

  • The wrench tool has a cracked plastic handle. I could still use it without problems.

  • When using a pattern that requires switching between A and B positions, I strongly recommend putting the L/R indicator onto the 2 or above position (but not at 8). When L/R indicator was on one, the switching needle position when A/B knob was used sometimes did not work as expected. I suspect that the gear is not engaging properly at the very starting position but it engages very well when the L/R is on two. I opened up the machine and checked and there are no visual wear/tear signs on the plastic gear. When I used the settings I just described to knit tuck-stitch (where every other needle was brought to C position and those needles were alternating on every row), I absolutely did not have any problems. My video confirms that.

  • I discovered that the ratchet tool (the wrench) needs to be used with confidence and medium-strength force, especially when a significant amount of needles needs to be moved to C positions (like, in my video, where I had to move 100 needles to C position). Force lighter than medium might result in not all needles being moved forward. Just be on the lookout for that while adjusting to this machine and to which force to use to move the needles forward.

Despite these two potential hiccups, which just need a bit of adjustment and a bit more paying attention, everything else was great on this machine. I hope you will enjoy using it.

Brother Profile 585 for Georgia

Brother Profile 585 is a 8 push button machine with a pattern center. Read more about this model in my previous post.

Here is a brief overview of the setup prepared for Georgia with its pros and cons.

The machine was cleaned, the pattern center was checked for all functions. All needles were inspected, cleaned and tested (when knitting on a full bed). The carriage functions were tested manually (I moved all knobs and levers) and in work while knitting hold, tuck-, slip- and stockinette stitches. Lace carriage and lace knitting were not tested. However, the lace carriage for KH585 is very simple and I do not anticipate any problems with it.

The machine comes with all major assesories. All of them are in excellent shape (especially the cast on combs). A typical setup for Brother Profile 585 usually has only one cast one comb but this machine came with two – a long and a short one. They are metal and heavy on their own – excellent for cast on without any additional weights.

The handle (that screw onto the main and lace carriages) are from another setup. So, the color mismatches a bit the main blue color of the machine and other assesories. Because I had to borrow a handle from another setup, the lace carriage will not have a separate handle. (read more on that below)

The minor assesories that are NOT included are:

  • Parafin wax
  • Assesories kit (it is simple a plastic cover for transfer tools and spare needles)
  • Oil bottle (it was yellow and old and I discarded it). A gun oil from Amazon is recommended to use
  • Cast-on thread: I typically use any silky thin yarn/thread.
  • Only a handle for the main carriage is included. The handles are interchangible with the main carriage and the lace carriage. I could only find one handle to supply with this machine. If I come across another one, I will ship it for free. However, lace carriages are used quite seldom by beginners… So, I hope by the time you decide to try lace carriage, I will find an additional handle. Regardless, the lace carriage can be moved by hand without a handle: there are less moving parts and it simply slides on the main bed while transferring the stitches. Also, lace carriage is used for 1-2 rows in a pattern and then the main carriage is used.
  • Plastic case for spare needles
  • The hard copy of the manual is also not includd but can be found online. I strongly recommend folloiwng the manual while setting up and testing and learinig how to use this machine. It is written very well. The manual has some simple patterns. For more complex and diverse patterns check out this brochure.

This machine worked great as you can see in my video. I had no major problems with it. Some minor potential problems are:

  • An auxiliary rail on the left-hand side is missing. These are needed to secure extension rails when knitting with lace carriage. So, you will simply need to keep your lace carriage on the right hand side. I am currently looking for sources where – to get the missing one. When I find it, I will ship it for free. It will only inconvenience the operator while knitting lace.


Some buttons need a bit firmer pressing than others (in the video it is sometimes button #5). But with firm pressing the button remain in their pushed-in position.

Some snags occurring during the video demo were because of some knots in the yarn – it was an old cone I inherited with one of the machine knitting machine lots.

The tension dial on the main carriage has a piece broken off. The dial still rotates well without any problems. The damage is simply cosmetic.

The lace carriage is missing the name tag: you can see the glue is still on it but there is no name.

The case has minor scratches, discoloration, and dents. None affect how the lid closes and/or stores the machine.

Overall, this machine is in great shape and should knit without problems.

KH585 profile refurbished in April 2023

Brother Profile 585 (sometimes called KH585) is an 8-push button knitting machine manufactured by Brother Company in the early 1970-ies or late 1960-ies. It is one of the last machines (besides Profile 588) to have metal end caps, which makes this machine very durable, and easy to ship and handle. Its bed is narrower than later models (with numbers above 710).

In addition to eight push buttons that control which needles will be selected, Brother Profile 585 has a pattern center. It includes the push buttons, reset button, A/B and L/R knobs. Reset button (blue on the left-hand side) unpushes all buttons currently pushed in. A/B knob determines which needles will be brought forward: those selected (the knob in position A) or Not selected (the knob in position B). L/R knob determines how much to shift the needle selection. This shift is shown on the small dial on the left-hand side. It might sound confusing but once you start working according to got the instructions in the manual, it will be more clear.

Specifically about this machine:

The machine was cleaned. A new sponge bar is inserted. All needles are inspected and cleaned manually one by one. The machine was tested on all needles to knit stockinet, tuck-stitch, and part-knitting patterning. Details of this testing are shown in my video. All tests went great and all needles knit wonderfully. Push buttons are very easy to operate. Just in some cases, they need to be pressed very firmly but it happened just once. Typically, when it happens, I just reset all the pattern center knobs.

The machine came to me without any assesories so I made a set from my own supplies. So, all major assesories will be included and some extra.

Comes with all major assesories. The assesories did not come with this machine but I made a set of all major tools. The selection rulers are not identical to those mentioned in the manual but is a good start.

Minor assesories not included are:

  • Unravel cord (any smooth thread will work)
  • Wax (the one that came with the machine was crumbled but when I tested the machine with acrylic yarn I did not feel the need for waxing)
  • The box for assesories (including its lid) is not included as it was missing from the original setup
  • The needle selection rules are somewhat different than in the manual but I included couple of extra ones
  • A hard copy of the manual is not included but can be found online (it is a generic one for 8-push button machines).
  • Oil bottle (I threw it away – was too old) but a gun oil can be purchased on Amazon

The mast that came with the original machine was causing me problems. I replaced it with the working one from my stash. So, it fits a bit funky into the lid but is still manageable.

The assesories setup comes with only a long cast-on comb. To knit swatches, I recommend purchasing a small cast-on comb like this one or this one.

The rail guards need to be a bit lose when inserting the rails. Tighten them after the rails are inserted. Also, if using a ribber, they need to be removed. Keep them in a safe place because the replacements are hard to find.

The only imperfections with this machine were on the case itself (see the pictures below).

One minor rust spot on the lid (on the end cap). The case has usual very minor pumps and discolorations.

Some minor bumps and scruffs on the case:

Other than that I don’t have any other complaints or imperfections for this machine.

Below is what I knitted on this machine while testing it: a reversible cowl/neck warmer/hood.

I hope you, a reader of this blog, will be soon a proud owner of this machine!!

Brother Profile KH552 refurbished in March 2023

Brother Profile 552 knitting machine is an 8-push-button knitting machine. It is probably the first 8-push-button machine, and it appeared on the market around 1964. The pattern center includes eight needle selection buttons, a reverse lever, a slide dial, and a set lever. 

This is my fifth 8-push-button knitting machine refurbished and prepared for other knitters, and I am completely falling in love with these machines!!

The role of the set lever is to bring the needles forward: you push the corresponding buttons and then rotate the set lever with a special wrench, and the needles move forward.

The role of the reverse lever is that, for example, you want to select needles 2 through 8. So, you simply push button #1, turn the reverse lever to B, and rotate the set lever: all but needles in position 1 will be brought forward.

The role of the slide dial is to shift the needle selection. For example, a pattern requires the selection of needles 1 and 5, then 2 and 6, then 3 and 8. Instead of pushing and unpushing the corresponding buttons, you simply push buttons 1 and 5 and then simply move the slide dial to the corresponding number of places. If you move the dial only once, needles 2 and 6 will be selected even though buttons 1 and 5 are still pushed in. If you move the slide dial two places, then (even though the buttons 1 and 5 are pushed in) needles in positions 3 and 7 will be moved forward.

The additional patterning is accomplished by moving and holding the cam lever in positions I, II, or III and by pressing pattern selector buttons.

Now about this specific machine. I refurbished, cleaned, and serviced it. A completely new sponge bar was inserted. All needles are cleaned and inspected individually. They were also checked by knitting on a full bed to make sure they form the stitches properly.

It will come with all major accessories:

  • The toolbox with a lid
  • Latch hook, crochet hook
  • Transfer tools
  • Needle selection rulers
  • Claw weights (greenish to match the color of the machine)
  • Brush to clean the carriage and the needle bed
  • Replacement needles
  • Ratchet for the set lever
  • Carriage lock
  • Handle for the mani carriage
  • Two cast-on combs: one long for the full bed and one shorter for swatches
  • Table clamps
  • I will even include
  • Yarn mast
  • Bottle with oil
  • Wax (two small wax cylinders will be included; the reason why is below).

The hard copy of the manual will not be included, but it can be found here.

All these assesories are shown in the picture below.

The accessories fit nicely into a special toolbox.

And the toolbox then sits on the bed. So, you have all you need for your knitting set up in one place.

I always like to knit on a full bed when I test my machines. First, it gives me a chance to see if I overlooked any defective needles. Even when inspecting each needle individually, it is easy to miss a latch that is not moving as freely, a slight bend in the tip of the needle, etc. So, when I knit on a full bed, I see immediately if there are needles that repeatedly mispattern or create strange stitches. If defects on the fabric occur randomly, it is very likely not a defective needle since these defects might be due to carriage snags, some small knots, or imperfections in the yarn (yarn splits sometimes, which might also result in uneven stitches randomly appearing on the knitted fabric).

The second reason to knit on a full bed, which is especially important for push-button machines, is to see if all needle pushers inside the machine are working as they are supposed to be. The patterning mechanism on push-button machines uses long strips. They look sort of like needle selection tools (some people call them combs or rulers). Each metal strip has “teeth”, shifted by one position on each strip. There are 4 strips for 4-button machines and 8 for 8-button machines. The position of the teeth is shifted by one on every strip. There are, accordingly, 4 and 8 positions on the strips for 4- and 8-button machines. So, if these “teeth” are bent or damaged, not all needles will be pushed forward. And this is what I am checking when I knit patterns on the full bed on push-button machines. 

So, on this machine, I knitted slip-stitch and tuck-stitch on the full bed. The stockinet was very easy to knit. When I knitted the pattern, I noticed that the tension was getting tighter and tighter. It was due to the static accumulation. This was the first time I experienced such static accumulation (using the same yarns on other machines) but attaching a wax to the tension mast solved the problem.

Knitting a 1×1 tuck pattern on this machine uses all needles. In the first row of the pattern, all odd needles are selected and in the second row of the pattern, all even needles are selected. So, on a full bed when knitting this tuck-stitch, we test the needle selection and how needles knit the tuck-stitch. All went well as shown in my video. After such a successful test, I then knitted a pouch for my husband’s paddle (the knitting process is shown in the video, and the end result is on the picture to your right).

This brings us to the imperfections of this particular Brother Profil 552 knitting machine:

Buttons need firm pushing. Sometimes I had to press the button twice or three times. The firmer you press, the fewer times you’ll need to repeat pressing. Also, all the levers need to be in their default positions when you start pressing the buttons. Once the buttons are pressed, they are firmly sitting in their positions and do not jump back. It took me some time to get used to firmly pressing the buttons. But once I got used to the right force needed to push the buttons and reset all levers before, all went smoothly. This is one of the reasons this machine needs a patient knitter. Watch my video to see how these buttons sometimes misbehave.

The second imperfection of this machine is slight discoloration of the metal surface as well as roughness. I only see this discoloration on the carriage. However, keeping in mind that this machine is over 55 years old, this should not be surprising. And I still think that this machine has a lot to offer for another 20-30 years, especially if serviced and maintained well. However, because of this, the static accumulation on this machine is a bit more than average. But this problem is solved by using wax and regular oiling. Thus, with this setup, I am including two wax cylinders. This is the second reason this machine needs a patient and caring knitter who will ensure all the setup steps are undertaken prior to the knitting and ensure this machine is well-kept and serviced on time. One tube of oil will be included.

The third imperfection is the levers on the carriage. The lever on the right-hand side slides not as smoothly as on the left-hand side. The metal bracket on the left-hand side popped out when I got this machine. I fixed it and secured it (it will NOT pop out again), but the metal grooves are not as smooth. I am a petite woman with medium-strength hands, and I still move the levers without too much force. At the end of my video, I show the movements of these two side levers.

Video of tests and demo of all imperfections is here.

A couple of cosmetic flaws are shown in the photos below.

Scratches inside the lid:

Minor dents on the outside of the lid.

Scuff mark on the right-hand side of the carriage.

The machine knits wonderfully despite imperfections. In fact, push-button machines handle some unusual yarns better than punch-card machines (not sure why, but maybe due to the more fragile nature of the punch-card mechanism if lint or dirt is stuck in it, it will not pattern properly…??). This is why I like these machines so much. They are working horses!! A combination of automatic stitch selection with hand manipulation of the needles will give a knitter a lot of possibilities!! Yes, punch cards and electronic machines are more versatile, and people think they are easier. But think about it: to come up with a novel design for a punch-card machine, a knitter needs to carefully punch a card and then test it. But the design is limited to a 12-24 stitch-repeat pattern. Yes, on an electronic machine one can use repeat patterns with more stitches, but then the software is needed, special cables, and all those machines are still expensive to buy!!

The bottom line is: there are fewer things going wrong with the mechanically-patterning push-button machines, and this is why I love them and highly recommend them to a beginner machine knitter or to hand-knitters who still would like to maintain the satisfactory feeling of knitting by hand but with a bit of help from the machine in speed and forming more even stitches!!

I am currently testing the KR580 ribber, which fits the Brother Profile KH552 machine.


Brother KH588 knitting machine

Brother KH588 knitting machine is a gauge (4.5 mm) knitting machine manufactured in Japan. It features 200 needles and is capable of patterning using semi-automatic needle selection performed by 8-push buttons and a pattern center. It was manufactured in the mid-seventies of the last century. I could not find more precise information on their first appearance on the market.

The machine and all associated assesories are blue in color. The end caps of the machine case and the lid are metal. The machine comes with a lace carriage, cast-on combs and extension rails to hold the lace and the main carriages. The handles on these carriages detach (screw on) and when not in use, are stored separately in the lid on the toolbox.

The pattern center features 8-push buttons, a set-lever (it engages by a special ratchet tool and moves the needles after the corresponding buttons are pushed), a reverse lever (to determine whether the operator wants to bring forward the needles that are selected or those NOT selected), slide dial (the knob helping the knitter to shift the needle selection by 1-8 positions without pushing/unpushing or selecting/unselecting the needles) and MC change lever.

The picture below shows part of the pattern center for the KH588: 8 push buttons, a reverse lever and a slide dial.

MC change lever has N and MC positions also accompanied by the open and black triangles, which helps if you get a machine with Japanese writing for all main functions on the main

bed and carriage. MC change lever is used for fair isle patterning (when moved to the MC position).

The shapes of the table clamps is typical for older models – with two wide screws, one of which is attached to the main bed.

Unlike many other machines I refurbished, Brother KH588 comes with laying-in thread feeders (two metal pieces laying next to the blue claw-weights in the picture to the left). They are used for weaving. They are inserted under the knobs between the knob and the sinker plate.

The KH588 machine I worked on had all words written in Japanese (see the picture below). Next to it is a carriage from Brother KH588 released to the English-speaking market. Unlike some other Brother machines, including some 8-push buttons ones, holding cam levers (marked on the bottom side of the carriage as I, II, and III) are moving horizontally along the low side of the carriage. On many machines, these cam levers are on the side. The carriage also has a change knob (on the top right-hand side of the carriage). This knob chooses normal, weaving, or fair-isle knitting.

Brother KH588 can knit with KR586, KR587 and KR710 ribbers according to this chart.

Replacement needles for these machines are still available on the used market. They are shaped differently than newer models of Brother knitting machines. They have an unusual concaveness next to the needle butt which makes them stand out. Sponge/retaining bars, however, can be found easier. The retaining bar is 41 x 0.5 inch and those are still sold new. Some knitters replace only the sponge and any dense sponge with the smooth fabric top should work.

Since KH588 needle selection is fully mechanical, there are only a number of things that can go wrong and they are easily fixable (unlike electronic and punch-card machines). This feature makes these machines very reliable horses. It is excellent for designers who prefer to have control and like hand-manipulations. This machine is also excellent for beginners who just start machine knitting. I also feel that Brother KH588 would be an excellent fit for somebody who is transitioning from hand-knitting to machine knitting and simply wants to accelerate their work while maintaining satisfaction from manipulating stitches and patterns by hand. This machine is compact as the bed is more narrow than newer models. Because of this, it is light-weight of this machine makes it excellent for people who are not as strong with their upper bodies or for older knitters.

I hope this information helps you to know more about Japanese knitting machines and maybe to consider getting this machine for your craft, creative and/or production needs.

This article was published using my personal observations and experience using Brother KH588 knitting machine.

If you are interested to learn about other 8-push button knitting machines, check my other articles on KH710, KH581.

Brother KH588 and Genie 710 knitting machines: same or different?

Brother KH588 and Genie 710 knitting machines are both standard gauge (4.5 mm) knitting machines manufactured in Japan. Both feature 200 needles and are capable of patterning using semi-automatic needle selection performed by 8-push buttons.

This website states that these machines are the same but my experience is somewhat different as I had a chance to work on both machines. Below is my assessment.

Brother KH588

The machine and all associated assesories are blue in color. The end-caps of the machine case and the lid are metal. The machine comes with lace carriage, cast on combs and extension rails. The handle on the carriage detaches (screws on) and when not in use, is stored separately in the lid on in the tool box.

The pattern center features 8-push buttons, set-lever (the one that moves the needles after the corresponding buttons are pushed), reverse lever (to determine whether the operator wants to bring forward the needles that are selected or those NOT selected), slide dial (the knob helping the knitter to shift the needle selection by 1-8 positions without pushing/unpushing or selectin/unselecting the needles) and MC change lever.

The shapes of the table clamps is typical for older models – with two wide screws, one of which is attached to the main bed.

Brother KH588 comes with laying-in thread feeders (two metal pieces laying next to the blue claw-weights in the picture to the left). They are used for weaving. They are inserted under the knobs between the knob and the sinker plate. See the images below.

Picture below shows part of the pattern center for the KH588: 8 push buttons , reverse lever and a slide dial.


The pictures of the MC change lever (shown below) features the N and MC positions also accompanies by the open and black triangles, which helps if you get a machine with Japanese writing for all main functions on the main bed and carriage.

The KH588 machine I worked on had all words written in Japanese (see the picture below). Next to it is a carriage from Brother KH588 released to English-speaking market. Unlike some other Brother machines, including some 8-push buttons ones, holding cam levers (marked on the bottom side of the carriage as I, II and III) are moving horizontally along the low side of the carriage. On many machines these cam levers are on the side. The carriage also has a change knob (on the top right-hand side of the carriage). This knob chooses normal, weaving or fair-isle knitting.

Brother KH588 can knit with KR586, KR587 and KR710 ribbers according to this chart.

Genie KH710

Genie KH710 is white/brown/orange in color scheme and some with all the same assesories (lace carriage, extension rails, cast-on combs). The laying-in feeders did not with the standard setup for Genie KH710. The table clamps for this machine are of newer design: they simply slide into the main bed slots and then screwed on to the table.

Genie 710 has 8-push buttons, reverse lever, slide dial and the MC lever.


Carriage for Genie 710 featuring a change knob, foldable handle, set levers moving horizontally along the length of the carriage.


Genie 710 is very similar to KH588 and I will not explain in this post the purpose of the main levers and buttons as I did for KH588. I also have a dedicated post to KH710 specifically.

So, the summary of the differences:

  • Genie 710 did not come with the laying-in yarn feeders and KH588 did
  • Genie 710 is white and brown/orange in color and KH588 is blue
  • Handles for main and lace carriages screw on in KH588 and are permanently attached in Genie 710 but can be folded
  • End-caps for the main bed case and for the lid are plastic in Genie 710 and are metal for KH588
  • Table clamps are of different shapes: KH588 has clamps that screw on to the main bed and table clamps for the Genie 710 slide into the main bed to hold it to the table
  • KH710 is a bit newer model than KH588 judging by its computability with ribbers and newer table clamp design.

If you discovered other differences I did not mention, please message me so we can update this information. I would also appreciate if you message me if you found this article useful.