Vintage KnitLeader KL111 prepared for Sheryl, April 2024

KnitLeader KL111 + customer’s ship label

$44 + customer provides shipping label

$44.00

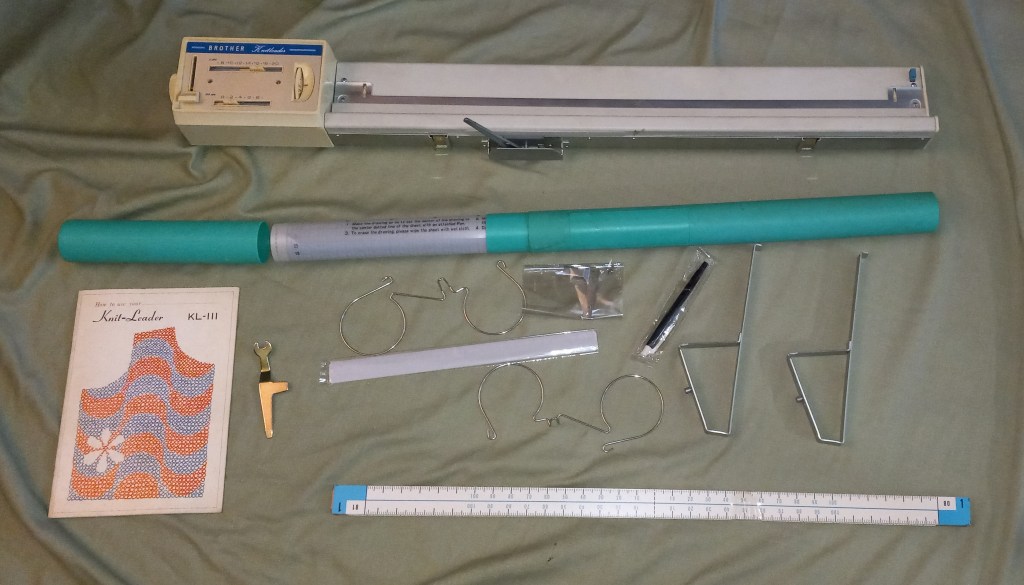
KL111 knitleader has all major accessories, including a good-looking hard copy of the manual, mylar sheets, scales, ruler and very important triangular brackets. The post below is about a particular knit leader but to know more details about the KL111 model, refer to my other post.

I did not test the knit leader on the machine but all the buttons, knobs and levers move freely. I inspected it thoroughly and wiped easy-to-remove dust and grime. Some stains remained – I do not like rubbing the plastic parts too extensively out of fear of damaging this old plastic even more.

The ratchet with the white handle is missing. So I will include the ribber spanner that fits well although is not as ergonomic as the original one. The handle can be improved a bit by applying several layers of tape.

The long scales seem like were never used. The mylar sheet also looks in great shape.

The knit leader tripped will be included if your carriage did not come with one.

The control center is in great shape also:

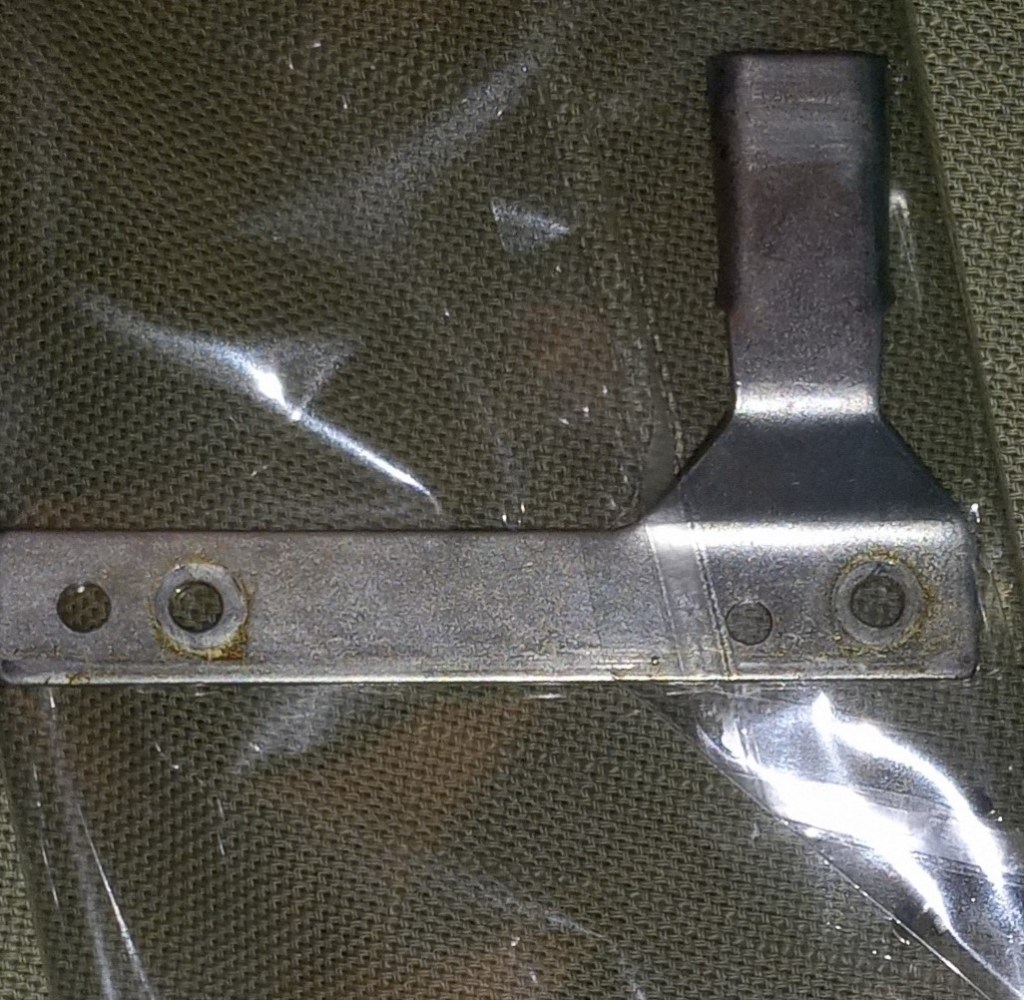
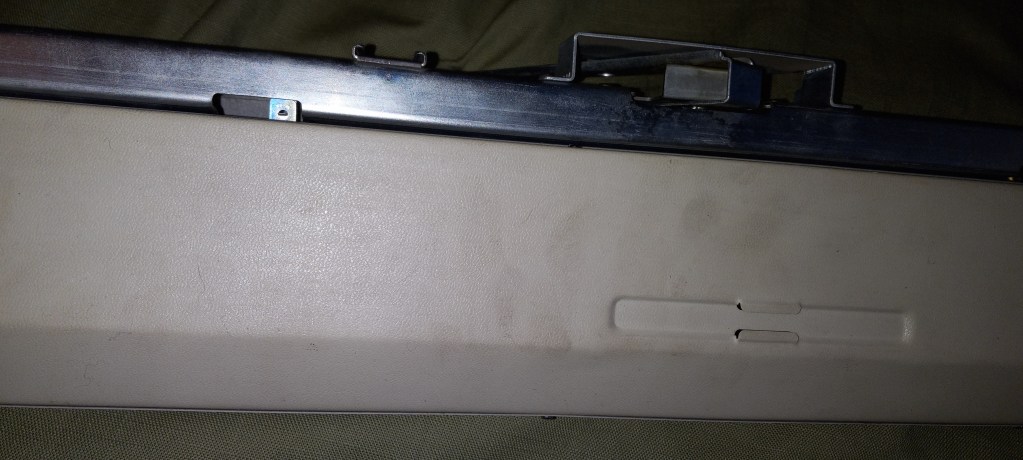
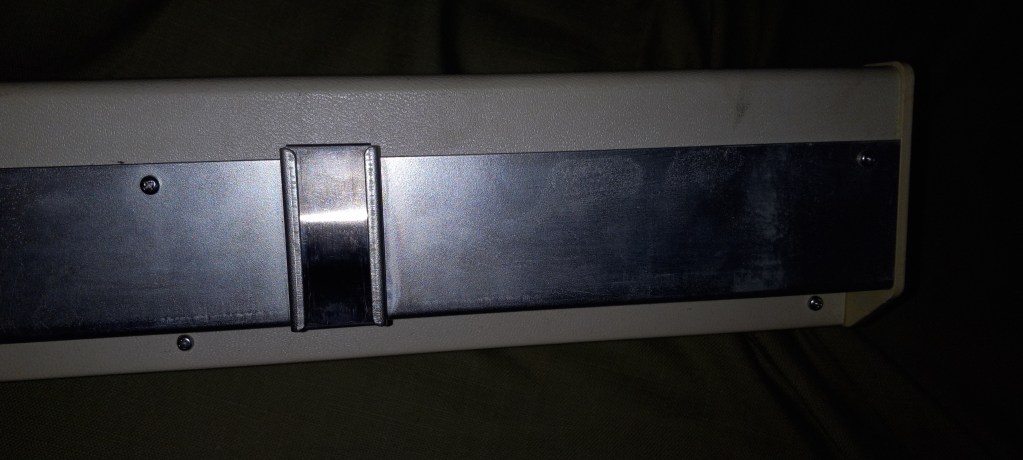
Below are some imperfections I noticed when preparing the knit leader. Most are the different degrees of staining on the boxy of the knit leader.

About retaining bars in knitting machines and ribbers.

… this article is in constant progress as I learn about various knitting machines and their retaining bars.

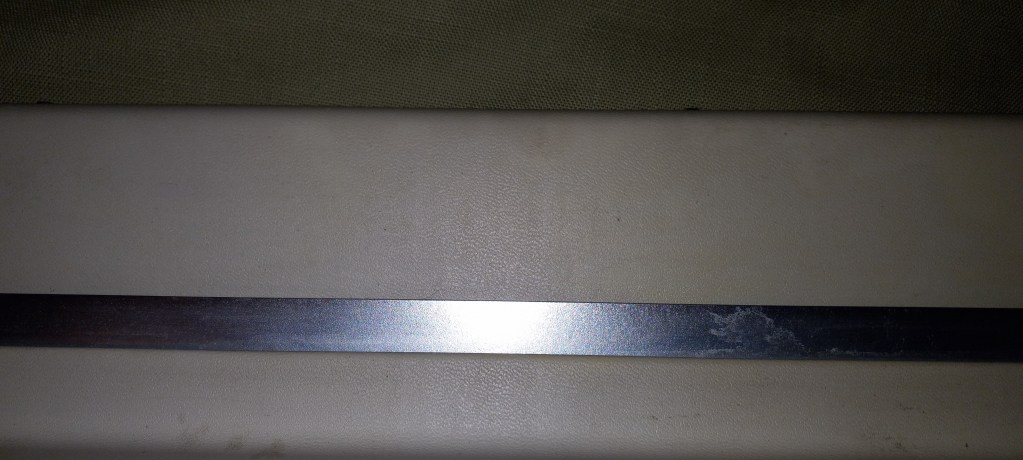
Almost all knitting machines and ribbers have retaining bars. Some machines have retaining bars with a sponge attached to them. Some machines (the majority of plastic flatbed machines) have only a long and narrow sponge (without the metal holder). Ribbers come with either a “retaining bar+sponge” assemble or only with the plastic retaining bar (no sponge strip).

The main role of these retaining bars is to hold the needles in place and to prevent it from bouncing up and down when knitting.

Below are the situations when you want and need to remove (and inspect in many cases) the retaining bar:

  1. When you just purchased your machine (especially used and NOT recently serviced), the first thing you need to do is to remove your retaining bar and inspect it. I made a short video on how to do it because I have been asked about it so many times by my customers.
  2. When you need to replace faulty needles.
  3. When you need to clean your machine.
  4. When you notice your knitting machine mispatterning without any good reason.

Hopefully, you purchased your knitting machine new or recently serviced. In this case, the sponge should be 1-2 cm above the metal edge of the retaining bar.

But in most cases, this is not the case. Thus, it is possible that when you remove the retaining bar, you will see a disintegrated sponge. I’ve seen some spongy strips being just a gooey mess. The old sponge needs to be removed as soon as possible (since it often corrodes the needles) and replaced.

There are two ways to approach this replacement.

First approach: just replace the spongy strip

If you decide to replace the sponge, you will need to remove all this goo. I first use a flat-head screwdriver to scrape all the residue out of the retaining bar canal. Then, I use “Goo Gone” to remove the rest of the residue. I typically do it outside because it is a very messy process. I pour a thin layer of “Goo Gone” liquid into the retaining bar and wait for hours. Then I scrape the remains of the old sponge again with the screwdriver. Lastly, I wash the retaining bar with soap and water, wipe it really well and let it dry (or blow dry it). You can purchase just the sponge in my store.

I sometimes read in forums that some thrifty machine knitters get a simple weather stripping and use them as sponge strips. Well, those have different dentistry and sometimes do not have a silky ribbon on one side. Also, they are not suited to be exposed to oils and might decompose rapidly leaving a sticky (potentially unremovable) residue inside your machine.

I read that experienced machine knitters use different ways to attach the spongy strip to the retaining bar. (By the way, the width of the spongy strip is not as critical and it can be a little bit narrower than the channel of the retaining bar but not by much). I tried different glues and my current choice is hot glue. Some machine knitters use wood glue. I apply the glue to the metal part of the retaining bar and attach the strip to the metal by the sponge side (not the silky ribbon side). I then tape the ends if the sponge to the plastic ends. I like using medical tape. Only one layer of the tape is enough to gluattach the ends of the sponge. More layers will only get stuck when you insert the newly refurbished retaining bar back into the machine. To avoid stripping this tape, push it down on the ends of the retaining bar while inserting it into the machine.

Second approach: buy a new retaining bar

Or if you do not feel like dealing with all this mess, you can purchase a retaining bar with a sponge already in it. (Those will soon be available in my store as well.) Before you order a new retaining bar, make sure you measure the dimensions of your old bar: its width and its length.

Most commonly used by machine knitters Brother, Studio/Silver Reed/Singer, and Toyota knitting machines have somewhat similar retaining bars but there are some differences depending on the model and the gauge of the machine.

For the retaining bars for these machines, there are three different lengths (41, 43, and 47 inches) and two different widths (0.375 and 0.5 inches). This is why it is important to measure your old retaining bar to ensure that you are getting the retaining bar suitable for your machine. Most JUKI, Toyota, Silger/Silver Reed/Studio, Artisan knitting machines use 0.375-inch wide retaining bars. The lengths are either 41 or 43 inches (depending on the model).

I’ve read stories on FaceBook groups, where the new machine knitters were puzzled by the fact that they JUST replaced the sponge bar and the needles do not move, advance, or retract the way they are supposed to. I especially see I happen to be the owner of 8-push button Brother knitting machines. There is somewhere out there some incorrect information on the retaining bar for these machines. 4-push-button machines use a 0.375-inch wide retaining bar and the 8-pushbutton machines use a 0.25-inch wide retaining bar. (I’ve refurbished over a dozen pushbutton machines and I know the difference first-hand).

Brother ribbers use plastic retaining bars without sponges. When (re) inserting the retaining bar into the Brother ribbers, the concave surface (the “channel”) should face you.

There are machines with unique retaining bars – I will update the blog soon when I learn more. I am also putting a table on machines (and models) and retaining bar compatibility. Stay tuned!

In the meantime, enjoy your adventure in retaining/sponge bar replacement!

PS. I measured several dozens of retaining bars with my calipers. Even though the “official” measurement is 0.375 and 0.5 inches, mine are measured as 0.40-0.41 and 0.44-0.46 inches respectively. This inaccuracy in inches makes me like the mm scale (aka metric) a bit better. So the narrower retaining bars are 10.0-10.5 mm while the wider are 11-12 mm wide. Who knew that just 1 mm would make such a difference but it does! I had an incorrect bar installed on my KH581 8-pushbutton machine and the needles would not go back from E to B (or A) position!!!

Review of Scrubby yarn and how it knits on circular knitting machines Addi

Scrabby yarn (from IceYarns or from RedHeart) has sort of an eye-lash thread but with the “eyelashes” are created with the twistiess. It is typically used to knit washcloth for dishes and baths

Knitting by hand with this yarn was fun – it creates a unique texture without any effort. I also decided to use my Addi circular machine to see if I can make household items faster. So, I was able to knit loofahs, coffee holders (aka reusable sleeves for paper cups), place holders, table pads and coasters.

Both IceYarns and RedHear offer a very wide variety of colors, including solid, two and three color variegated types. I chose white and black yarn because in my opinion it hides all the crumbs and spills really well

The IceYarn offers scrubby yarn as 100% polyester. One skein holds 3.53 oz (100 g) and contains 103 yards (95 m). Red Heart offers both 100% polyester (100g/3.53 oz and 85 meters/92 yards per skein) and 100% cotton yarn (weight and yardage depend on whether the color is solid or variegated). I only tested the 100% polyester yarn because I had cotton washcloths and I could never get rid of the smell of dirty dishes even after washing the scrubbies over and over again.

The cast-one was straightforward and relatively easy. It did help to keep the tension loos but not too loose because the yarn is silky (very smooth) enough where it can skip stitches (which we don’t want). However, I started using contrasting waste yarn because it is easier to manipulate the stitches afterward (in order to put the washcloths together )

The knitting on the machine became significantly easier after the first two rows. However, some of the stitches did not sink into the slots on their own and I had to help “them” . Even though the yarn will hide all defects because of the variegated colors and because of the twisties on the yarn, I still did not want to create tuck stitches because they sometimes lead to missed stitches. Check out my youtube video on how I dealt with these stubborn stitches.

A square scrubby took 12 rows. In the same video, I demonstrated the techniques I used to finish these square scrubbies. I tested them and they are washable on a regular cycle and even dryable on “knits” cycles. Coffee mug sleeves would probably take 12-30 rows depending on whether you like it single-or double-layered. Placement mats should be done on large Addi. I made mine rectangular and double-layered with 60 rows.

Hague Linker – review by ComfiKnits, April 2022

I purchased a new Hague linker directly from Hague in UK and so far I am very pleased although not everything is ideal. This is the only linker that I ever used so I don’t really have what to compare. My linker with the one with the electronic foot pedal control but the same pros and cons and advice are applicable to a manual machine.

What I did on Hague linker:

  • Linked the edges of the scarf knitted on standard knitting machines. As the Hague manual mentions, it is extremely important to get a hang by practicing putting the knitted edge on the linker’s pegs to create a very nice and even seam.
  • Linked the open stitches on every and every other needle. I use this technique when I was to create more stretchy edges. Check out my video on those.
  • Linked the edges of the scarf knitted on a bulky machine – was very pleased as well

Overall recommendations:

  • Learn how to put the knitted edge efficiently and evenly on the pegs.

    I typically try to put the whole piece on a linker – it helps me to evenly distribute the stitches along the piece length.

  • Always knit blank 10-12 stitches at the end to easy take of the linked piece of the machine and to hide the loose ends. By ‘blank’ stitches I mean the thread looping on itself without any underlying fabric.
  • Push the fabric placed on pegs as far as possible so it does not slide off.
  • Keep even tension between first and second fabric layer when joining them on pegs

Pros and Cons.

(+) The edge is nicer than when sewn by hand

(+) Faster than linking by hand

(+) Easy to see as you knit whether the edge is even or not

(+) the size of the linker is compact enough so I sometimes move the whole machine if for some reason I feel that moving the ring with pegs is not convenient. Or sometimes I move around myself whatever works, right?!?

(+) very well-written instructions and manual.

(+) If the needle breaks, it is easy to replace

(+) Parts are available from the manufacturer.

(-) even though there is a tension mast and a threading mechanism with tension control, I feel the flow of the threading yarn is not even. I tried to wind my thread in a different way and it still catches one in a while. But that’s ok and is easy to get control over.

(-) it does miss stitches once in a while. So the yarn threading, tension, combination of thread and the thickness of the knitted pieces are all important.

(-) Even though replacing a needle is relatively easy, putting it in the absolutely correct position requires trial and error. It is doable, yes! But I had to step away from my Hague linker for a couple of days not to get too frustrated

Pros and cons specifically for an electric linker:

(+) Hands are free – all control over the needle movement and speeds are through the foot pedal.

(+) The electric linker can be used manually as well but not many stitches.

(-) I wish the cord was a bit longer. But I wonder if this is some sort of safety precaution because the cord on my sewing machine is also shorter than I want.

I learned a lot by simply using and experimenting with various techniques. There is still a lot to knit and to link and to learn on Hague linker! Below are some products I finished on Hague!

Since this is the only linker I ever tried I cannot really compare it to anything else rather than sewing the garment pieces by hand and on a sewing machine. Overall I am very pleased and will continue getting a hang of various techniques, including decorative ones, on my Hague linker.

Brother yarn winder

As all my other assesories, this yarn winder was inherited by me with the two large lots of knitting machine and their assesories.

After testing several variety of different yarn winders, I realized that this model and this yarn winding mechanism is actually my favorite (check my blog for the pros and cons of other yarn winder as well as a table comparing severla at once).

Like most home and hobby yarn widners, this one has a screw-on clamp that has a winder range and allows the winder to be attach to variety of thick and thin table surfaces.

Both of the yarn-guide rods have a spiral thread-through mechanism – so if you screwed up your yarn winding, you don’t have to cut it to start all over (like some other models).

The second rod (or yarn guide) is rotating which allows for a more even yarn distribution and also for a bigger yarn skeins to be wound.

Well, it is kind of hard to find many words to describe this yarn winder (as well as others).

I think it would be better if you simply watch my short video:


I really hope you can buy this yarn winder since , in my opinion, it is one of the best ones!!

Comparison of various yarn winders


Royal

Brother

Silver reed

Knit Picks


Overall rating:

****

*****

****

****


Capable of winding into cones?

Yes, with add-on cones

Yes, yes with add-on cons

Yes, with add-on cons

No, to the best of my knowledge


Can handle large skeins?

Yes, tested on 6 oz

yes

no

no


Manufactured now?

No

Maybe – similar design but not 100% the same

no

yes


Here are more details on each individual winder:


Video demo

Detailed pros and cons

Royal

https://wordpress.com/post/thoughtsandknits.wordpress.com/507

Silver Reed

https://wordpress.com/post/thoughtsandknits.wordpress.com/477

Brother

https://wordpress.com/post/thoughtsandknits.wordpress.com/566

KnitPicks


2021-12-14 review of royal yarn winder

When I inherited this strange-looking Royal Ball winder, I quickly dismissed it and kept it in a drawer. It was when I was still in love with my KnitPicks ball winder and did not knit at high volumes from big skeins of yarn.

But the more I read and participated in FB group exchanges, I realized how valuable it is to some people and I decided to give it try.


First – why I found it strange. At a glance, it looks like an old grammar hair curler was glued to stuck. Would not you agree? Second, the way to thread the yarn through the whole device and (how I discovered later) around the “hair curler” is not intuitive at all. Check out my video of failed attempts.

However, this small device is pretty mighty. You can place a detachable cone on it and wind the yarn directly on it and then remove. I managed to wind 6 oz of yarn. (However, in my opinion, it looked pretty ugly and not like a cone at all! )


I very much liked that it has a built-in and easy-to-screw-in table clamp. So, I would not worry about losing the clamp like with other winders. However, I felt that the thread started weakening as I had to tighten it during the process of wounding the yarn. I also feel that this yarn winder might not be attached to all tables – too thick or too thin table might not work with it.


Below are pros and cons of this Royal Yarn Winder:


(+) can work with detachable plastic cones

(+) has built-in table clamp – you don’t have to worry about loosing it

(+) can handle large skeins of yarn

(+) even slippery yarns don’t slide in the middle of your wounding (like on some other yarn winders).

(+) compact


Cons:

(-) Hard to find

(-) I feel that the screw thread for the clamps inside the body might get broken with age… I somewhat observed it with both yarn winders I tested – I had to tighten them quite a bit during the wounding.

(-) threading the yarn through was not straight-forward and intuitive for me

(-) I wish the large cake looked a bit prettier after it is all done But it is in no way a deal braker for me.

(-) might not be attached to a wide range of tables due to the clamp size limitations.


I sold both of my Royal Yarn Winders as I liked my other ones better but I enjoyed testing this one and learning how it works. I hope you will find one soon to introduce yourself to it too

2021-12-14 Review of a vintage Silver reed yarn winder

This little cute guy was, as all other my aseesories, a part of my last lot of knitting machine purchased during an estate sale. It has seen its ways and was probably working hard jugding by a small chip on its cone.

Howeer, I was very curious to test it and compare to other yarn winders since I have never seen one like this before either in real life or on posts related to hand and machine knitting. It is obviously vintage since these yarn winders are no longer in production and nobody makes such designs.

I was pleasantly surprized how heavy its base was. At first, I though it was the only way it would sit on the table – no other support is needed. After several uncesuful attempts to wind the yarn in this way, I realized that it is indeed supposed to be attached to the table.. the reason I did not realize it quickly enough because the slot for the clamp was not obvious and the base was so heavy. Also, all the clamps that came with that lot were in one large bag – who knows which machine they were for.

However, not all clamps were suitable for this little guy. The clamp shown above has a little knotch sticking out and it did not slide easily into the slot.

However, I was able to find a clamp with the slightly elongated top part – I suspect the clamp for silver reed or studio machine. And it worked perfectly: it slid in without problems and the extra length helped to hold this winder stronger.

The device has a yarn guide that moves in a wide range and guides the yarn to be wound evenly across the cone.

Overall I was pleased. Below is how it is compared to other ones.

Pros and cons:

(+) The design is simple.

(+) Straightforward usage.

(+) can be attached to any table with a metal clamp available with almost every knitting machine.

(+) even though there is no groove to insert the yarn for extra tension, the yarn cake/ball does not slide (like on my KnitPicks Yarn winder) in the middle of the winding. I found this a huge advantage of this Silver Reed winder.

(+) compact


Cons:

(-) I wished it had a little groove to attach the yarn like other cones do so the yarn does not slide and it is easy to find the yarn end inside the cake.

(-) the cone is not detachable.

(-) Although I did not specifically test it, other cones probably will not fit on this winder and might prevent yarn guide from sliding freely.

(-) the size of the yarn ball might be limited to 4 oz. When the cake becomes too large, the yarn guide does not slide easily and the cake start slipping and skipping.

(-) does not seem to be capable of winding the yarn into cones


Watch how it works in my you tube channel.

https://youtu.be/TDeg5UnBHzc

Brief contents of KnitKing magazines for Machine knitting, years 1972-1992

Here are the magazines I am selling in my Etsy store. I am slowly reading them to see what useful information they provide but for now just a glance which cloth items they describe how to knit.

I will add more comments as I discover something new

Volume 28, issue 3

Cover and table of contents:

Brief content in pictures


Volume 28 Issue 2

Cover and table of contents


Brief content in pictures


Volume 28, issue 1

Cover and table of contents


Brief content in pictures

Volume 27, Issue 4

Volume 27, Issue 3

Cover and table of contents

Brief content in pictures

Volume 27, Issue 2

Cover and table of contents

Brief content in pictures

Volume 27, Issue 1

Cover and table of contents

Brief content in pictures

Volume 26, Issue 4

Cover and table of contents

Brief content in pictures

Volume 26, Issue 3

Cover and table of contents

Brief content in pictures

Volume 26, Issue 2

Cover and table of contents

Brief content in pictures

Volume 26, Issue 1

Cover and table of contents

Brief content in pictures

Volume 25, issue 4

Cover and table of contents

Brief content in pictures

Volume 25, Issue 3

Cover and table of contents

Brief content in pictures

Volume 25, Issue 2

Cover and table of contents

Brief content in pictures

Volume 25, issue 1

Cover and table of contents

Brief content in pictures

Volume 24, Issue 4

Cover and table of contents

Brief content in pictures

Volume 24, Issue 3

Cover and table of contents

Brief content in pictures

Volume 24, Issue 2

Cover and table of contents

Brief content in pictures

Volume 24, Issue 1

Cover and table of contents

Brief content in picures

Volume 23, Issue 4

Cover and table of contents

Brief content in pictures

Volume 23, issue 3

Cover and table of contents

Brief cotnent in pictures

Volume 23, Issue 2

Cover and table of contents

Brief content in pictures

Volume 23, Issue 1

Cover and table of contents

Brief content in pictures

Volume 22, Issue 3

Cover and table of contents

Brief content in pictures

Volume 21, issue 1

Cover and table of contents

Brief contnt in pictures

Volume 17, Issue 3

Cover and table of contents

Brif content in pictures

Volume 13, Issue 4

Cover and table of Contents

Brief content in pictures

Volume 13, issue 2

Cover and table of cotents

Volume 12, issue 4

Cover and table of contents

Brief content in pictures

Volume 9, issue 5

Cover and table of content

Brife content in pictures (most other pictures are black and white)

Volume 9, Issue 4

Cover and table of contents

Brief cotnent in pictures (more pictures are published but they are black and white, I did not phorograph them