Needle positions of various flat-bed knitting machines

Brother Knitting machines

A – non-working position

B – standard working position

C, DI, DII – patterning positions

E – holding position

Machine Model number
Needle Positions
Basic (manual) knitting machines
4-Pushbutton machines
KH511
KH521ABCDIDIIE
KH531ABCDIDIIE
(Profile) KH551ABCDIDIIE
8-Pushbutton machines
KH552ABCDIDIIE
KH561ABCDE
KH571ABCDE
KH581
(Profile) KH583ABCDE
KH585ABCDE
Profile 585ABCDIDIIE
KH587ABCDIDIIE
KH588ABCDIDIIE
KH601
(Genie) KH710ABCDIDIIE
12-stitch punchcard machines
KH800, KH801ABCDIDIIE
24-stitch punchcard machines
KH830, KH840, KH890ABDE
Electronic machines
KH900, KH910, KH930, KH940, KH950, KH965, KH970

Silver Reed Knitting machines

Machine Model number
Needle Positions
SK120ABDE

First steps of testing new-to-you ribber.

If you just purchased or snatched a ribbing attachment to your knitting machine, I can imagine how happy you are!

If your ribber came to you fully serviced and tested, you still need to learn yourself how to use it and attach to you machine. So, follow the steps below. However, if your ribber came to you AS IS, follow the steps outlined in my other article on how to clean and service it before you start the knitting tests.

  1. The first most important step is attaching your ribber to the main knitting machine bed. Your ribber manual is the best source for this. If you are a visual learner, there are plenty of youtube video on how to do it for your particular ribber.
  2. Before you even attach the ribber carriage, main carriage and the connecting arm together, you ABSOLUTELY have to make sure the distance between the main and ribber bed is the optimum. Too wide or too narrow distance between the beds will cause all kinds of problems: yarn is not latching onto the needles, resulting in dropped stitches, grinding noise, difficulties to move the carriage, bent latches, etc. for Brother knitting machines, the best manual that explains how to do it is for the Brother KR810 ribber (available online, just Google it). There are also a lot of YouTube resources on how to establish the optimum distance.
  3. Check all magnets on connecting arm and carriages to make sure nothing got stuck to them.
  4. Once you are satisfied with the distance, make sure the connecting arm is attached to the main carriage properly. (Poorly attached connecting arm will manifest itself in dropped stitches, grinding noise, difficulties in moving in one or both directions, damaged needles or needle latches). Follow manual instructions to the dot. Once you attached the connecting arm to the main carriage, run through the needles (no yarn) to make sure nothing is touching the connecting arm. Start with 20-30 needles and if everything is good, add another portion of 20-30 needles, and so on.
  5. Attach the ribber carriage (unless you have a vintage, earlier model, of ribber, in which case you don’t need to do that) to the connecting arm/main carriage assembly. Again, follow instruction to the dot. Then run again the carriage assembly through just the ribber needles. For this purpose, only bring 20-30 needles to working position and run the carriages through. If everything seems smooth, add another section of 20-30 needles, and so on.
  6. Start knitting on a small swatch. Start with 1×1 rib on every other needle. (When setting up the ribber and knitting the first cast-on rows, it is extremely important to move the needles to the B working position as close as possible. Otherwise the carriage might bend the latches.) Use very thin yarn at first. Preferably the yarn that is no prone to static. (Quick side note on how to check the static of the yarn: bring a small strand of yarn to the crack between the beds and if the yarn sticks to one of the beds, yep, you probably have static. Change the yarn or apply wax). Do not use cotton yarns. Thin smooth acrylic yarn should work. Starting with the very thin and smooth yarn will prevent you from having problems related to JUST yarn: static, tension, friction if yarn has texture. (Please, do not think that knitting swatch is a waste of your yarn or time. There are several learning opportunities. For example, you will also learn how to choose the right tension for the yarn you chose, practice transferring the stitches (by hand or using a transfer carriage), whether there is static with this yarn, etc.) Follow the cast-on and knit instructions to the dot. Knitting just a small swatch will let you 1) check whether all buttons and functions move freely on the ribber carriage and 2) master the cast-on procedure.
  7. Knit on a full bed using the yarn you had success on with the swatch. Start with the 1×1 rib on every other needle. I do not recommend knitting on ALL needles on the ribber – leave 1-3 on each end in non-working position. It will be easier to attach wire-weight-hangers and will also ensure you all stitches are knitted before the carriages returns in the opposite direction. Knitting on the full bed will show you whether all needles function well (If a needle is bend, misaligned, or has a sticky latch, stitches will not form properly. You might also see dropped stitches, tucked-stitches or lots of pull stitches. ) And also discover (if any) additional problems with the setup. (All minor problems not seeing while knitting the swatch might manifest in a full bed in a more pronounced way). The panels knitted on the full bed during your tests can be converted to hats (knit 100-120 rows for one-layered hat with a brim and 200+ rows for a double-layered hat). During your tests on a full bed you’ll also learn how to hang and rehang the wire-hangers with weights to ensure nice edges, how to recognize dropped stitches, how to catch dropped stitches on the very ends of the panel and what to do to prevent them, etc. Knitting on a full bed when you are just starting is a whole new game.

Let me know how the first test went!

Tension spring for Brother Knitting machine

Carriages of Brother knitting machines have several types of springs to ensure smooth needle handling. This article is about a medium size spring, part of the intricate mechanism of Brother knitting machine carriages. These springs can be purchased in my store.

In particular, this short blog article is about a tension spring responsible for smooth the movement of the middle button on the carriage. (At the end of this article, I show other places in the carriage where the same type of spring can be used). This button is typically used to knit fair isle or/and to reset all other buttons.

To expose that spring, one needs to remove the plastic carriage cover (this step NOT covered in this article) and then remove the metal cover.

For that purpose, remove the two screws marked below.

The plate will then hang by the springs marked in the picture below but they do not have to be removed. Just push the metal plate out of the way. If the springs detach, they are easily to put back. Just take a picture of the agreement before removing the cover.

Once the cover is removed, you will see the springs right away. In my case, one of the springs was simply missing and the mechanism was not retracting automatically the way it was supposed to.

So the replacement spring was placed where one was missing. I made a short video showing where the spring was installed.

“How” the spring was installed is NOT shown in that video because it is kind of hard to capture how to attach the spring. But the loops of the spring need to grab the posts marked in the picture below.

The same spring can be used in positions shown below. The springs marked with crosses are either small/bigger in size or a spring without the loops (springs for the buttons) and thus, cannot be used.

Singer HK100, fully serviced and tested in December 2022

Singer HK100 plastic flat-bed knitting machine was made in 1983 to supply hobbyists with less expensive and simpler knitting machines. Indeed, it is extremely easy to set up and is almost intuitive to use. It still can produce a lot of nice garments with a variety of yarns. I personally tested some cotton yarns, acrylic (Red Heart – shown in my video), and the worsted wool blend. This machine is excellent for beginners who are just trying to get a feel for what machine knitting is like.

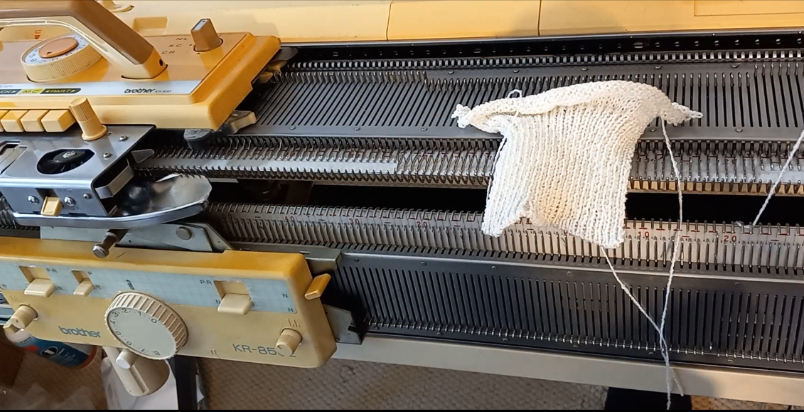
Singer HK100 is considered a mid-gauge/bulky knitting machine. It contains 120 needles and is capable of only manual stitch and needle manipulation to create various patterns, like, tuck, slip, fair isle, cables, lace, etc. However, there are so many youtube tutorials and printed patterns that the possibilities are endless.

The machine has a unique brown/white color combination, which makes this machine very distinguishable.

What I found especially user-friendly is the yarn guide/tension mast. It simply inserts into the carriage while the yarn cone or cake is positioned on the floor. The reason I find it newbie-friendly is that even seasoned machine knitters sometimes struggle with the metal tension masts on more advanced knitting machine models. Additionally, when I knit on my flat beds, I typically don’t lift my head up to see what’s going on with the yarn on the mast and sometimes there are sudden stops if the yarn tangles. In the case of HK100 and the yarn being right in front of you, you will always see what is happening with it and you can easily catch the knots before they choke your carriage. In fact, my video shows that there was a knot in the yarn, I caught as it was about to enter the carriage, untangled it, and then continued knitting without problems. I was very pleased that I fixed the problem on the go.

I also liked very much the intuitiveness of this machine. For example, when I was a newbie on my metal flatbed machines, I always had to look in the manual as to what the position of the levers meant; what I need to do to simply slide the carriage without knitting. On Singer HK100 there are not that many levers and the only function of the levers on the side of the carriage is to NOT KNIT 😊 You will see in my video that after I made a mistake, I simply pressed the lever and slid the carriage out of the way without knitting.

Another interesting observation I made with this model is that it handles knots without too much drama 😊 Here is what I mean by that: during one of my tests, my worsted wool blend tangled a bit and formed a small loose knot. It passed through the carriage so easily that I only saw the knitted-in knot after 10 (or so) rows. On one side, I was pleased because in my other machines, a knot in the yarn means a tighter row, breakage, sudden stop… But in this case, the knot became part of the knitted fabric. In fact, the knitted-in know was visible only on the wrong side but not on the right side.

Below are the specifics on the machine, I cleaned and tested and offering for sale here and in my Etsy store:

When I just took the machine out of the box (which looked like it was the original box), it looked like it was never used. However, it was dusty. I took out all the needles and cleaned and inspected each individually. I removed the sponge bar, cleaned the “canal” for it inside the machine (right under the flatbed), and inserted a new sponge bar. (Video on how to remove a retaining for inspection, or for a needle change bar is here.

The machine comes with all major assesories, a hard copy of the manual, and three brochures on how to knit various things (all in excellent, barely-use, like-new shape).

A couple of minor things missing are:

  • The plastic gauge ruler (also called a gauge scale). The gauge scale can be easily calculated manually. In fact, I find these rulers confusing.
  • Tapestry needle, but any needle can be used. In fact, I like using colored plastic needles since they have a larger opening and are not as sharp, and easier to see if dropped. But I am also not worried if I, my kids, or my other family members including dogs step on one.
  • Ravel cord. Actually, any smooth yarn could be used as a ravel cord (also sometimes called a waste-yarn thread). I keep several long sections of various yarns on the hook next to my machines to use as a ravel cord. Some knitters don’t even use ravel cords at all.

The fact that all these minor assesories are missing, does not affect how the machine works.

One missing part that I had to fix is a row counter tripper. The machine arrived to me without it. I glued a yellow piece of plastic shown below and it stayed throughout my whole testing.

To make sure it does not break again, I packed it with lots of bubble wrap. Other solutions are possible as well (for example, inserting an L-shape piece of plastic into one of the slots on the back of the carriage).


I recorded a video of almost all the tests I ran on this machine. The knitted fabrics were converted into a colorful cowl/neck warmer, and a set of matching scarf, and a slouchy hat.


A favor: please, comment on the blanket in the background. Apparently, I used it without my son’s permission and I am now in trouble. But if he hears from my readers how cute his favorite blanket is (it is his camping blanket), I might be forgiven 😊)

Personal knitting machines museum (those I personally tested_.

MACHINES:

Standard (4.5 mm gauge/distance between needles):

Basic models: Brother KH550

Push-buttons:

4-push buttons: Brother KH551

8-push buttons: Brother KH552, Brother KH581, Brother KH588,  Genie 710 (Brother)

Punch-cards:

Studio: Singer 321, Studio 360K, Singer 360K, Singer 210, Singer 700 memomatic

Electronic: KH930, KH930e,

Mid-gauge:

Basic models: KX350 (7 mm gauge)

Bulky:

Basic models: Brother KH210

Punch-cards: Brother 260, Brother 260e

RIBBERS:

Standard: Studio SRN321

Bulky:

Brother KH260 refurbished in September 2022

Brother KH260 are wonderful and highly desired machines. They habe 110 needles, spaced 9 mm apart from each other).

This distance and large needles makes this machine “bulky”. Brother KH260 can handle a large variety of thicker yarns, including worsted. I tried double-thrded boucle yarn and it ahndled it well as well. I was especially happy about it because I love textures yarn, especially boucle, but not many machines can handle them.


What I did on this machine:

  • Removed all needles, cleaned them and inspected individually and then during knitting on a full bed.
  • Oiled carriage and ensured that all levers and kbod ove frely and do not mis-function during knitting
  • Cleaned the bed and gently cleaned the plastic parts

Overall the machine was in good shape before I started cleaning it. The case does not have any major bends/scratches. Only minor ones.

This machine came with all its assesories with some minor exeptions.

The card clips were missing – I cinluded two paris of new ones (small yellow plastic things in the picture below).

The assesories that are missing from the machine and wll not be included are:

  • Oil canister. I do not include old oil on purpose. Please, get a fresh/new oil. The recommended by many machine kntiters is Hoppe’s Elite Gun Oil
  • No ravel cord is included but any smooth strong yarn can be used.
  • Place card holder was missing from the set. As you can see in the video, I was not even using it and the cardreder worked well. However, any straight or bent hand-knitting needles will work. I included one.
  • -some manuals state that the machine comes wth 20-count punch card set. The hard copy of the manual that came with this machine lists only 15 cards. Indeed, a set containing only 15 cards came with it.


All tools fit into a tool box: a buil-tin compartment on the main bed.

This tool box is excellent to store assesories whlie the machine is not in use. The sinker plate, tuck-brushes, punchcard, tension rod and the row counter also fit wonderfully into the lid of the case when not in use.

The machine size is larger than all other single-bed flat-bed machines. The bed is winder and slitly longer.

The machine performed wonderfully with slip, tuck and fair isle patterning on full bed. I did not even have my usual trial/error starts. I did nothave to putz around too much with tension and the right number of hanging weights…. I was very pleased how well everything went.

I used this machine to knit simple stockinet, fair-isle, slip and tuck-stitch patterning. You can see those in my video. Below are the things I made while testing this machine and filming my demo.

Cowl/hoodie from a variegated dark red yarn using slip-stitch. Reversible/double sided.


Cowl/hoodie with a matching hat. Hoodie was knitted using a self-striping yarn and tuck-stitch patterning. Can be worn as reversible. The hat was knitted using simple stockinet. The ribbing was made by a mock-1×1 ribbing.

Cowl/hoodie knitted using fair isle and custom-made punch card. It can be worn as double-sided/reversible.


I did not really find a lot of cons for this machine. Maybe simple specifics of the machine which make it to stand out.

So, pros and cons are:

Pros:

+ Carriage (despite being heavy) is still relatively easy to move especially in KC mode (attached to a timing belt)

+ capable of handling thicker and textures (typically challenging) yarns

+ accessories, including needles, are still easy to find.

+ straightforward manual

+ because of the usage of thicker yarn, creates a texture similar to hand-knitting. I personally love those large stitches. Makes me instantly feel warm and cozy. The thicker yarn when knitted on loose tension also make the knitted fabric very soft and moldable (not stiff as on some standard machines).


Cons:

– Larger than other machines, including some other bulky models. It is also heavier.

– Expensive as they are highly desirable.

– carriage levers prone to sticking, especially when not in use for a long time. This might result in improper needle selection. But can be done with regular maintenance/care.

– requires more weights than other machines very likely because of heavier yarns.

– tuck brushes need to be installed. Some machines (mostly standard) already have built-in tuck-brushes on sinker plate. This is not really a con but just one more thing to keep track of and not to misplace.


Overall, machine knitters all over the world call Brother KH 260 a working horse. And I am in complete agreement!!

Electronic knitting machines and software combinations

This is a list for me as I am learning about various software and knitting machine combos. Feel free to comment if you see errors.


Wincrea

Passap E6000


image2track

Brother KH-930, KH-930e, KH-940, KH-950i, KH-965i, KH-970


Knit and Sew

Brother kh-940, KH-950i, KH-965i, KH-970, KH-930, KH-930M


DAK (design a knit)

All (to the best of my knowledge)


AYAB (All yours are beautiful)

Brother electronic machines


List of pros and cons of various machines I personally tested

Updated: May 2022

Summary of the machines I personally tested/refurbished/cleaned/fixed (more details pros and cons are below):


Singer/Studio


Needle selection mechanism

Max pattern

Tuck?

Slip?

Fair Isle?

Weaving/weaving brushes?

Built-in Knit leader?

Row counter

# of needles

Carriage removal mechanism: if carriage is stuck during knitting…

Toolbox?

Main bed material?

End rails?

Comments


Singer

210


Punch card


24 stitches

yes

yes

yes


200

Unscrew the sinker plate

no

metal


Standard set include only 10 punch cards. No hard lid. All parts are inside a sterofoam mold/packing

Singer

321 English

yes

yes

yes

Yes/yes

no

detachable

200

Yes

metal

Built-in metallic

Comes with Spanish and English version (words on the carriage and manual)

Singer

321 Spanish

yes

yes

yes

Yes/yes

no

detachable

200

yes

metal

Rubber


Singer

326

yes

yes

yes

Yes/yes

yes


200

Yes, free standing

metal

Rubber


Singer

360


Yes

Built in


Release lever

Built-in

metal

Rubber


Studio

360

Punch card

yes

yes

yes

Yes/yes

yes

200

Release lever

Built-in

metal

Rubber


Studio

700

Punch card

yes

yes

yes


200


metal


Brother


Patterning mechanism

Tuck?

Slip?

Fair Isle?

Weaving/weaving brushes?

Built-in Knit leader?

Brother

KH551

4 push buttons

Yes, manually


No

Brother

KX350

Manual needle selection

Yes, manually


No

Brother

KH930

Electronic

Yes

Yes

Yes

Yes

No (but there might be an option to program it in the machine memory)


List of pros and cons of machine I personal tested

Model

When obtained/restored

What has been done…

Opinion


Miscellaneous machines

Own?

Addi King 46 needles

2019

Knitted sweater, scarves, hats, neck warmers

(+) Excellent circular machine, very reliable, fast to knit

(-) can knit limited items – hats might be too small for some, lots of hand-manipulation of finished garments required for more advanced items

Yes

Add 22 needles

2019

Knitted gloves, socks, toys for dogs

yes

Brother


Brother KX350

Fall 2020

Cleaned, changed sponge bar, replaced all needles, knitted two sweaters with cables

(+) Nice, light, reliable, easy to maintain, parts easily available, takes bulkier yarns

(-) too much hand manipulation for patterning. Limiting for those who want to do more advanced knitting

SOLD, January 2022

Brother KH551

October 2021

Deeply cleaned, refurbished, cleaned needle selection mechanism, full tested, knitted a sweater and neck warmers/scarves

(+) Excellent for beginners, lighter than other metal bed machines, easy semi-automatic needle selection

(+) Very robust almost failure-proof patterning mechanism

(-) still requires a lot of manual manipulation (but with the ratchet tool), manual might be confusing for some

SOLD, December 2021

Brother KH551

November 2021

Cleaned, replaced sponge bar, extensively tested, knitted two blankets

SOLD, January 2022

Brother KH930

August 2022

Cleaned, tested electronics, tested pattern transfer from DAK, knitted single motif, fair isle, tuck, slip

(+) easy patterning

(+) spare parts are available online, many of them are interchangible with other 700 and up Brother machines

(-) electronic might go bad with time but electronic parts are still easy to find to replace

To be posted on Etsy in September 2022

Singer/Studio


Studio/Singer 360K Memomatic

September 2021

Cleaned, fully tested, knitted a sweater for mom (light burgundy) using tuck punch card

(+) very reliable, easy manual, would keep it for sure for myself

(+) All manuals and brochures are available online.

(+) Easy-to find replacement needles

(+) Built-in row counter

(+) Built in knit leader

(-) not electronic (which might be good – nothing will go bad with time)

(-) rubber end rails (but easy to manage without them even if knitting on a full bed)

SOLD, October 2021

Studio 360K memomatic

February 2022

Cleaned, fully tested, replaced sponge bar, check and cleaned all needles

SOLD, April 2022

Studio 360 memomatic

July 2022

Cleaned, fully tested, replaced sponge bar, check and cleaned all needles, replaced ends on the machine side

SOLD, July 2022

Studio 360K memomatic

August 2022

Cleaned, fully tested, replaced sponge bar, check and cleaned all needles. Replaced two large plastic parts of the top console: left where the built in box as and

Currently cleaning/testing


Singer MemoMatic 210

November 2021

Cleaned, changed sponge bar, tested on full bed (made a blanket on all 200 needles).

(+) very reliable, easy manual, would keep it for sure for myself

(+) looks less overwhelming than 360K

(+) light weight…

(+) Easy-to find replacement needles

(-) does not have a hard case cover

(-) not electronic and has limitation

SOLD, December 2021

Singer/Studio 700

November 2021

Changed the sponge bar, tested Knitted a patterned blanket.

Knitted fair isle socks/leg warmers

(+) The patterning drums make it very easy to move the carriage.

(+) The manual is very well-written

(+) All tools fit nicely into a built-in storage box, the cover of which actually shows how to arrange them.

(+) The tools are pretty standard and interchangible with other models.

(+) built-in knit-leader

(+) putting this machine to storage and opening and closing is very easy

(+) built-in row counter

(+) All parts fit into a case. The schematics on the case lid shows how to put away the machine and it is very easy to follow (much easier than on Brother).

(+) Easy-to-learn patterning. The knobs on the carriage are straightforward – just follow the steps in the manual.

(-) drums often get stuck if not oiled regularly.

(-) setup does not contain cast-on bars

SOLD, March 2022

Studio 321

Spanish

May 2022

Replaced sponge bar, cleaned needles, covered rust spots on cover, cleaned punch card mechanism from rust

Knitted neck warmer, shawl

(+) very reliable, easy manual, would keep it for sure for myself

(+) the manuals is available online.

(+) Easy-to find replacement needles

(+) The tools are pretty standard and interchangible with other models.

(+) built-in metallic end rails, not rubber – will not decompose and fall off

(-) not electronic (which might be good – nothing will go bad with time)

Posted on Etsy

Singer 321

English

May 2022

(+) very reliable, easy manual

(+) the manuals is available online.

(+) Easy-to find replacement needles

(+) The tools are pretty standard and interchangible with other models.

(-) not electronic (which might be good – nothing will go bad with time)

(-) rubber end rails like most studio/singer machines

SOLD August 2022

Singer 326

May 2022

(+) very reliable, easy manual, would keep it for sure for myself

(+) The manuals is available online (but the scan quality is not that great).

(+) Easy-to find replacement needles

(+) The tools are pretty standard and interchangible with other models.

(-) not electronic (which might be good – nothing will go bad with time)

Posted on Etsy


Soon to refurbish/test/clean


Brother KH260


Yes, started


Brother KR260


yes


Brother KH840


yes

Brother KH930


Currently tested, posted soon

Brother KH910


yes

Brother KH860


yes

Brother KH890


yes


Brother KR810


yes

Brother KR850


Toyota 747


yes

Toyota 901


Yes

Toyota 610


Yes


Singer 666


yes

Studio 327


yes

Singer/Studio 360


Studio by White


Yes

Studio SK740


yes

Singer HK100


yes


SR50


yes


Mitsubishi


yes


Garter carriages (88, 89, 93)


yes


Color changer, Brother


yes


Knit Leader, KL116, KL113, KL111


yes


Review of Scrubby yarn and how it knits on circular knitting machines Addi

Scrabby yarn (from IceYarns or from RedHeart) has sort of an eye-lash thread but with the “eyelashes” are created with the twistiess. It is typically used to knit washcloth for dishes and baths

Knitting by hand with this yarn was fun – it creates a unique texture without any effort. I also decided to use my Addi circular machine to see if I can make household items faster. So, I was able to knit loofahs, coffee holders (aka reusable sleeves for paper cups), place holders, table pads and coasters.

Both IceYarns and RedHear offer a very wide variety of colors, including solid, two and three color variegated types. I chose white and black yarn because in my opinion it hides all the crumbs and spills really well

The IceYarn offers scrubby yarn as 100% polyester. One skein holds 3.53 oz (100 g) and contains 103 yards (95 m). Red Heart offers both 100% polyester (100g/3.53 oz and 85 meters/92 yards per skein) and 100% cotton yarn (weight and yardage depend on whether the color is solid or variegated). I only tested the 100% polyester yarn because I had cotton washcloths and I could never get rid of the smell of dirty dishes even after washing the scrubbies over and over again.

The cast-one was straightforward and relatively easy. It did help to keep the tension loos but not too loose because the yarn is silky (very smooth) enough where it can skip stitches (which we don’t want). However, I started using contrasting waste yarn because it is easier to manipulate the stitches afterward (in order to put the washcloths together )

The knitting on the machine became significantly easier after the first two rows. However, some of the stitches did not sink into the slots on their own and I had to help “them” . Even though the yarn will hide all defects because of the variegated colors and because of the twisties on the yarn, I still did not want to create tuck stitches because they sometimes lead to missed stitches. Check out my youtube video on how I dealt with these stubborn stitches.

A square scrubby took 12 rows. In the same video, I demonstrated the techniques I used to finish these square scrubbies. I tested them and they are washable on a regular cycle and even dryable on “knits” cycles. Coffee mug sleeves would probably take 12-30 rows depending on whether you like it single-or double-layered. Placement mats should be done on large Addi. I made mine rectangular and double-layered with 60 rows.

Hague Linker – review by ComfiKnits, April 2022

I purchased a new Hague linker directly from Hague in UK and so far I am very pleased although not everything is ideal. This is the only linker that I ever used so I don’t really have what to compare. My linker with the one with the electronic foot pedal control but the same pros and cons and advice are applicable to a manual machine.

What I did on Hague linker:

  • Linked the edges of the scarf knitted on standard knitting machines. As the Hague manual mentions, it is extremely important to get a hang by practicing putting the knitted edge on the linker’s pegs to create a very nice and even seam.
  • Linked the open stitches on every and every other needle. I use this technique when I was to create more stretchy edges. Check out my video on those.
  • Linked the edges of the scarf knitted on a bulky machine – was very pleased as well

Overall recommendations:

  • Learn how to put the knitted edge efficiently and evenly on the pegs.

    I typically try to put the whole piece on a linker – it helps me to evenly distribute the stitches along the piece length.

  • Always knit blank 10-12 stitches at the end to easy take of the linked piece of the machine and to hide the loose ends. By ‘blank’ stitches I mean the thread looping on itself without any underlying fabric.
  • Push the fabric placed on pegs as far as possible so it does not slide off.
  • Keep even tension between first and second fabric layer when joining them on pegs

Pros and Cons.

(+) The edge is nicer than when sewn by hand

(+) Faster than linking by hand

(+) Easy to see as you knit whether the edge is even or not

(+) the size of the linker is compact enough so I sometimes move the whole machine if for some reason I feel that moving the ring with pegs is not convenient. Or sometimes I move around myself whatever works, right?!?

(+) very well-written instructions and manual.

(+) If the needle breaks, it is easy to replace

(+) Parts are available from the manufacturer.

(-) even though there is a tension mast and a threading mechanism with tension control, I feel the flow of the threading yarn is not even. I tried to wind my thread in a different way and it still catches one in a while. But that’s ok and is easy to get control over.

(-) it does miss stitches once in a while. So the yarn threading, tension, combination of thread and the thickness of the knitted pieces are all important.

(-) Even though replacing a needle is relatively easy, putting it in the absolutely correct position requires trial and error. It is doable, yes! But I had to step away from my Hague linker for a couple of days not to get too frustrated

Pros and cons specifically for an electric linker:

(+) Hands are free – all control over the needle movement and speeds are through the foot pedal.

(+) The electric linker can be used manually as well but not many stitches.

(-) I wish the cord was a bit longer. But I wonder if this is some sort of safety precaution because the cord on my sewing machine is also shorter than I want.

I learned a lot by simply using and experimenting with various techniques. There is still a lot to knit and to link and to learn on Hague linker! Below are some products I finished on Hague!

Since this is the only linker I ever tried I cannot really compare it to anything else rather than sewing the garment pieces by hand and on a sewing machine. Overall I am very pleased and will continue getting a hang of various techniques, including decorative ones, on my Hague linker.