
If you just purchased or snatched a ribbing attachment to your knitting machine, I can imagine how happy you are!
If your ribber came to you fully serviced and tested, you still need to learn yourself how to use it and attach to you machine. So, follow the steps below. However, if your ribber came to you AS IS, follow the steps outlined in my other article on how to clean and service it before you start the knitting tests.
- The first most important step is attaching your ribber to the main knitting machine bed. Your ribber manual is the best source for this. If you are a visual learner, there are plenty of youtube video on how to do it for your particular ribber.
- Before you even attach the ribber carriage, main carriage and the connecting arm together, you ABSOLUTELY have to make sure the distance between the main and ribber bed is the optimum. Too wide or too narrow distance between the beds will cause all kinds of problems: yarn is not latching onto the needles, resulting in dropped stitches, grinding noise, difficulties to move the carriage, bent latches, etc. for Brother knitting machines, the best manual that explains how to do it is for the Brother KR810 ribber (available online, just Google it). There are also a lot of YouTube resources on how to establish the optimum distance.
- Check all magnets on connecting arm and carriages to make sure nothing got stuck to them.
- Once you are satisfied with the distance, make sure the connecting arm is attached to the main carriage properly. (Poorly attached connecting arm will manifest itself in dropped stitches, grinding noise, difficulties in moving in one or both directions, damaged needles or needle latches). Follow manual instructions to the dot. Once you attached the connecting arm to the main carriage, run through the needles (no yarn) to make sure nothing is touching the connecting arm. Start with 20-30 needles and if everything is good, add another portion of 20-30 needles, and so on.
- Attach the ribber carriage (unless you have a vintage, earlier model, of ribber, in which case you don’t need to do that) to the connecting arm/main carriage assembly. Again, follow instruction to the dot. Then run again the carriage assembly through just the ribber needles. For this purpose, only bring 20-30 needles to working position and run the carriages through. If everything seems smooth, add another section of 20-30 needles, and so on.
- Start knitting on a small swatch. Start with 1×1 rib on every other needle. (When setting up the ribber and knitting the first cast-on rows, it is extremely important to move the needles to the B working position as close as possible. Otherwise the carriage might bend the latches.) Use very thin yarn at first. Preferably the yarn that is no prone to static. (Quick side note on how to check the static of the yarn: bring a small strand of yarn to the crack between the beds and if the yarn sticks to one of the beds, yep, you probably have static. Change the yarn or apply wax). Do not use cotton yarns. Thin smooth acrylic yarn should work. Starting with the very thin and smooth yarn will prevent you from having problems related to JUST yarn: static, tension, friction if yarn has texture. (Please, do not think that knitting swatch is a waste of your yarn or time. There are several learning opportunities. For example, you will also learn how to choose the right tension for the yarn you chose, practice transferring the stitches (by hand or using a transfer carriage), whether there is static with this yarn, etc.) Follow the cast-on and knit instructions to the dot. Knitting just a small swatch will let you 1) check whether all buttons and functions move freely on the ribber carriage and 2) master the cast-on procedure.
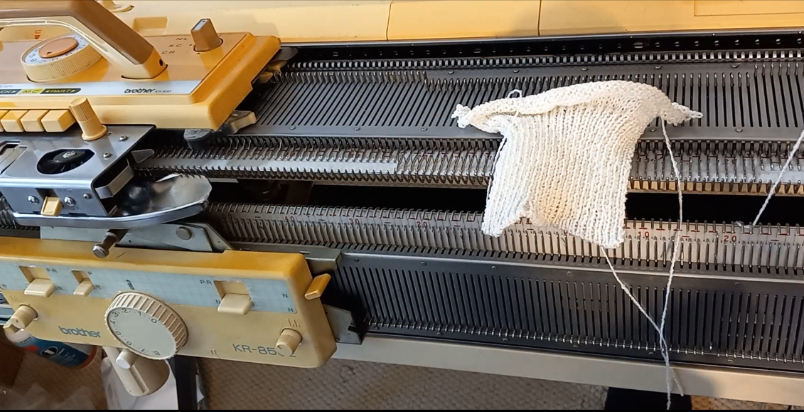
- Knit on a full bed using the yarn you had success on with the swatch. Start with the 1×1 rib on every other needle. I do not recommend knitting on ALL needles on the ribber – leave 1-3 on each end in non-working position. It will be easier to attach wire-weight-hangers and will also ensure you all stitches are knitted before the carriages returns in the opposite direction. Knitting on the full bed will show you whether all needles function well (If a needle is bend, misaligned, or has a sticky latch, stitches will not form properly. You might also see dropped stitches, tucked-stitches or lots of pull stitches. ) And also discover (if any) additional problems with the setup. (All minor problems not seeing while knitting the swatch might manifest in a full bed in a more pronounced way). The panels knitted on the full bed during your tests can be converted to hats (knit 100-120 rows for one-layered hat with a brim and 200+ rows for a double-layered hat). During your tests on a full bed you’ll also learn how to hang and rehang the wire-hangers with weights to ensure nice edges, how to recognize dropped stitches, how to catch dropped stitches on the very ends of the panel and what to do to prevent them, etc. Knitting on a full bed when you are just starting is a whole new game.
Let me know how the first test went!


 Studio SRN321 ribber is an attachment that allows alternating knit and purl stitches. It was released in 1972. The ribber has 200 needles. Studio SRN321 ribbing attachment fits the following knitting machines: Singer/Studio 321, as well as models MOD. 315, 313, 312 and 305. SRN321 ribber adds so many patterning possibilities, as mentioned in the instructions and beyond. I did not see in the instructions if this ribber can provide double jacquard possibilities and I did not test it myself yet.


