Working, mechanism, pros and cons of drums-based knitting machines (sold under the Silver Reed, Singer, Studio, Empisal model names) with punch card capabilites.

… in progress. Last update: January 2026

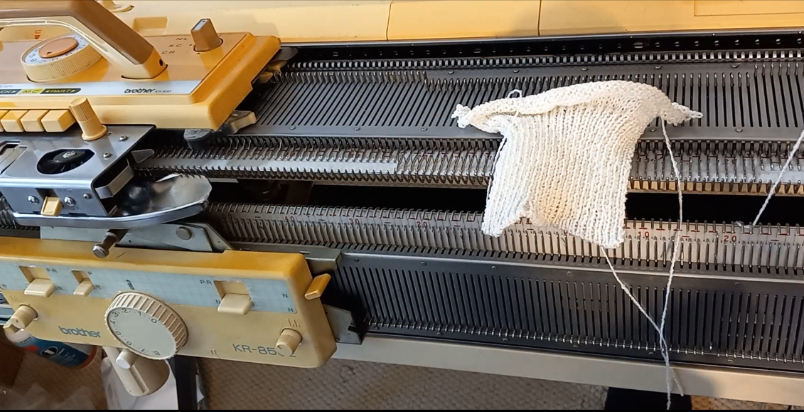
Knitting machines with punchcard capabilities have carriages with drums that glide on the back rail and also assist in needle selection when they are passed over a punchcard reading mechanism pegs.

Well, since these patterning drums are such a prominent feature (which also makes these machines stand out from Brother punchcard knitting machines), a lot of cons and pros are associated with them.

PROS:

  • needle selection is localized to drums/carriages, thus fewer (theoretically) things can go wrong;
  • Drums assist the carriage in sliding on the needle bed

CONS:

  • Yarn and debris can’t tangle around these drums
  • These drums often freeze up when the machine is not in use for a prolonged time due to solidified old grease/oil.

Here are my other observations/feedback so far:

Pegs on the drums pass the needles to either B position or C position.

When the patterning dial is in the fair isle position, the mani yarn goes onto the needles in C position.

I see blog posts stating that some of the clanking noise might be due to the static in the yarn. To solve this issue, attach wax to the tension mast so the yarn passes through it.

But some knitters experience that noise even when there is no yarn in the carriage. Sometimes, if the carriage was not recently serviced or the sponge in the retaining bar is old, you might hear some clanking noise. I am discussing this issue (as well as how to address/minimize it) in my video.

When the ribber connecting arm is attached (from SRP50 ribber – maybe others, still researching), the carriage cam dial does not turn from L to Stockinet freely. You will need to disconnect the connecting arm, and the problem will be solved.

Needle positions of various flat-bed knitting machines and ribbers

Brother Knitting machines

A – non-working position

B – standard working position

C, DI, DII – patterning positions

E – holding position

Machine Model number
Needle Positions
Basic (manual) knitting machines
KM100, KH355, KH360, KH370, KH380, KH390, KH395ABCD
KH210, KH220, KH311ABCDE
KX350, KX395ABDE
KX355unknown
4-Pushbutton machines
KH35, KH212, KH218no indicators
KH511ABCDE
KH521, KH531, (Profile) KH551ABCDIDIIE
8-Pushbutton machines
KH110, KH120, KH552, Profile 585, KH587, KH588, KH705,
(Genie) KH710, KH601
ABCDIDIIE
KH561, KH571, KH581, (Profile) KH583, (Profile) KH585ABCDE
KH811 (also 24-stitch punchcard)ABDE
12-stitch punchcard machines
KH800, KH801ABCDIDIIE
24-stitch punchcard machines
Bulky: KH260
Standard: KH810, KH811, KH820, KH821, KH830, KH831, KH836, KH840, KH850, KH851, KH860, KH864, KH871, KH881, KH890, KH891, KH893, KH894
ABDE
Electronic machines
KH900, KH910, KH920, KH930, KH940, KH950, KH965, KH970ABDE
Ribbers
KR551ABC
KR110, KR120, KR586, KR710, KR810, KR830, KR840, KR850, KR890, KR900, RK900ABDE
KR582unknown

KnitKing Knitting machines

A – non-working position

B – standard working position

C, DI, DII – patterning positions

E – holding position

Machine Model numberNeedle Positions
24-stitch punchcard machines
Bulky:
Standard: KH881, KK91
ABDE
Electronic
Compuknit IV,ABDE

Silver Reed Knitting machines

Machine Model number
Needle Positions
SK120,ABDE

First steps of testing new-to-you ribber.

If you just purchased or snatched a ribbing attachment to your knitting machine, I can imagine how happy you are!

If your ribber came to you fully serviced and tested, you still need to learn yourself how to use it and attach to you machine. So, follow the steps below. However, if your ribber came to you AS IS, follow the steps outlined in my other article on how to clean and service it before you start the knitting tests.

  1. The first most important step is attaching your ribber to the main knitting machine bed. Your ribber manual is the best source for this. If you are a visual learner, there are plenty of youtube video on how to do it for your particular ribber.
  2. Before you even attach the ribber carriage, main carriage and the connecting arm together, you ABSOLUTELY have to make sure the distance between the main and ribber bed is the optimum. Too wide or too narrow distance between the beds will cause all kinds of problems: yarn is not latching onto the needles, resulting in dropped stitches, grinding noise, difficulties to move the carriage, bent latches, etc. for Brother knitting machines, the best manual that explains how to do it is for the Brother KR810 ribber (available online, just Google it). There are also a lot of YouTube resources on how to establish the optimum distance.
  3. Check all magnets on connecting arm and carriages to make sure nothing got stuck to them.
  4. Once you are satisfied with the distance, make sure the connecting arm is attached to the main carriage properly. (Poorly attached connecting arm will manifest itself in dropped stitches, grinding noise, difficulties in moving in one or both directions, damaged needles or needle latches). Follow manual instructions to the dot. Once you attached the connecting arm to the main carriage, run through the needles (no yarn) to make sure nothing is touching the connecting arm. Start with 20-30 needles and if everything is good, add another portion of 20-30 needles, and so on.
  5. Attach the ribber carriage (unless you have a vintage, earlier model, of ribber, in which case you don’t need to do that) to the connecting arm/main carriage assembly. Again, follow instruction to the dot. Then run again the carriage assembly through just the ribber needles. For this purpose, only bring 20-30 needles to working position and run the carriages through. If everything seems smooth, add another section of 20-30 needles, and so on.
  6. Start knitting on a small swatch. Start with 1×1 rib on every other needle. (When setting up the ribber and knitting the first cast-on rows, it is extremely important to move the needles to the B working position as close as possible. Otherwise the carriage might bend the latches.) Use very thin yarn at first. Preferably the yarn that is no prone to static. (Quick side note on how to check the static of the yarn: bring a small strand of yarn to the crack between the beds and if the yarn sticks to one of the beds, yep, you probably have static. Change the yarn or apply wax). Do not use cotton yarns. Thin smooth acrylic yarn should work. Starting with the very thin and smooth yarn will prevent you from having problems related to JUST yarn: static, tension, friction if yarn has texture. (Please, do not think that knitting swatch is a waste of your yarn or time. There are several learning opportunities. For example, you will also learn how to choose the right tension for the yarn you chose, practice transferring the stitches (by hand or using a transfer carriage), whether there is static with this yarn, etc.) Follow the cast-on and knit instructions to the dot. Knitting just a small swatch will let you 1) check whether all buttons and functions move freely on the ribber carriage and 2) master the cast-on procedure.
  7. Knit on a full bed using the yarn you had success on with the swatch. Start with the 1×1 rib on every other needle. I do not recommend knitting on ALL needles on the ribber – leave 1-3 on each end in non-working position. It will be easier to attach wire-weight-hangers and will also ensure you all stitches are knitted before the carriages returns in the opposite direction. Knitting on the full bed will show you whether all needles function well (If a needle is bend, misaligned, or has a sticky latch, stitches will not form properly. You might also see dropped stitches, tucked-stitches or lots of pull stitches. ) And also discover (if any) additional problems with the setup. (All minor problems not seeing while knitting the swatch might manifest in a full bed in a more pronounced way). The panels knitted on the full bed during your tests can be converted to hats (knit 100-120 rows for one-layered hat with a brim and 200+ rows for a double-layered hat). During your tests on a full bed you’ll also learn how to hang and rehang the wire-hangers with weights to ensure nice edges, how to recognize dropped stitches, how to catch dropped stitches on the very ends of the panel and what to do to prevent them, etc. Knitting on a full bed when you are just starting is a whole new game.

Let me know how the first test went!

Tension spring for Brother Knitting machine

Carriages of Brother knitting machines have several types of springs to ensure smooth needle handling. This article is about a medium size spring, part of the intricate mechanism of Brother knitting machine carriages. These springs can be purchased in my store.

In particular, this short blog article is about a tension spring responsible for smooth the movement of the middle button on the carriage. (At the end of this article, I show other places in the carriage where the same type of spring can be used). This button is typically used to knit fair isle or/and to reset all other buttons.

To expose that spring, one needs to remove the plastic carriage cover (this step NOT covered in this article) and then remove the metal cover.

For that purpose, remove the two screws marked below.

The plate will then hang by the springs marked in the picture below but they do not have to be removed. Just push the metal plate out of the way. If the springs detach, they are easily to put back. Just take a picture of the agreement before removing the cover.

Once the cover is removed, you will see the springs right away. In my case, one of the springs was simply missing and the mechanism was not retracting automatically the way it was supposed to.

So the replacement spring was placed where one was missing. I made a short video showing where the spring was installed.

“How” the spring was installed is NOT shown in that video because it is kind of hard to capture how to attach the spring. But the loops of the spring need to grab the posts marked in the picture below.

The same spring can be used in positions shown below. The springs marked with crosses are either small/bigger in size or a spring without the loops (springs for the buttons) and thus, cannot be used.

Personal knitting machines museum (those I personally tested_.

MACHINES:

Standard (4.5 mm gauge/distance between needles):

Basic models: Brother KH550

4-push buttons: Brother KH551

8-push buttons: Brother KH552, Brother KH581, Brother KH585, Brother KH588,  Brother KH601, Brother (Genie) KH710

Punch-cards:

Studio/Silver Reed.Studio.Empisal: Singer 321, Studio 326, Studio 360K, Singer 360K, Singer 210, Singer 700 memomatic

Brother: KH800, KH830, KH836, KH840, KH860, KH890,

Electronic: Brother KH930,  Brother KH930e, Brother KH940

Mid-gauge:

Basic models: KX350 (7 mm gauge), KnitKing Simple Seven (7 mm),  Singer KH100 (8 mm gauge)

Bulky:

Basic models: Brother KH210 (9 mm), Silver Reed SK120 (8 mm)

Punch-cards: Brother 260, Brother 260e

RIBBERS:

Standard: Studio SRN321, Brother KR580, Brother KR810, Brother KR830, Brother KR850, Brother KR850e,

Bulky:

List of pros and cons of knitting machines I used

…in progress. Updated: June 2025

abbreviations:

b-in = built-in

mb = metal bed

sg = standard gauge

st = stitch

mb, sg, 200 needles, 24-st punchcard

https://youtu.be/L1GwyLg46V0 Can do tuck slip, 2-color fair isle; if carriage is stuck, unscrew the sinker plate, no built-in toolbox; has built-in knit leader; standard set of punchcards has only 10 cards, no hard case lid (all parts are inside a sterofoam packaging; budget, lightweight model. https://wordpress.com/post/thoughtsandknits.wordpress.com/427

m, sg, 200 needles, 24-st punchcard

https://youtu.be/27blcVPYAlw Can do tuck slip, 2-color fair isle; if carriage is stuck, unscrew the sinker plate, no built-in toolbox; no built-knit leader; compatible with standard add-ons (ribbers, knit-leaders, color changers, row counter) http://thoughtsandknits.com/2025/05/26/studio-mod-324-knitting-machine-prepared-for-lara/

md, sg 200 needles, 24-stpunchcard; b-in knit leader, tool tray

https://youtu.be/0PnXE_Bc8yc Can do tuck slip, 2-color fair isle; if carriage is stuck, unscrew the sinker plate, no built-in (but has stand-alone) toolbox; compatible with standard add-ons (ribbers, color changers, row counters) http://thoughtsandknits.com/2022/06/11/studio-326/

XXX

XXX

XXX

XXX

XXX

XXX

XXX

XXX

XXX

Hague Linker – review by ComfiKnits, April 2022

I purchased a new Hague linker directly from Hague in UK and so far I am very pleased although not everything is ideal. This is the only linker that I ever used so I don’t really have what to compare. My linker with the one with the electronic foot pedal control but the same pros and cons and advice are applicable to a manual machine.

What I did on Hague linker:

  • Linked the edges of the scarf knitted on standard knitting machines. As the Hague manual mentions, it is extremely important to get a hang by practicing putting the knitted edge on the linker’s pegs to create a very nice and even seam.
  • Linked the open stitches on every and every other needle. I use this technique when I was to create more stretchy edges. Check out my video on those.
  • Linked the edges of the scarf knitted on a bulky machine – was very pleased as well

Overall recommendations:

  • Learn how to put the knitted edge efficiently and evenly on the pegs.

    I typically try to put the whole piece on a linker – it helps me to evenly distribute the stitches along the piece length.

  • Always knit blank 10-12 stitches at the end to easy take of the linked piece of the machine and to hide the loose ends. By ‘blank’ stitches I mean the thread looping on itself without any underlying fabric.
  • Push the fabric placed on pegs as far as possible so it does not slide off.
  • Keep even tension between first and second fabric layer when joining them on pegs

Pros and Cons.

(+) The edge is nicer than when sewn by hand

(+) Faster than linking by hand

(+) Easy to see as you knit whether the edge is even or not

(+) the size of the linker is compact enough so I sometimes move the whole machine if for some reason I feel that moving the ring with pegs is not convenient. Or sometimes I move around myself whatever works, right?!?

(+) very well-written instructions and manual.

(+) If the needle breaks, it is easy to replace

(+) Parts are available from the manufacturer.

(-) even though there is a tension mast and a threading mechanism with tension control, I feel the flow of the threading yarn is not even. I tried to wind my thread in a different way and it still catches one in a while. But that’s ok and is easy to get control over.

(-) it does miss stitches once in a while. So the yarn threading, tension, combination of thread and the thickness of the knitted pieces are all important.

(-) Even though replacing a needle is relatively easy, putting it in the absolutely correct position requires trial and error. It is doable, yes! But I had to step away from my Hague linker for a couple of days not to get too frustrated

Pros and cons specifically for an electric linker:

(+) Hands are free – all control over the needle movement and speeds are through the foot pedal.

(+) The electric linker can be used manually as well but not many stitches.

(-) I wish the cord was a bit longer. But I wonder if this is some sort of safety precaution because the cord on my sewing machine is also shorter than I want.

I learned a lot by simply using and experimenting with various techniques. There is still a lot to knit and to link and to learn on Hague linker! Below are some products I finished on Hague!

Since this is the only linker I ever tried I cannot really compare it to anything else rather than sewing the garment pieces by hand and on a sewing machine. Overall I am very pleased and will continue getting a hang of various techniques, including decorative ones, on my Hague linker.

List of machines I tested/refurbished/cleaned/fixed

Updated: March 2025;

Total machine count: 86

2 circular plastic

3 bulky basic

2 bulky punchcard

6 mid-gauge plastic bed

2 standard basic

3 turn-knob

16 ribbers

6 mid-gauge plastic bed

2 standard basic

7 four-pushbutton

9 eight-pushbutton

30 standard-gauge punchcard

4 electronic standard-gauge

Specific Machines:

Addi King 46 needles

Add Express 22 needles

Brother KH210

Brother KH230

Brother KH260 (two) 

Brother KX350 (five)

Brother KH500

Brother KH521

Brother KH550

Brother KH551 (six)

Brother KH552

Brother KH581

Brother KH585 (two)

Brother KH588 (two)

Brother KH601

Brother KH710 (two)

Brother KH800

Brother KH830 (two)

Brother KH836

Brother KH840 (three)

Brother KH860 (four)

Brother KH881 (two)

Brother KH890

Brother KH892

Brother KH930 (four)

Singer HK100

Silver Reed SK120

Singer 210 Memomatic

Studio SK303

Singer 321 (tw0)

Studio/Empisal mod. 324 (two)

Studio 326

Singer/Studio 360K (seven)

Singer mod. 700 MemoMatic (two)

Studio by White SK740

Singer 888

Ribbers

Brother KR260

Brother KR521

Brother KR551

Brother KR580

Brother KR810

Brother KR830 (six)

Brother KR850 (four)

Studio SRN321

Studi SRP50