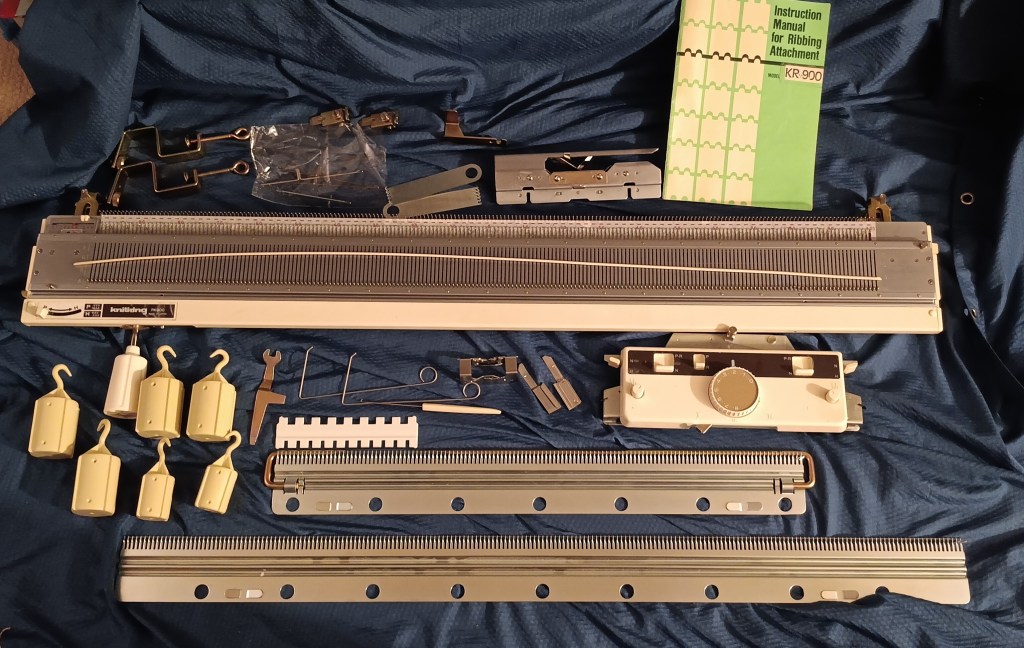
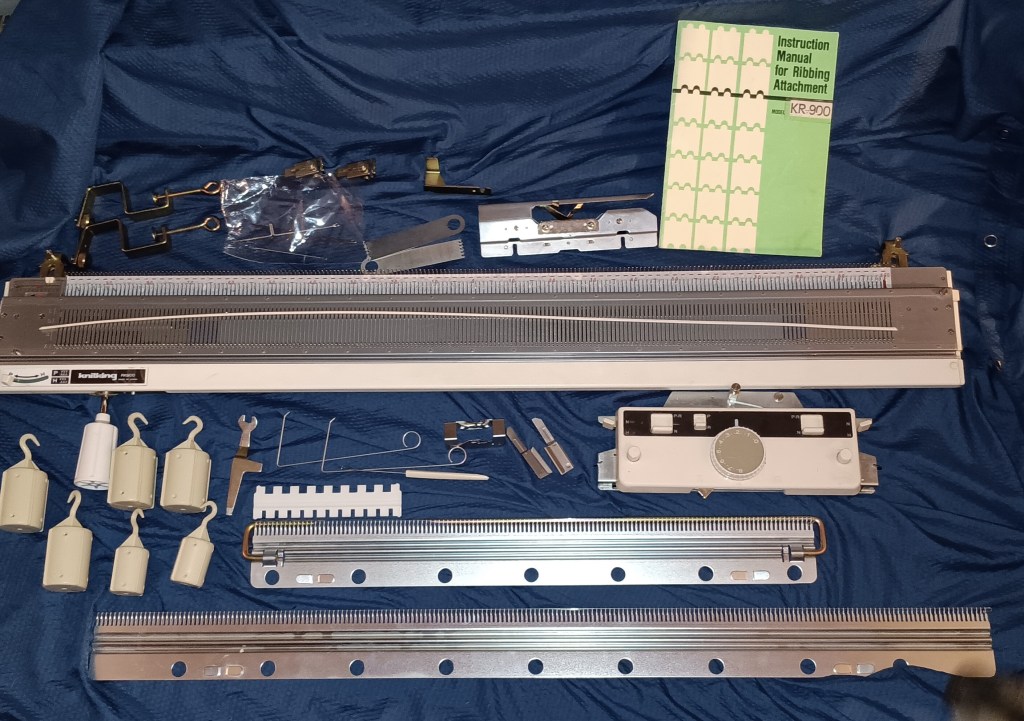
Knitking RK900 ribber fits most Brother and Knitking knitting machines with punchcard and electronic capabilities. It is identical to the Brother KR850, KR890 and KR900 ribbers. Thus, read the corresponding articles about their pros and cons in my Knitting Machine Encyclopedia. The rest of the blog post below is dedicated to a specific ribber, serviced and tested in my shop in November 2025.
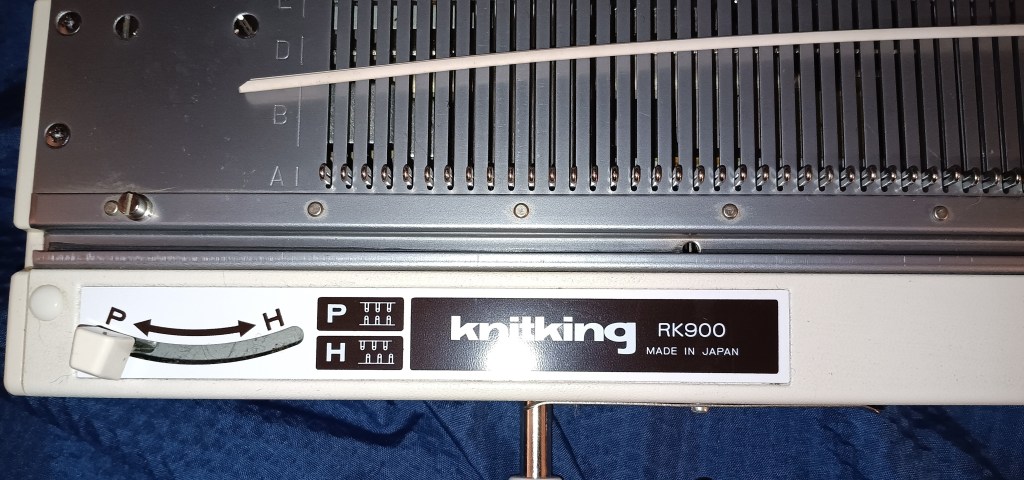
Before I even started testing the ribber, I removed all needles, cleaned them and inspected each individually for any bents, flaws, sticky latches, etc.
I then tested the machine using three different yarns. One yarn is a sport-yarn thickness with wool content (50%), and two others ones are thinner 100% acrylic yarns. The machine handle all of those wonderfully. The tests were done on small number of ever-other-needles, on two configurations of every-pther-needles, but on the full bed and on all needles on a select number of needles. The machine behaved really well during the tests: watch a video I recorded to confirm that.
On one of the knitted panels, I saw an area with an ok-formed stitch but not super even. I was not sure what it was (probably because I mistakenly moved forward several needles on the main bed to B position, not every other one). I tested that middle section on ALL (not on every-other-one) needles. Because all the needles were selected, the carriage moved a bit harder. But all stitches formed beautifully. So: false alarm.

All carriage buttons and level move freely. The little round knob on the carriage bottom lever is missing but will be replaced soon.

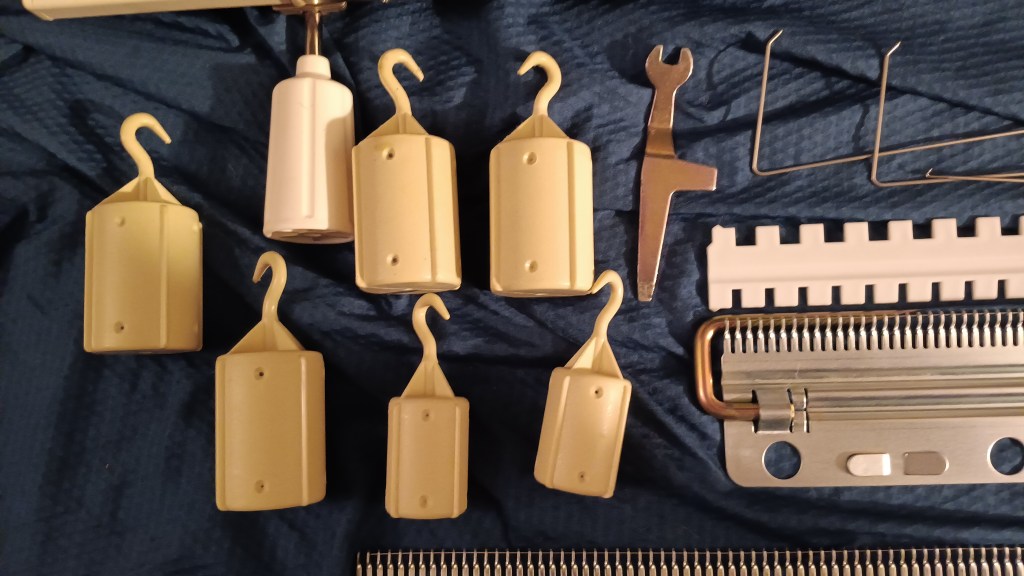
The machine will come with all accessories. A lot of these accessories look brand new (from my personal stash), especially the cast-on combs and the barrel weights. Several are indeed new from new stock (double eyelet transfer needle, needle selection comb, ratchet tool, claw hanging weights).


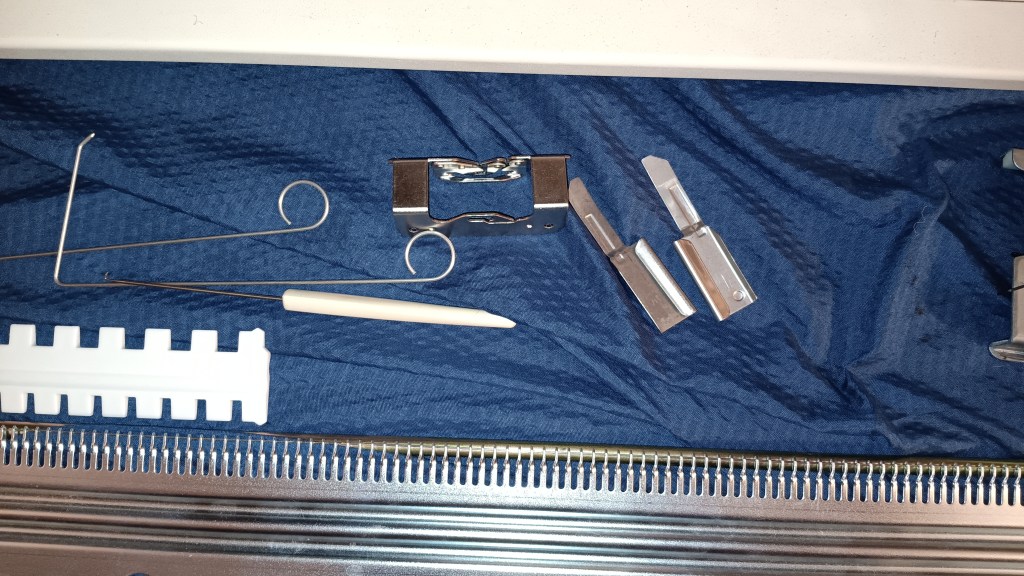
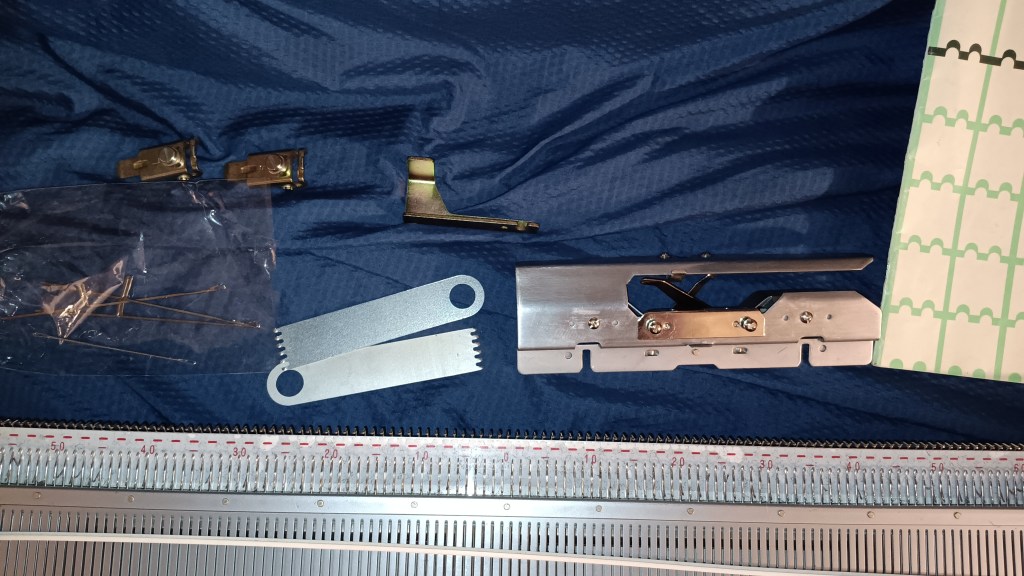
A hard copy of the manual is included as well (it is marked as Brother KR900, which is the same model).
CONS and IMPERFECTIONS:
- Carriage cover has some minor scratches and spots (none affect the functioning)
- The only, very minor “accessory” missing is a spare needle case
- Attaching the connecting arm might need paying attention (see below)
- Cam lever knob is missing (but is replaced soon)

The way I figured out the best way for this setup to attach the connecting arm is this: insert the connecting arm into the main carriage, slightly fasten the oister knobs, move the carraige+connecting arm to connect to the ribber carriage; after it snaps into the ribber carriage, finish fastening the oister knobs, but do not overtighten it. I found out that this is the best way to securely and reliably tighten the connecting arm to the main carriage and to the ribber carriage. When I tried the usual method (completely insert the connecting arm, tighten and then attach to the ribber carriage positioned to the left of the carriage, they did not feel all reliable and did not nest as snugly. My TLC-method is also shown in the video.
The panel knitted while testing this ribber were converted to a hat (the brown ribbing in on the “right” side and the greyish ribbing is on the inside), which will go to charity during our local Thanksgiving and Christmas hat and scarf drive.

Happy Knitting on this wonderful ribbing setup!