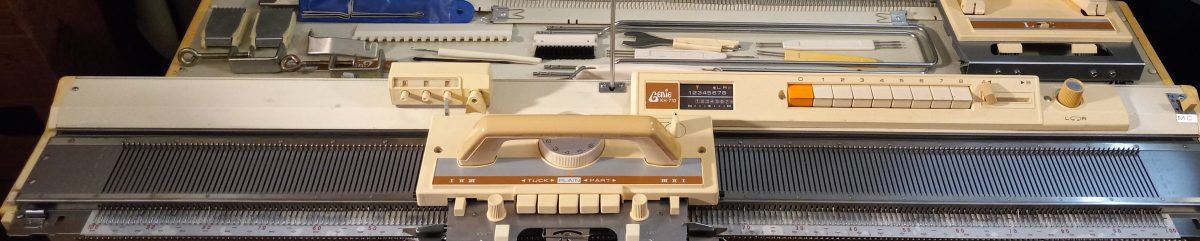
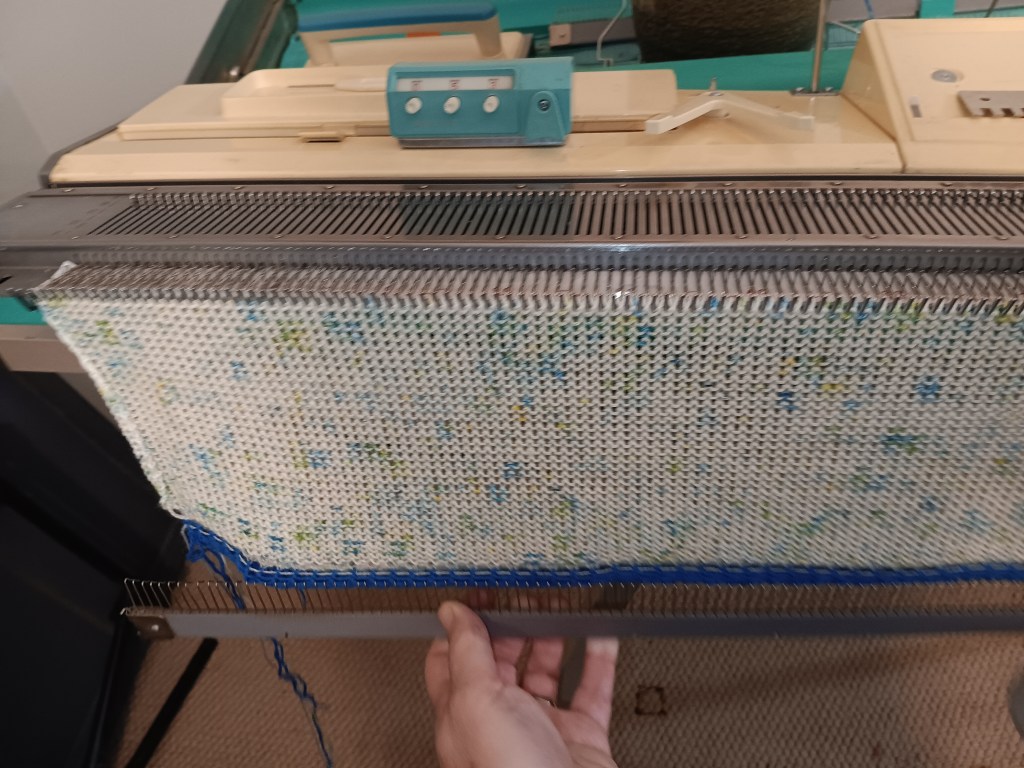
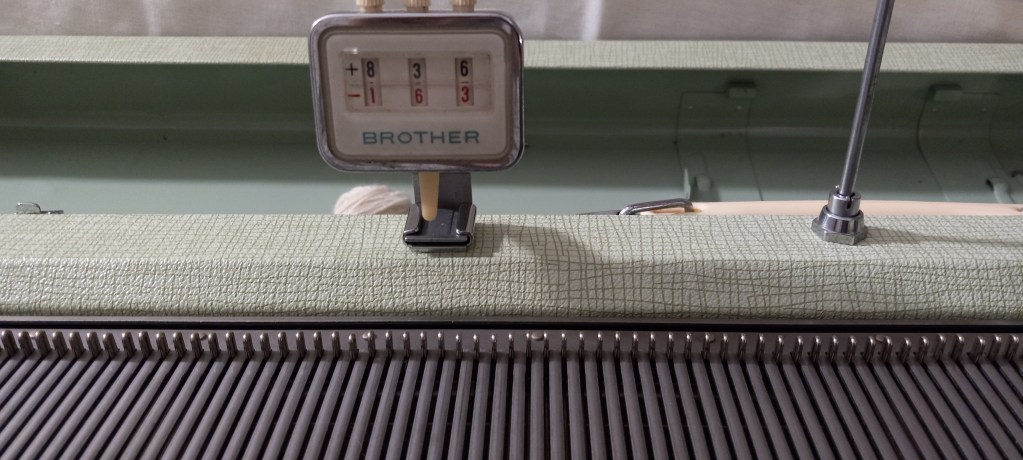
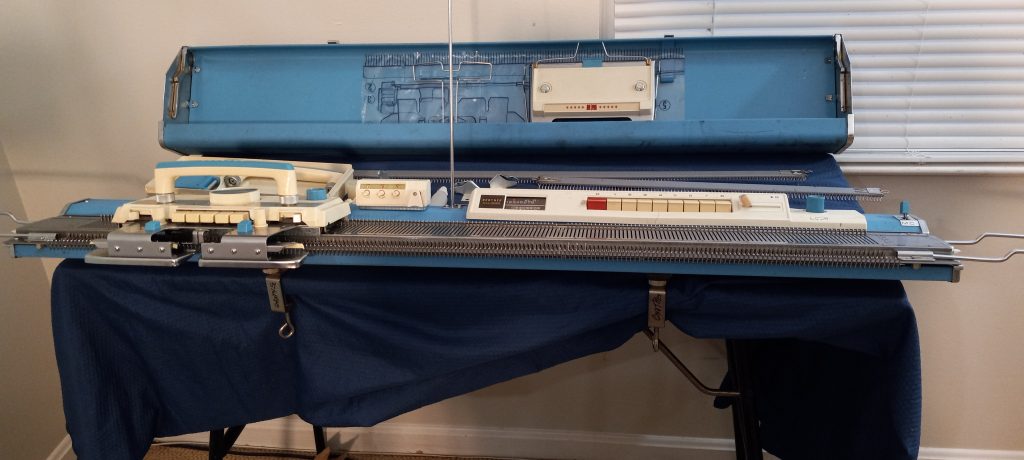
Two-color Fair Isle patterning on Brother KH800 and KH801 knitting machines.

These unique knitting machines, Brother KH800 and KH801, make it super easy to make punch cards and knit various patterns.

However, as I started to explore the steps on how to knit these various patterns, I discovered that the manual does not really present all the steps clearly, especially for the two-color fair isle knitting. So, a combination of researching manuals of similarly (with a ratchet) working push-button machines and my own trial & error, will be presented to you below as an attempt to ease up your learning of how to operate these wonderful machines. I also made a video of how I knitted a fair isle on my own Brother KH800 machine.

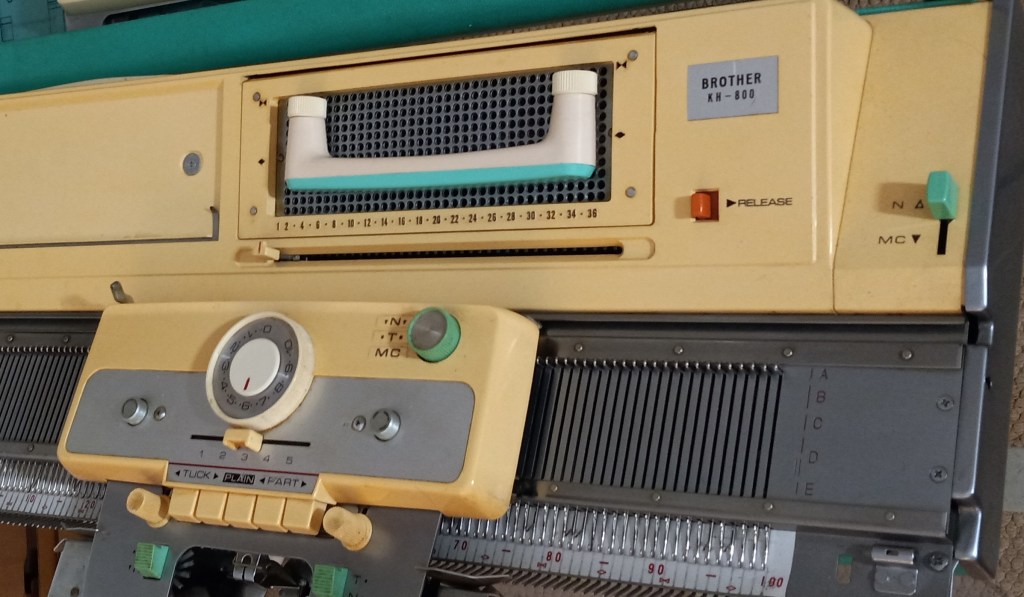
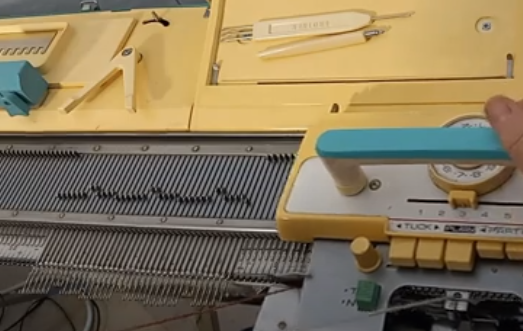
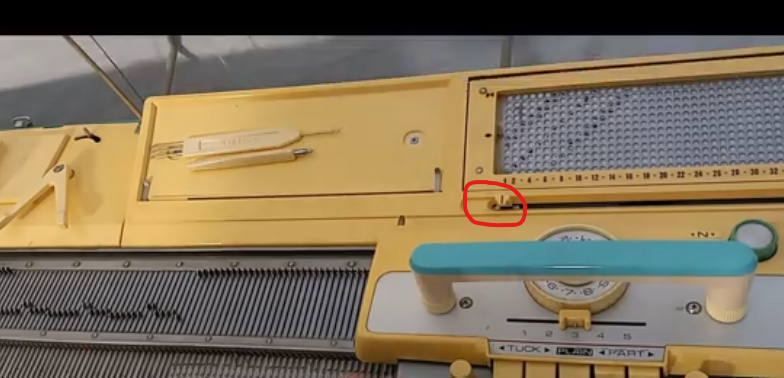
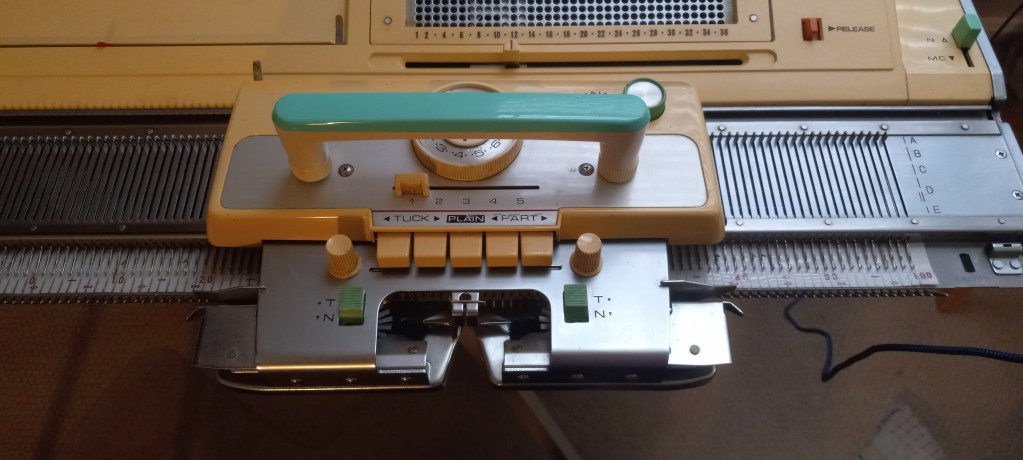
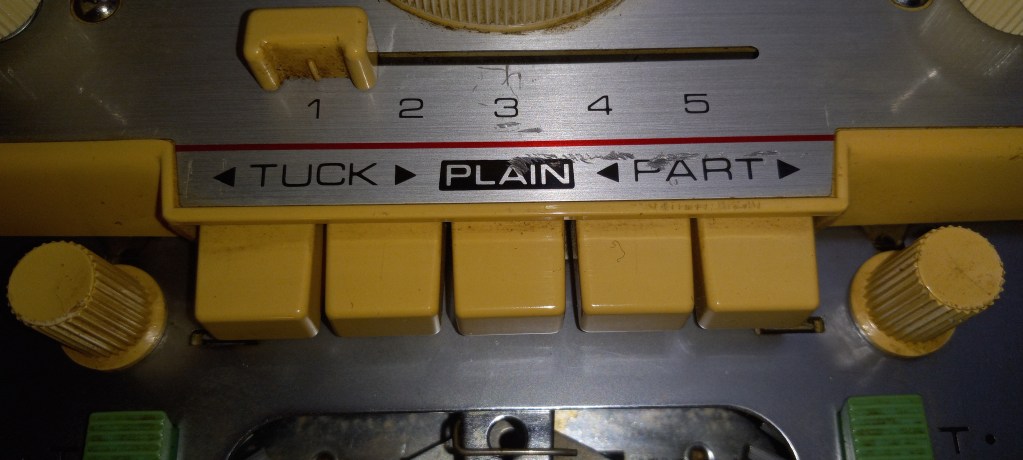
Before you even start, take a look at your main carriage. Find the N/T/MC knob in the top-right corner (we’ll need the MC settings). Please find the button on the carriage (we’ll need to push both PART buttons in). The slide lever on the carriage is on the settings “3”.

The change lever on the right-hand side of the needle bed in the top corner should be moved to MC.

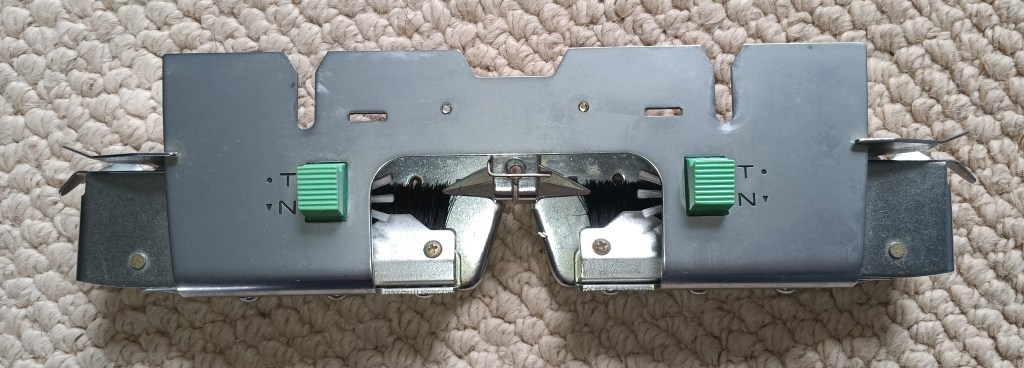
These are the components we need to pay attention to to change to knit fair isle on Brother KH800 and KH801 knitting machines.

Preparation: knit several rows of stockinet in the main color. The second yarn is threaded into the left-hand side wire of the tension mast.

Step 1. The carriage is on the left side. On the carriage, set the change knob to MC and establish the desired tension (a two-color fair isle is recommended to knit at higher tension numbers). MC change lever is also at the MC setting. Holding cam lever (HCL) is at the setting “3”. Insert a desired punchcard and pull the step indicator up (“unlock” position) so it advances every time we knit one row.

Step 2. Move the carriage to the right. All needles will shift to DI position. Push both PART buttons on the carriage. Double-check your tension. Guide/insert the second yarn into the slot on the left side of the sinker plate.

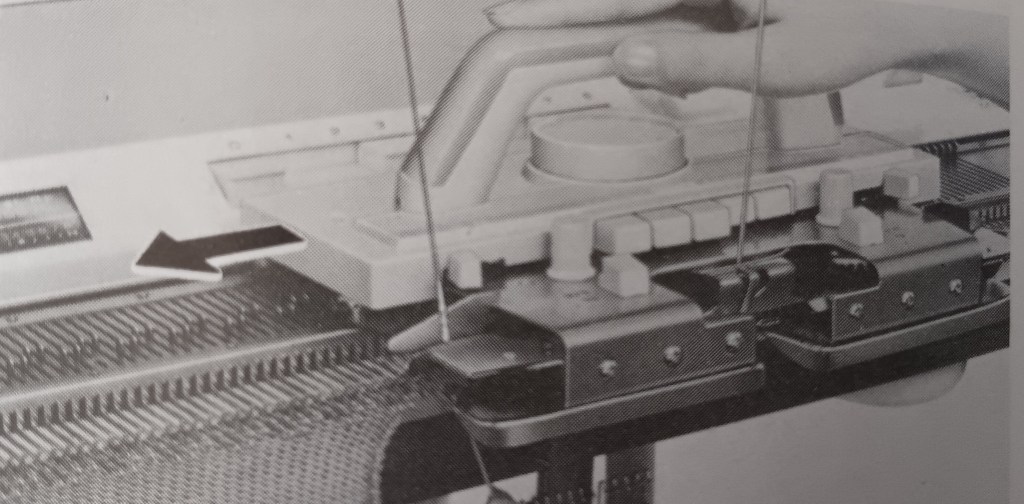
The manual for the KH800/KH801 knitting machines does a very poor job of showing how to insert/guide the second yarn into the slide slot of the sinker plate. I found an excellent demonstration in the manual for the KH710 knitting machine, which has very similar steps to the knitting fair isle. Also, watch my video on how I did it.

Step 3. Move the ratchet tool to move the needles according to the punch card. Notice they will split into the DI and DII positions. The needles that will knit with the second yarn remained in the DI position. The needles that will knit with the main yarn will move to the DII position. Move the carriage to the left while holding the second yarn gently (watch the video).

Step 4. Before moving the carriage back to the right, activate the needle selection for the second row: move the ratchet tool. As you move the carriage to the right, place the contrasting yarn onto the right-hand side guide of the sinker plate. Also, make sure that the row indicator moves after you pass the V-shaped trigger. If the row indicator does not move, pull it upwards.

Continue these steps.

The same approach can be used on fair isle patterning on pushbutton machines, like Brother KH585, KH588, KH581, KH552, KH601, etc. The carriages for the pushbutton machines and for the 12-stitch punchcard models KH800 and KH801 are the same (except for the slide lever – the 8-pushbutton machines have side levers for the same purpose). Thus, after the needle selection, all consequent actions are very similar for all these machines.

Happy Knitting!

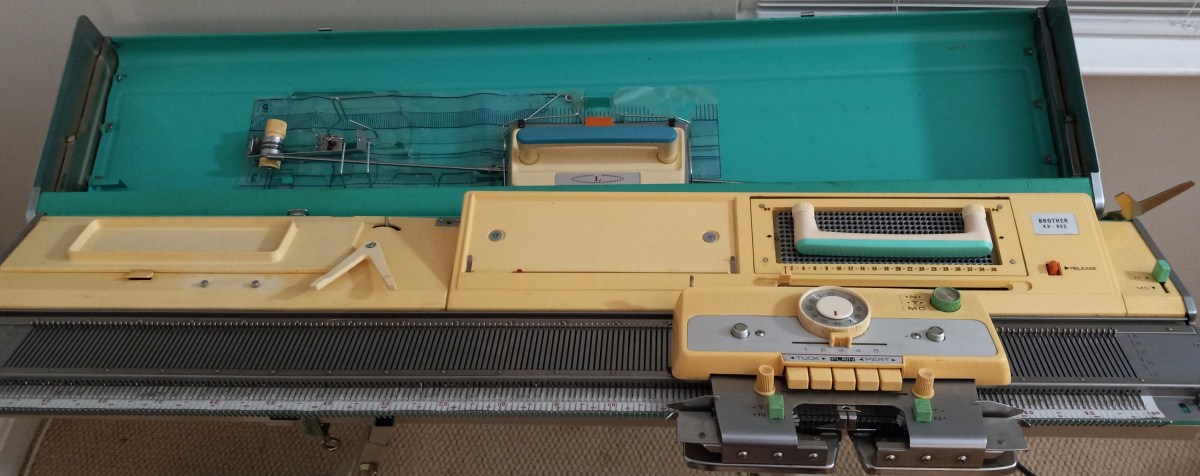
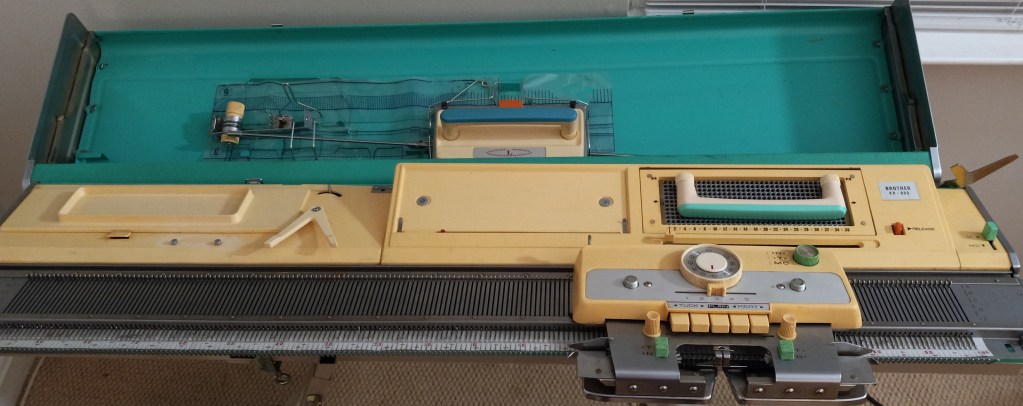
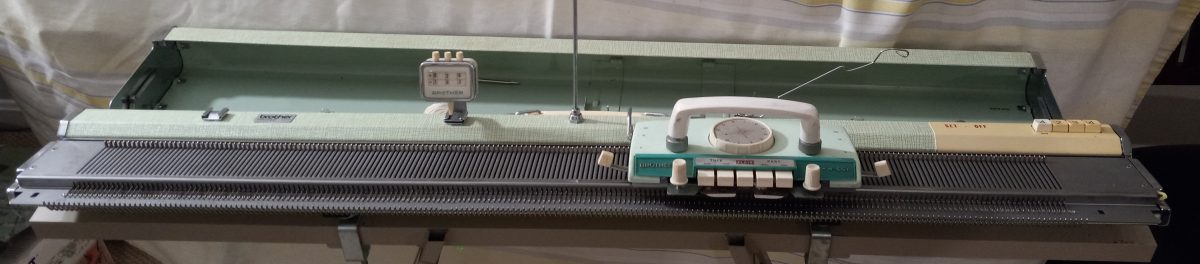
Brother KH800 knitting machine, serviced and tested in March 2024

Brother KH800 knitting machine

$625 machine + $110 shipping (with insurance)

$735.00

Click here to purchase.

This blog is about a specific Brother KH800 knitting machine, which I cleaned, serviced, and tested in March 2024.

To learn about the Brother KH800 model, with all its pros and cons, read my Knitting Machine Encyclopedia.

All needles were removed, cleaned, serviced, and inspected. The sponge in the retaining bar was replaced. The case and the lid were wiped thoroughly but I did not subject the case and the lid to excessive rubbing to remove all staining. So some stains remain. The same applies to the plastic panel: I was able to remove most of the dirt and grime but some minor staining might still be visible.

I installed new weaving brushes (it is typically a pain in the butt to do it – so take good care of them). The old ones completely fell apart. They are not black as the original ones but white with strong bristles.

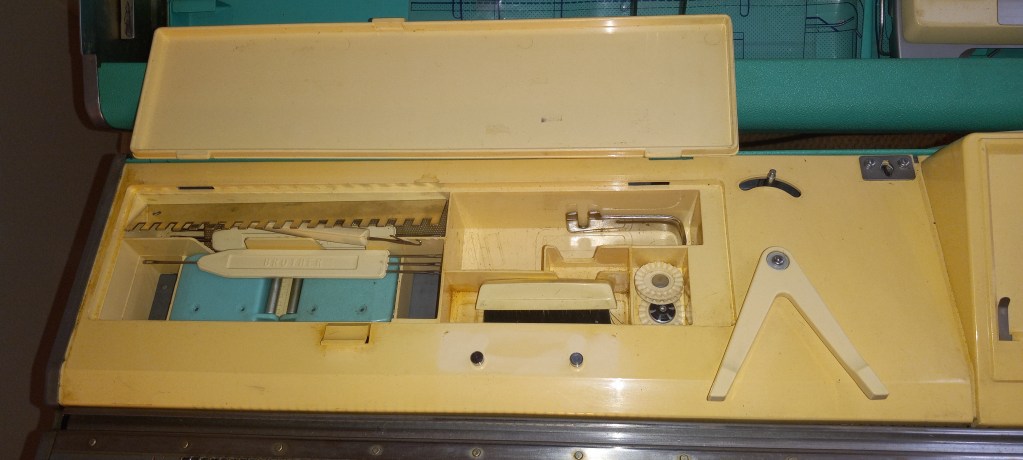
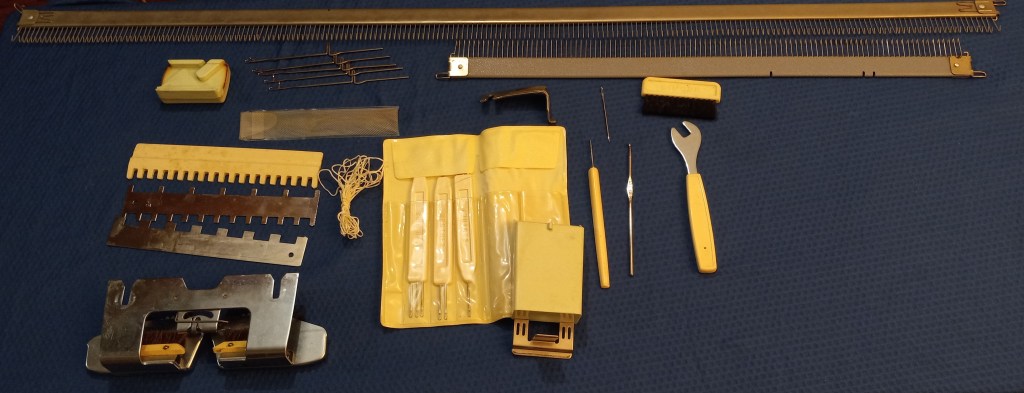
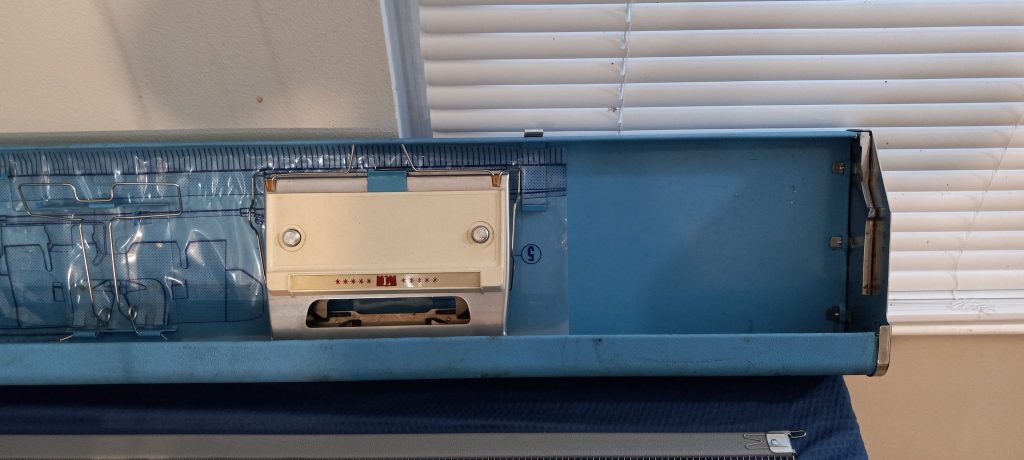
The machine will come with all major accessories (which fit inside the knitting machine case lid):

  • extension rails (to accommodate the lace carriage if you are using one or to accommodate the main carriage when you are knitting on the full bed)
  • tension mast
  • lace carriage
  • big and small cast on combs

Most critical minor accessories are included too:

  • metal 1×1 needle pusher
  • claw weights (greenish. like the machine)
  • latch and transfer tools as well as crochet needle
  • set of 3 spare needles
  • carriage lock
  • puncher
  • table clamps
  • set lever (also known as ratchet tool)
  • cleaning hand brush (good for cleaning carriage and removing some lint between the needles)
  • two carriage handles (one for the main carriage and one for the lace carriage)
  • row counter (I specifically looked for a greenish row counter to match the machine)

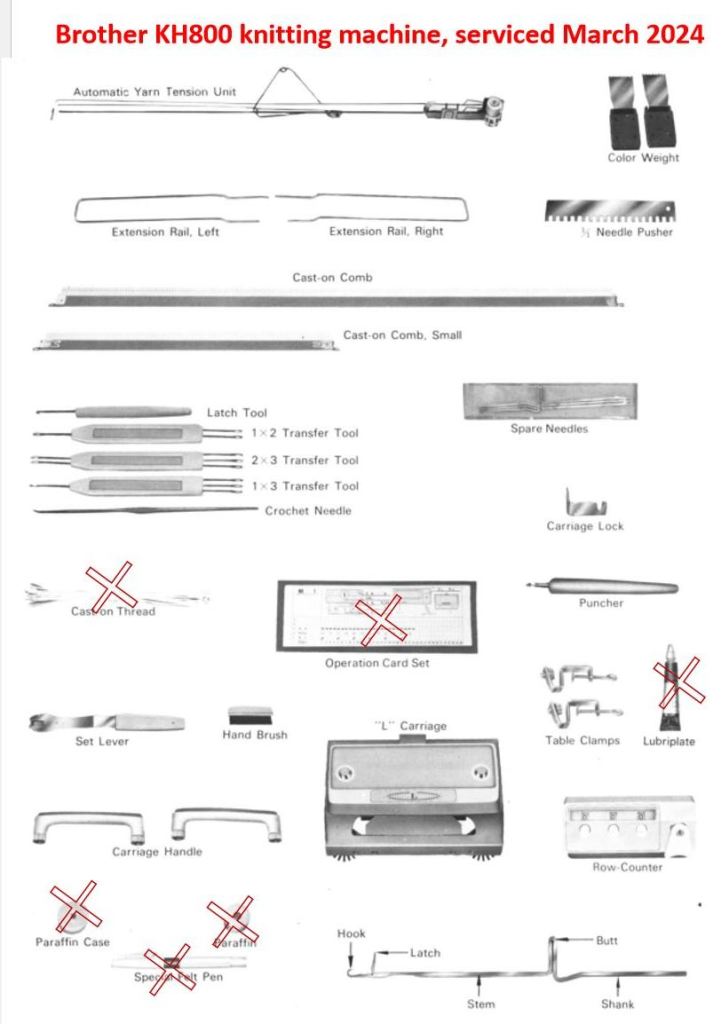
The minor accessories that are NOT included are marked below. These minor accessories do not affect the functioning of the machine. But read below about the punch and pattern cards.

The parafin is only needed for the yarns that are prone to static. The pen is actually for the knit leader and not for the machine. The greaze was old and I tossed it away. Any gun oil will work to service this machine. Any strong thin yarn can serve as a cast-on or waste-yarn thread.

All minor advisories are stored inside the built-in box with the lid.

The handles for both carriage are screw on and are also stored in this storage box. The carriage moves very smoothly on the needlebed.

The machine did not come with the original hard copy of the manual. It can still be found online for free. I can include a printed copy that came with this machine – just let me know but it might add to the weight (1-2 lbs) of the shipping package.

Even though the original pattern and punchcards are missing, it is very easy to make your own cards. I made a video on how to do it and described it in another blog. Follow the links for free pdf-files for the blank and pre-patterned cards. In my video, I printed out and used those cards.

Also, the cards are very easily to make (punch). Simply insert the cut-out of a new card into the punchcard reader and punch the wholes either using the punch provided or using a simple pencil. I describe it in my other blog and show it in my video as well.

The machine can be easily attached to a knit leader using the triangular tripper and the rod above it. Read on the manual of a specific knit leader on how to attach the machine to it.

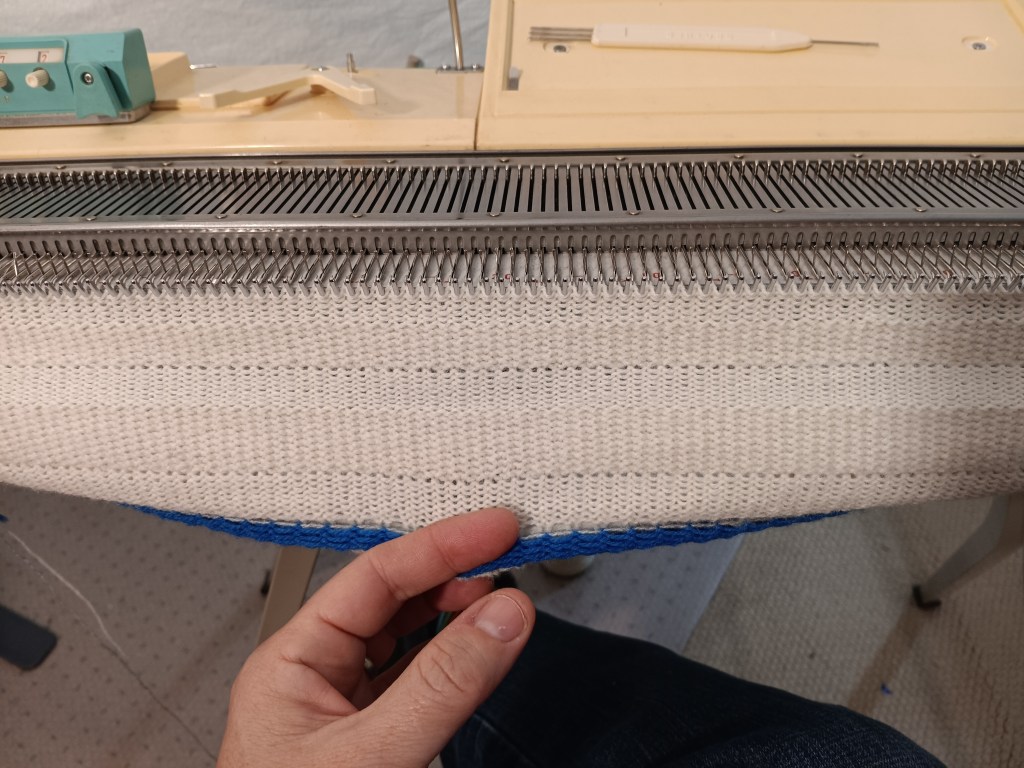
I knitted several swatches (tuck, slip, stockinet and fair isle) on this machine to ensure the carriage functions properly. I also knitted on the full bed to ensure all needles form proper stitches and that the patterning mechanism works well on the whole needlebed. Watch the video of all tests. The picture below shows the tuck-stitch fabric knitted during these tests.

Check out my blog and a video (…coming soon) on the fair isle patterning on this machine. It was quite interesting.

The panel I knitted during all these tests was converted to this 3-in-1 berett/cowl/hood shown below.

Turned out pretty good!!

Now about imperfections:

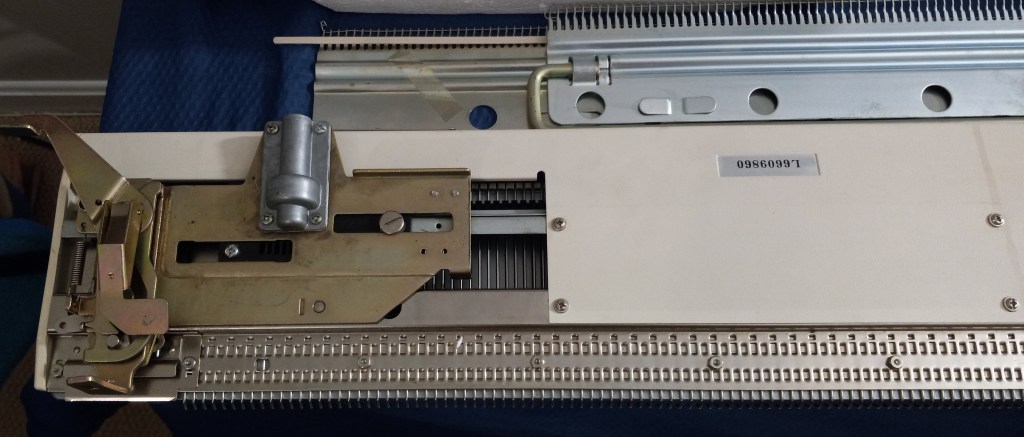
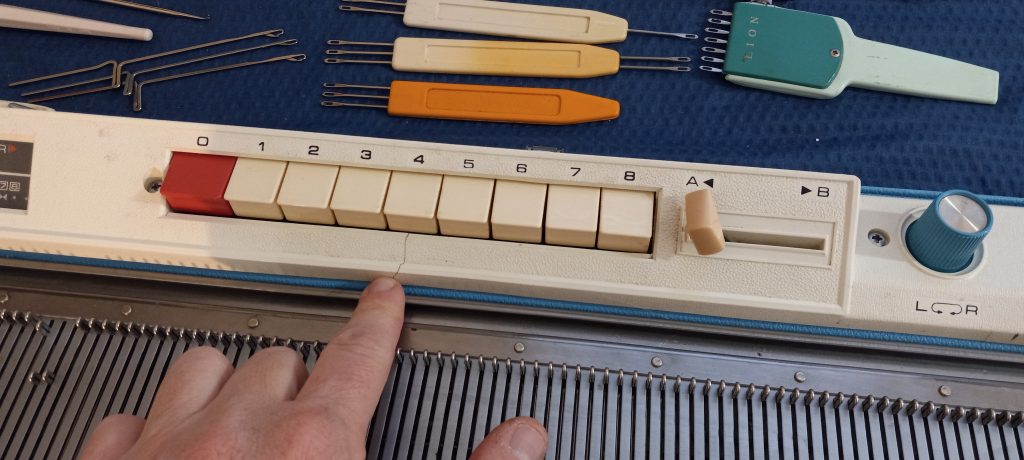
The most obvious imperfection is the scratches on the main carriage. They seem to be just cosmetic and did not affect the functioning of the machine.

All other impefections are also cosmetic. Like some minor dents and scratches on the lid and the case (not shown).

How to make punchcards for Brother KH800 and KH801 knitting machines.

Brother KH800 and KH801 knitting machines have unique designs for needle selection: they accept 12-stitch punchcards that are positioned flat on the special panel on the machine (called “card presser”).

Brother KH800 pattern center with the 12-hole card pressure in the middle.

If your machine came with original punchcards, you are super lucky! If you did not get the punchcards, or you want to make more cards for your own custom patterns, it is very easy to do.

Below are step-by-step instructions. You can also watch a video I made with these steps.

You need to cut a piece of paper, 20.5 x 6.5 cm (8 x 2.5 inches). Regular printer paper will work. Or print this file which shows blank cards for KH800. Another option is to print a standard set of cards (from the file downloaded here) and then punch the holes using the steps I will describe below.

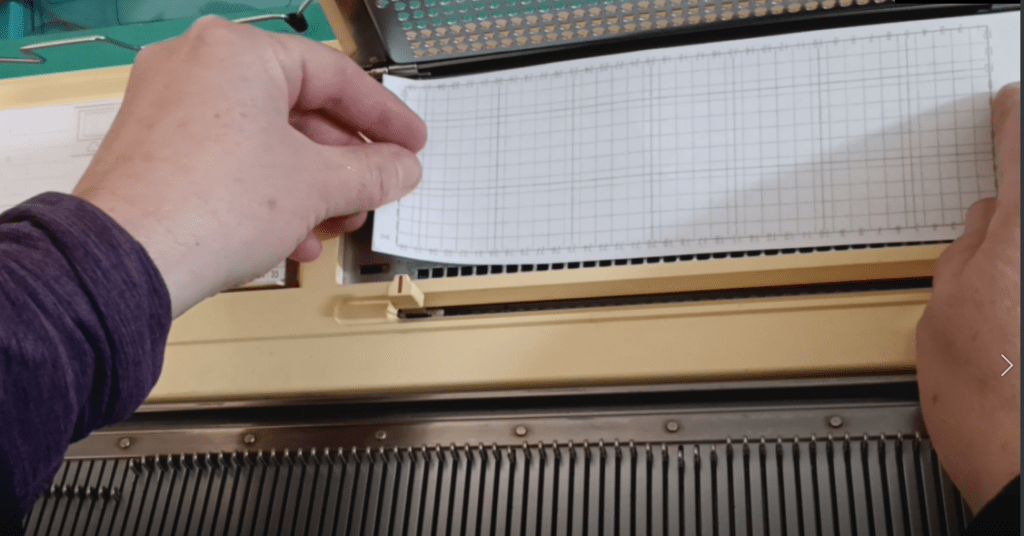
Insert the cut-out punch card into the pattern card cassette holder. The manual describes all the steps of inserting the card really well. The only difference from the manual is that you will have to push the paper through the setting pins.

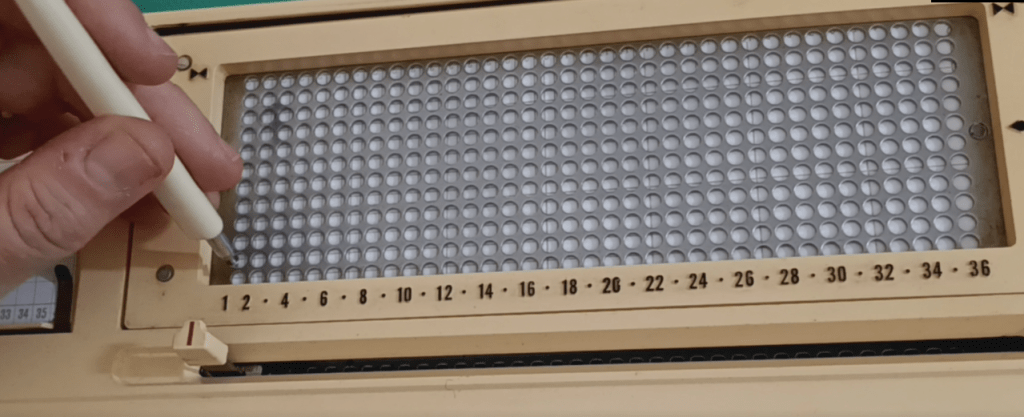
If your machine comes with a special puncher, you are again lucky. You can now use it to punch your pattern through the holes. If your machine did not come with it, you can use a marker with a relatively thick end. Ideally, find a marker that no longer draws (dried up or broken) so it does not draw on the machine.

Continue punching holes according to your desired pattern.

The holes do not have to be fully complete: they just need to be open enough for the patterning rods to go through upon activation.

Watch in the second half of my video how I tested and ensured that the rods indeed went through.

Happy punching and Happy knitting!

Also, read or watch about the patterning mechanism of Brother KH800/801.

Retaining bar vs knitting machine model chart

In progress. LAST UPDATED: June 2026

The table below lists the lengths and widths of various knitting machines I measured myself. Use this table as a reference to ensure you purchase the correct retaining bar for your knitting machine.


Model number
Retaining bar parameters
materialsponge strip?length, inch/cmwidth, inch/mm
Brother/Defendi/Empisal/ Jones/KnitKing
Brother KH500, KH531, KH551metalyes41/1040.375/10-10.5
Brother KH110, KH120, KH552, KH582, KH585, KH588, KH710, KH800, KH801, KH820, KH830, KH840, KH860, KH864, KH890, KH891, KH910, KH970metalyes41/1040.5/11-11.5
Brother KH230 machine, KR230 ribbermetalyes43/1090.5/11-11.5
Brother KH260, KH270metalyes47/1190.5/11-11.5
Brother KR810, KR830, KR850 ribbersplasticno41/104
Brother KR260 ribbermetalyes
Brother KR230 ribbermetalyes43/1090.5/11-11.5

JUKI
2500metalyes43/1090.75/11.0-11.5
Riccar/Silver/Empisal Knitmaster/Studio/Silver Reed/Singer
Silver Reed SK120metalyes43/1095 mm/0.2 inch
Silver Reed 260, 280, 321, 322, 323, 324, 326, 327,328,329,350, 500, 560, 580, 600, 700 840
SK270, 370, 830
metalyes41/1040.75/11.0-11.5
Silver Reed SK150.151, 155, 160, 860, 890, HK100metalyes43/1090.75/11.0-11.5
Toyota

About retaining bars in knitting machines and ribbers.

… this article is in constant progress as I learn about various knitting machines and their retaining bars. By the way, a chart on which machine uses what kind of retaining bar can be found here. Read how to deal with a stuck retaining bar at the end of this blog post.

Almost all knitting machines and ribbers have retaining bars. Some machines have retaining bars with a sponge attached to them. Some machines (the majority of plastic flatbed machines) have only a long and narrow sponge (without the metal holder). Ribbers come with either a “retaining bar+sponge” assembly or only with the plastic retaining bar (no sponge strip).

The main role of these retaining bars is to hold the needles in place and to prevent them from bouncing up and down when knitting.

Below are the situations when you want and need to remove (and inspect in many cases) the retaining bar:

  1. When you just purchased your machine (especially used and NOT recently serviced), the first thing you need to do is to remove your retaining bar and inspect it. I made a short video on how to do it because I have been asked about it so many times by my customers.
  2. When you need to replace faulty needles.
  3. When you need to clean your machine.
  4. When you notice your knitting machine mispatterning without any good reason.

Hopefully, you purchased your knitting machine new or recently serviced. In this case, the sponge should be 1-2 cm above the metal edge of the retaining bar.

But in most cases, this is not the case. Thus, it is possible that when you remove the retaining bar, you will see a disintegrated sponge. I’ve seen some spongy strips being just a gooey mess. The old sponge needs to be removed as soon as possible (since it often corrodes the needles) and replaced.

There are two ways to approach this replacement.

First approach: just replace the spongy strip

If you decide to replace the sponge, you will need to remove all this goo. I first use a flat-head screwdriver to scrape all the residue out of the retaining bar canal. Typically, the old sponge residue remains in the retaining bar channels. So, to remove those, I then use “Goo Gone” to remove the rest of the residue. I typically do it outside because it is a very messy process. I pour a thin layer of “Goo Gone” liquid into the retaining bar and wait for a couple of hours. Then I scrape the remains of the old sponge again with the screwdriver. Repeat the “Goo Gone” application if needed. Lastly, I wash the retaining bar with soap and water, wipe it really well, and let it dry (or blow-dry it). You can purchase just the sponge in my store or on Amazon.

I sometimes read in forums that some thrifty machine knitters get simple weather stripping and use them as sponge strips. Well, those have different densities and sometimes do not have a silky ribbon on one side. Also, they are not suited to be exposed to oils and might decompose rapidly, leaving a sticky (potentially unremovable) residue inside your machine.

I read that experienced machine knitters use different ways to attach the spongy strip to the retaining bar. (By the way, the width of the spongy strip is not as critical, and it can be a little bit narrower than the channel of the retaining bar, but not by much). I tried different glues, and my current choice is hot glue. Some machine knitters use wood glue. I apply the glue to the metal part of the retaining bar and attach the strip to the metal by the sponge side (not the silky ribbon side). I then tape the ends of the sponge to the plastic ends. I like using medical tape. Only one layer of the tape is enough to secure the ends of the sponge. More layers will only get stuck when you insert the newly refurbished retaining bar back into the machine. Insert a small section at a time and push the needles gently down. To avoid stripping this tape, push it down on the ends of the retaining bar while inserting it into the machine.

You will see some sellers offer plastic ends for retaining bars. There are several problems with those:

  • To insert them on top of your new sponge strip, you will very likely have to widen the metal section of the retaining bar where the ends snap into, and then clip the metal again around the plastic ends. Since you will very likely have to do this procedure often (twice a year), this process deteriorates the metal retaining bar, making it eventually unusable.
  • Sometimes the plastic ends do not snap into place easily and pop out of the retaining bar.
  • Removing the old plastic ends to insert the sponge strip along the whole length of the retaining bar can also damage the ends of the metal retaining bar.

Second approach: buy a new retaining bar

Or if you do not feel like dealing with all this mess, you can purchase a retaining bar with a sponge already in it. Before you order a new retaining bar, make sure you measure the dimensions of your old bar: its width and its length.

Most commonly used by machine knitters Brother, Studio/Silver Reed/Singer, and Toyota knitting machines have somewhat similar retaining bars but there are some differences depending on the model and the gauge of the machine.

For the retaining bars for these machines, there are three different lengths (41, 43, and 47 inches) and two different widths (0.375 and 0.5 inches). This is why it is important to measure your old retaining bar to ensure that you are getting a retaining bar suitable for your machine. Most JUKI, Toyota, Silger/Silver Reed/Studio, Artisan knitting machines use 0.375-inch wide retaining bars. The lengths are either 41 or 43 inches (depending on the model).

I’ve read stories on Facebook groups, where the new machine knitters were puzzled by the fact that they JUST replaced the sponge bar and the needles do not move, advance, or retract the way they are supposed to. I especially see I happen to be the owner of 8 push-button Brother knitting machines. There is somewhere out there some incorrect information on the retaining bar for these machines. 4-push-button machines use a 0.375-inch wide retaining bar, and the 8-push-button machines use a 0.25-inch wide retaining bar. (I’ve refurbished over a dozen push-button machines and I know the difference first-hand).

Brother ribbers use plastic retaining bars without sponges. When (re) inserting the retaining bar into the Brother ribbers, the concave surface (the “channel”) should face you.

There are machines and ribbers with unique retaining bars (like Silver Reed SK120 and SK121 models, Brother KR321 ribber) – I will keep updating the blog as I am learning more. I am also putting a table on machines (and models) and retaining bar compatibility.

In the meantime, enjoy your adventure in retaining/sponge bar replacement!

PS. I measured several dozen retaining bars with my calipers. Even though the “official” measurement is 0.375 and 0.5 inches, mine are measured as 0.40-0.41 and 0.44-0.46 inches, respectively. This inaccuracy in inches makes me like the mm scale (aka metric) a bit better. So the narrower retaining bars are 10.0-10.5 mm, while the wider ones are 11-12 mm wide. Who knew that just 1 mm would make such a difference, but it does! I had an incorrect bar installed on my KH581 8-pushbutton machine, and the needles would not go back from E to B (or A) position!!!

Sometimes the retaining bar gets stuck. Possible reasons are:

  • it was inserted incorrectly originally: e.g., with the metal side touching the needles, or misaligned with the channel or even bypassed the channel.
  • sponge strip disintegrated and the old goo got stuck to the needles;
  • sponge strip goo rusted the needles and they are grabbing onto the old sponge strip;

Solutions when the retaining bar is stuck inside the machine:

  • try to use pliers to pull the retaining bar out;
  • if not much is visible to grab, remove the end cap;
  • try to do the two previous ones from a different end of the needle bed;
  • try to push the needles to E position and try the previous bullet points again

The difference between Brother KH965e, KH965i and KH965.

Just a quick note on the differences between Brother knitting machines under the model numbers KH965, KH965e, and KH965i. The reason there is a lot of discrepancies and misunderstandings about the additional “i” in the model number is that these machines are very scarce and because the functionality seems to be . They are very desirable and those that are still available on the used market are still in great shape.

First, about “e” :

Even if Brother KH965e indeed exists, it would simply mean an anniversary edition since “e” stands for “eleganza” (the latest anniversary edition model to the best of my knowledge is KH950E). This machine would be identical to the functionality of the KH965 knitting machine but the color combination of the carriage, end caps, and control panel might be different (like in the case of KH930/930e and KR850/850e setups). However, I’ve seen only the KH260/KH260e, KR850/850e and KH930/KH930e combinations. Brother KH965 was released to the market significantly later (by about 5 years), so there will be no even for an “anniversary edition”. If you’ve seen the KH965e model and want to prove me wrong, shoot me a message.

Now about “i”:

The differences between the KH965 and KH965i models of electronic brother knitting machines are subtle and might vary depending on which market the machine was made for.

Some think that “i” in KH965i stands for “intarsia”. However, both KH965 and KH965i have built-in intarsia knitting capabilities according to the instructions (as well as their a bit older analogs, KH930 and KH940).

I researched pictures of a lot of pictures of various KH965i machines and all of them have the intarsia option. … which kind of makes sense because KH965i is an updated version of KH930/KH940, which also had this option.

Some think that “i” might stand for is “interactive” or “interface,” and the difference is that KH965i has a compartment to insert the PPD disk, however, KH965 has the same disk port (and the manuals for these machines both mention the compartment and disk port). So, basically, KH965i can accept files from external sources without any modifications to the machine.

Knitters who prefer a more advanced way or pattern transfer use a special cable instead of the PPD disk. This cable is inserted into the slot for the disk for file transfer through special software.

The KH965i model has also the capability of inserting the cable into the machine itself (originally assumed to be for the FB 100 disk drive and file transfer). And this is one of the main differences between KH965 and KH965i.
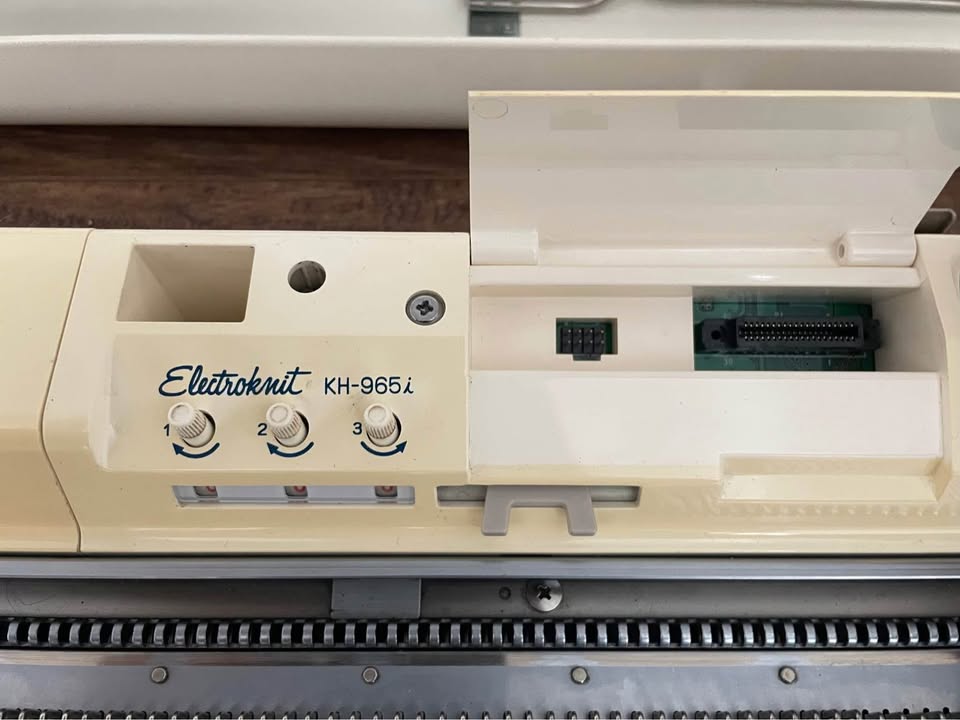
Another critical difference is the settings on the selection dial on the carriage. Brother KH965 does not have a KCII setting…

…unlike Brother KH965i.

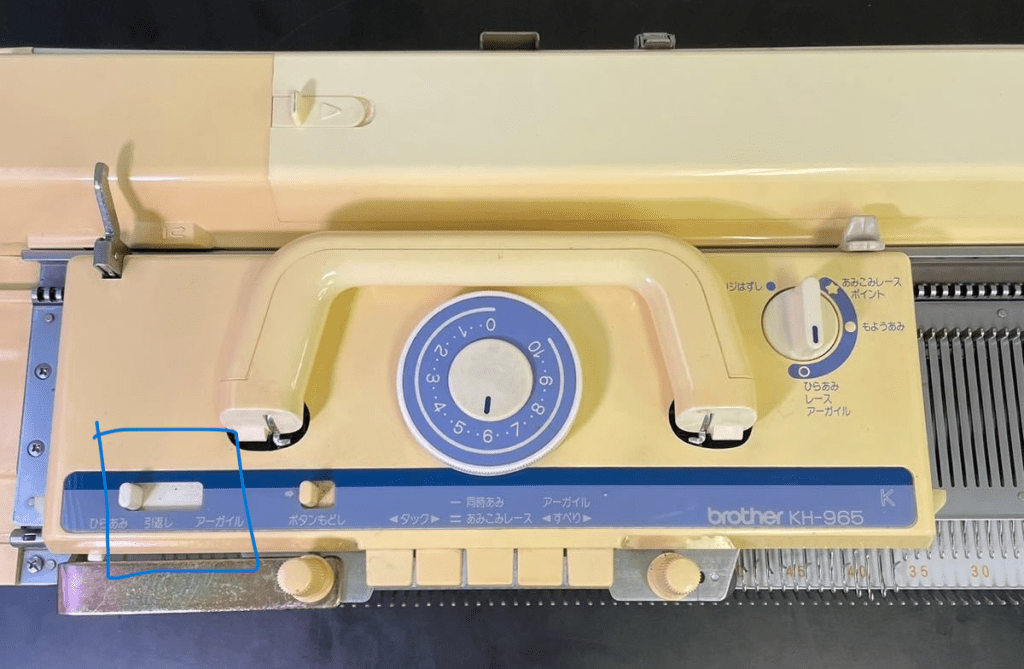
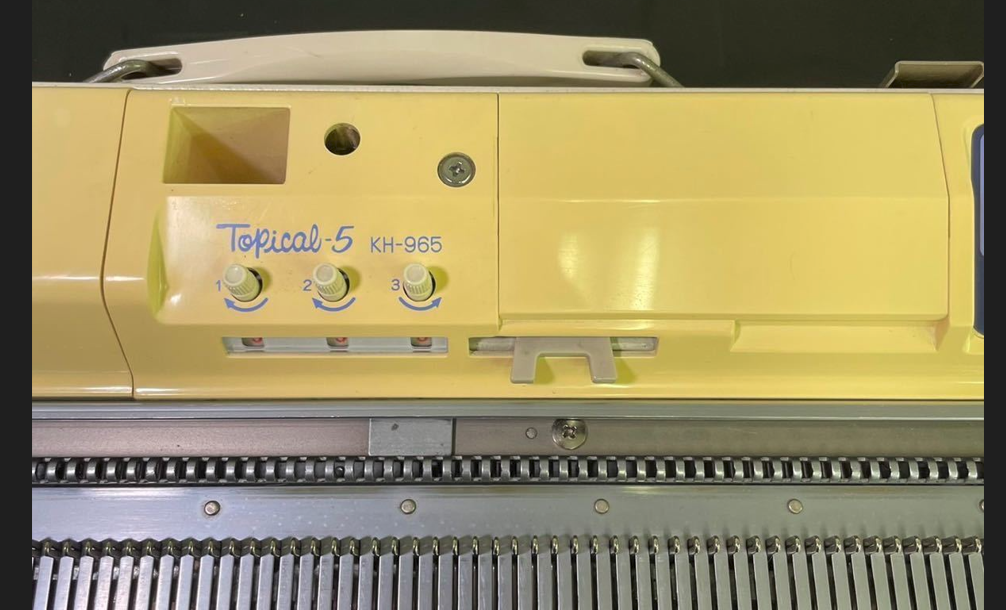
However, KH965 released to the Japanese markets (Topical-5) noticeably has also 4 positions on the selection dial, which probably implies KCI and KCII settings or maybe KC and SM settings? (Sorry – I would be more sure but I don’t read Japanese).

Thus, it seems that even if your KH965 does not have “i” next to its name, it might still have functionalities of the KH965i machine.

Thus, to identify whether you have a KH965 or KH965i, look for:

  • KCII option on the selection cam on the carriage (or four different options on that dial)
  • A port on the back panel of the machine.

All other functionalities of the KH965 and KH965i are the same (namely, memory, functions of the buttons on the panel, etc).

I really hope you are a lucky knitter who has a Brother KH965(i) in their collection!

Brother KH551 knitting machine serviced in November 2023

Brother KH551 is a standard gauge knitting machine with 4-pushbutton-based patterning mechanism. This blog is dedicated to one specific machine I serviced. If you want to know more about the Brother KH551 knitting machine model, refer to my Knitting Machine Encyclopedia article.

The machine (including carriage and all needles) was cleaned and serviced. All levers and the buttons on the carriage were checked and they moved and worked without problems. These levers were also tested while knitting. All needles were also checked while knitting on a full bed. No faulty needles were detected.

The 15 needles on each side (30 total) came from my refurbished stack. Thus, when I was knitting on the full bed, I was inspecting the edges especially closely to make sure all these refurbished needles worked well. Also, because of such a high number of refurbished needles, I am including the set of 5 spare needles (instead of usual 3).

The machine comes with all major assesories.

Several missing minor assesories are:

  • A hard copy of the manual is not included but can be found online.
  • Sinker plate yarn hangers, left and right. It can honestly be replaced with a regular paper clip (just unbent them to a desired shape). The manual describes their usage on p. 18. manual
  • The tool storage box is not included
  • Oil is not included also but I recommend Hoppe’s Elite Gun Oil.

Additionally, the small cast-on comb is not all metal – I pulled it out from my own stash.

On the full bed, I knitted stockinet, tuck, slip and hold patterns (see the video of tests – all went well). Butterfly stitch is my favorite on this machine.

Now about flaws and imperfections:

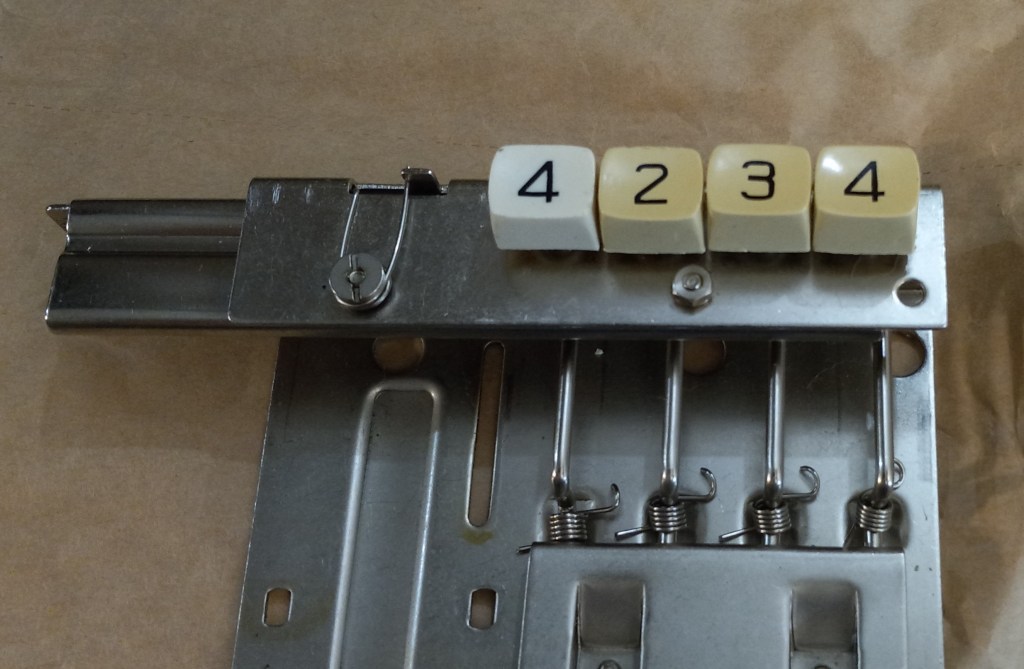
I had to replace the push-buttons but I did not have a part for the button marked #1. So, I replaced it with the button marked as #4 but it is of different shade of white. If you want, you can put a sticker on it with “#1” (I prefer not to put stickers on machines since it damages and stains the vintage plastic).

Despite being vintage, this machine will still serve your craft needs for many years especially if regularly serviced.

Happy Knitting!

Tension spring for Brother Knitting machine

Carriages of Brother knitting machines have several types of springs to ensure smooth needle handling. This article is about a medium size spring, part of the intricate mechanism of Brother knitting machine carriages. These springs can be purchased in my store.

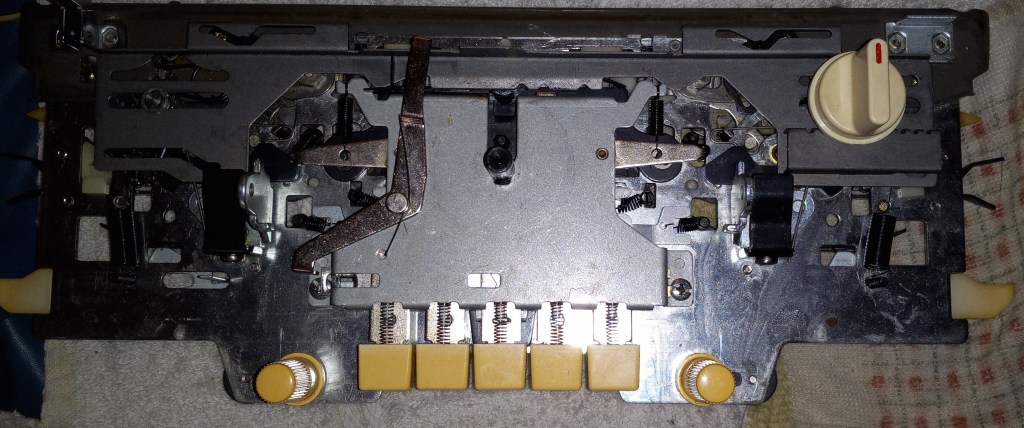
In particular, this short blog article is about a tension spring responsible for smooth the movement of the middle button on the carriage. (At the end of this article, I show other places in the carriage where the same type of spring can be used). This button is typically used to knit fair isle or/and to reset all other buttons.

To expose that spring, one needs to remove the plastic carriage cover (this step NOT covered in this article) and then remove the metal cover.

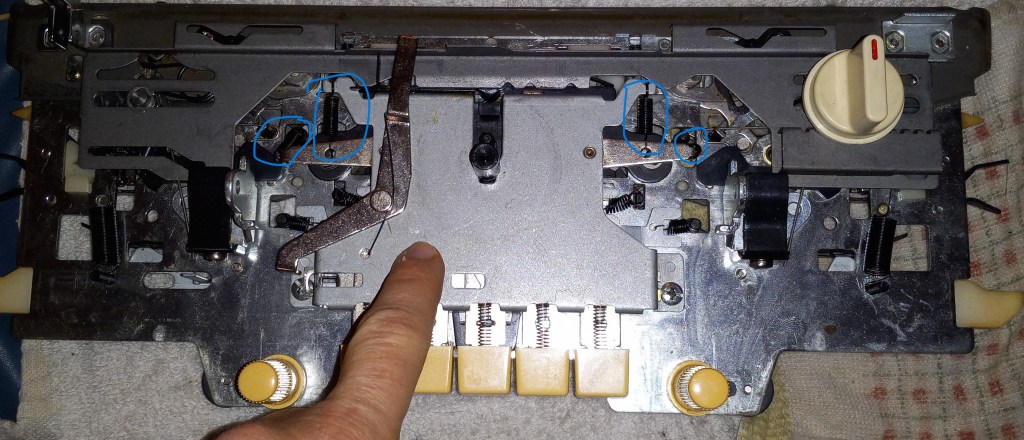
For that purpose, remove the two screws marked below.

The plate will then hang by the springs marked in the picture below but they do not have to be removed. Just push the metal plate out of the way. If the springs detach, they are easily to put back. Just take a picture of the agreement before removing the cover.

Once the cover is removed, you will see the springs right away. In my case, one of the springs was simply missing and the mechanism was not retracting automatically the way it was supposed to.

So the replacement spring was placed where one was missing. I made a short video showing where the spring was installed.

“How” the spring was installed is NOT shown in that video because it is kind of hard to capture how to attach the spring. But the loops of the spring need to grab the posts marked in the picture below.

The same spring can be used in positions shown below. The springs marked with crosses are either small/bigger in size or a spring without the loops (springs for the buttons) and thus, cannot be used.

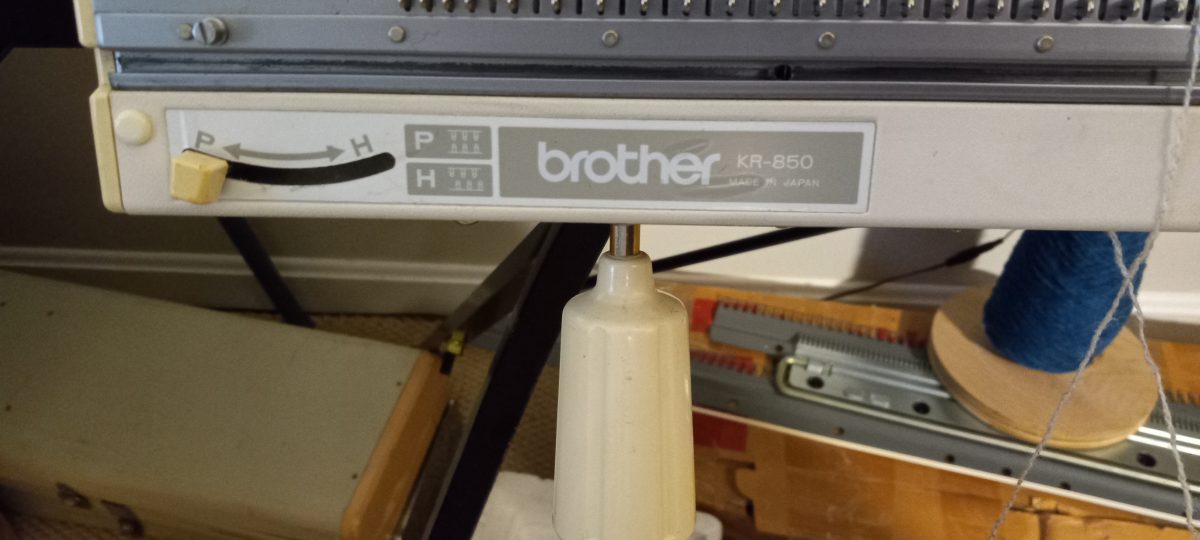
Brother KR850 ribber prepared for Judith in December 2023

Brother KR850 ribber fits numerous standard-gauge Brother knitting machines. Read more about Brother KR850 ribber in my Knitting Machine Encyclopedia. The blog below is dedicated specifically to the ribber serviced in December 2023 for my customer.

Brother KR850 was serviced and tested for Judith in December 2023. My store offers other ribbers for Brother and other knitting machines.

This ribber comes with all assesories including a hard copy of the manual (not shown in the pictures).

The bed, carriage, and assesories were cleaned, inspected and tested. All needles were cleaned and inspected individually, first visually and then by knitting on a full bed 1×1 ribbing (in two different combinations to make sure all needles were tested).

Swatch test was performed first. Swatch tests are useful to ensure that the carriage functions work well. In the case of swatch tests, we do not have to worry about artifacts and problems (such as the correct tension of the yarn, yarn thickness, yarn texture, correct number of barrel weights, side weights, etc.) associated with large number of needles in working positions.

Then the machine was tested on a full bed in two different configurations to ensure that all needles form nice and correct stitches. Carriage is very easy to move on swatch and on a full bed.

All tests went great. See the video of these tests in my youtube channel.

When knitting on the ribber, tension, the correct number of weights and the distance between the ribber and the main bed play a very important role. This machine handled really well two different distances between the ribber/machine beds and three different yarns (with different thicknesses and texture, see my video). One of the yarns was a mohair-containing fuzzy yarn. The machine handles it well too although some tests on the correct tension was needed as well as some wax (fuzzy yarns are more prone to static formation than other yarns).

The machine will come in its original packaging: two Styrofoam forms to fit all assesories …

… and pads inside the bottom of the cardboard box to support and protect the machine.

The only obvious flaw was the tape attached to one of the cast-on combs. I did not remove it because actually it is convenient to have that tape to store the fine bar ( the long plastic and very fragile rod-like bar) more easily (often it is overlooked during unpacking and thrown away).

This machine would serve long years especially if regularly oiled, cleaned and stored in controlled environment.

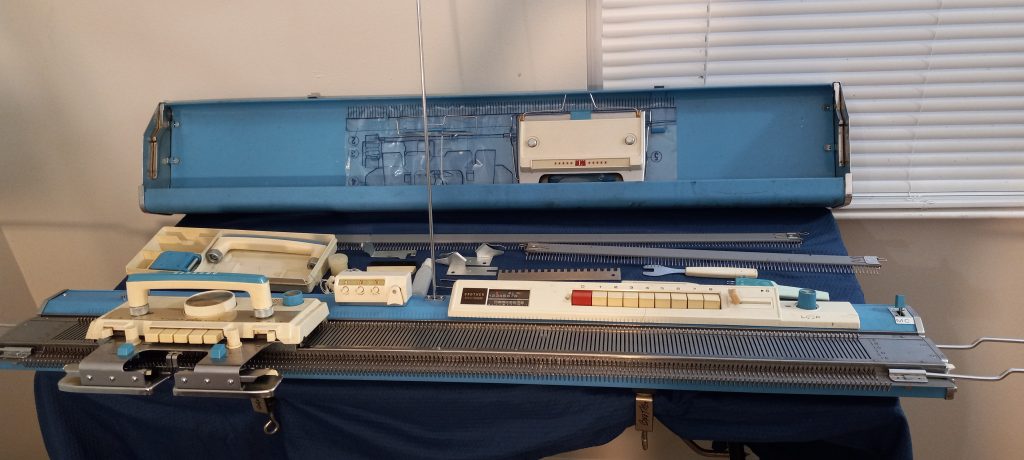
Brother KH588 machine serviced in December 2023

This machine was ordered as a Christmas present from a loving husband to his crafty wife.

It is a very nice vintage setup with blue hues. This post is dedicated to this particular machine. To know more about this model, read in my Knitting Machine Encyclopedia about its pros and cons.

The machine was cleaned from old dust and gunk and tested. The sponge in the retaining bar was replaced and will come inserted into the machine. I completely replaced the weaving brushes on the sinker plate as the old ones completely decomposed.

All needles were removed, cleaned and inspected, first visually and then by knitting on a full bed. The full-bed knitting tests were on stockinet, tuck, slip and holding patterns. The video with all these tests demonstrates that the machine did not have any problems knitting these stitches and none of the needles showed any signs of forming misshapen stitches.

Lace carriage was not tested but all knobs and levers move without problems.

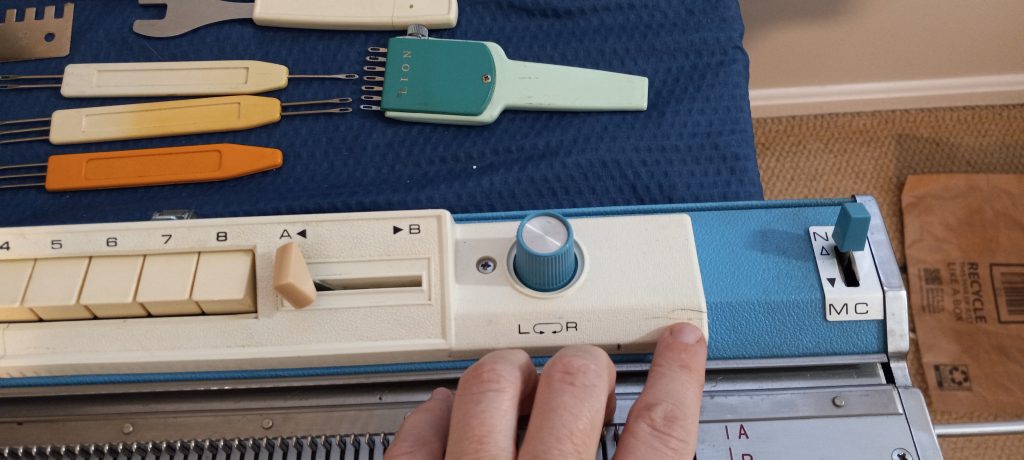
While knitting on a full bed all patterning buttons, knobs and levers were tested in action (with the exception of the N/MC lever but it moves freely) and are fully functional.

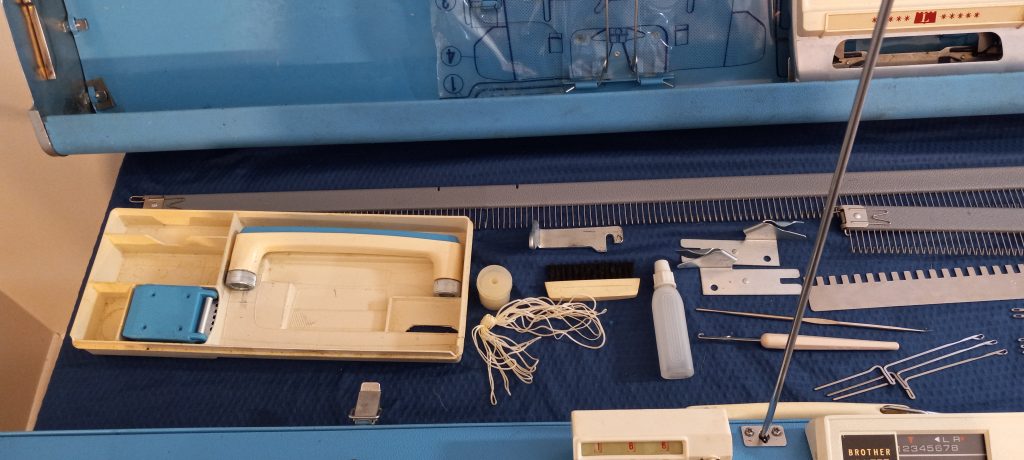
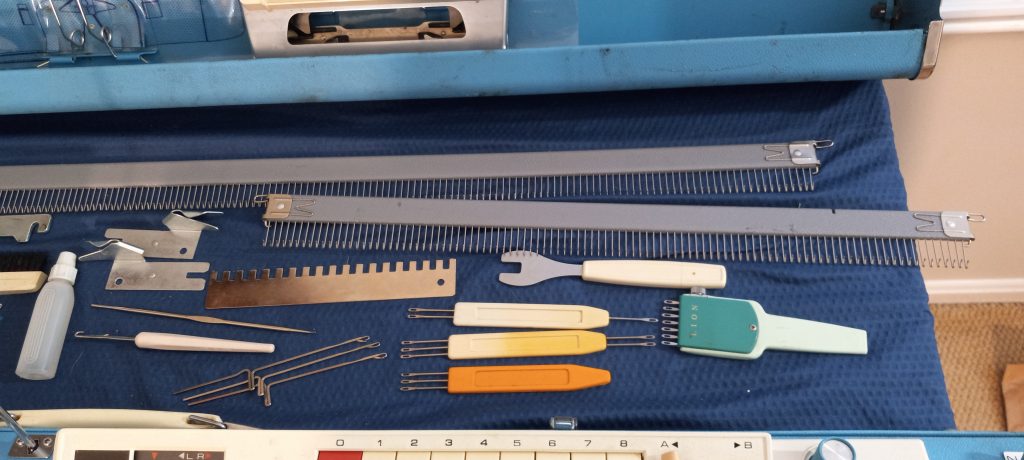
The machine comes with all major assesories (lace carriage, rails, row counter, sinker plate) and the majority of the minor assesories.

The row counter is from the new stock – the original row counter was missing from the setup.

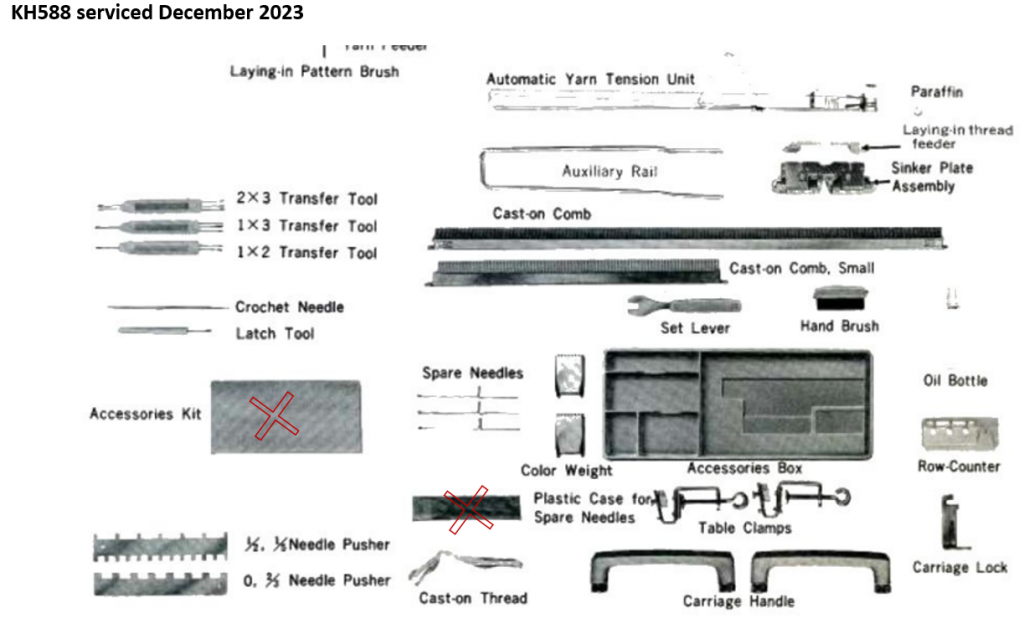
The minor assesories missing are:

  • the assesories kit: it is simply a cover with pockets to keep assesories inside
  • the lid for the assesories box. The plastic was so weak that it crumbled when the machine arrived to me and I had to discard it.
  • hard copy of the manual will not be included but it is available online for free. I strongly recommend following the manual step-by-step as it is the best resource to start knowing your knitting machine.

The 3/1 needle selection/transfer tool is missing the one-prong therefor I will include a universal stitch transfer tool as well.

I will include an old wax in its tube that came with the machine. Also, there is half a bottle of still decent looking oil. I will include it as well. If it runs out, I recommend using Hoppe’s Elite Gun Oil, available on Amazon and in local hardware stores.

The manual lists mostly basic patterns but additional patterns are in this brochure.

Despite working flawlessly, the machine had some minor imperfections:

The pattern center panel has two cracks: on the right-hand side and in the middle. additionally the knob on the AB lever is from another machine and thus is not blue in color (the original knob was missing).

The assesories box has a crack on the side and a broken piece on the bottom. The plastics from the 1960s and 1970s were not as weathering resistant as current plastics and thus severely degrade with time especially when exposed to the UV light and moisture.

The case has some minor scuffs on the outer side.

Some of the stains on the lid will remain as they did not come off completely (and I do not subject the old plastics to extensive exposure to harsh solutions).

The lid has some minor rust stains on the inside.

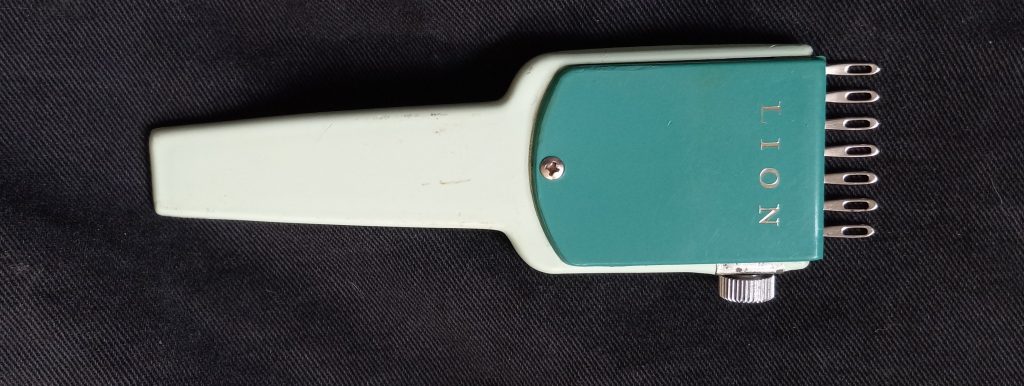
The ratchet tool has a minor crack.

None of these imperfections and some minor missing assesories affected the functioning of the machine, as you can see in my test videos.