Brother KH860 knitting machine combined with Brother KR830/850 ribbing attachment is a powerful standard-gauge knitting setup capable of producing garments, blankets, and other knitted items. Read more about pros and cons of KH860, KR83,0 and KR850 in my Knitting Machine Encyclopedia. The post below is dedicated to the particular setup serviced and tested in my shop in November 2025.
A typical first step for any needlebed is to remove, clean and inspect all needles. Bent needles or those with bad latches are replaced with new stock. Then I clean the needlebeds and carriages from old gunk and grease. I opened both carriages and cleaned under the lids as well. All the needles were then tested while knitting various fabrics: tuck, slip, fair isle and ribbing (see the videos of the ribber and the machine).
Knitting machine:
I replaced the end caps for the lid and the main bed as they were cracked. You might see slightly different colors between left- and right-hand side plastic caps.

The machine was tested on all needles. I knitted tuck-, slip- (same as part) and two-color fair isle. I discovered several faulty needles during these tests and replaced all of them.

Punchcare reader was cleaned from old grease, insides were cleaned from lint and old gunk. Its functionality and needle selection were tested using card #1, where every other needle is selected on every other row (easy to see if there are any problems).

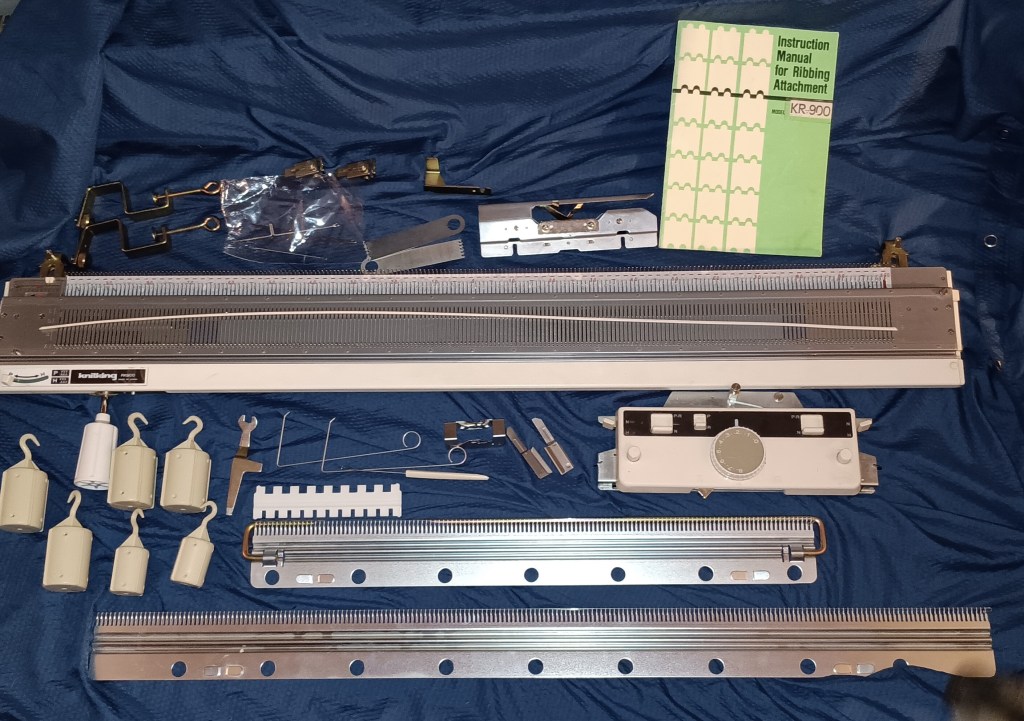
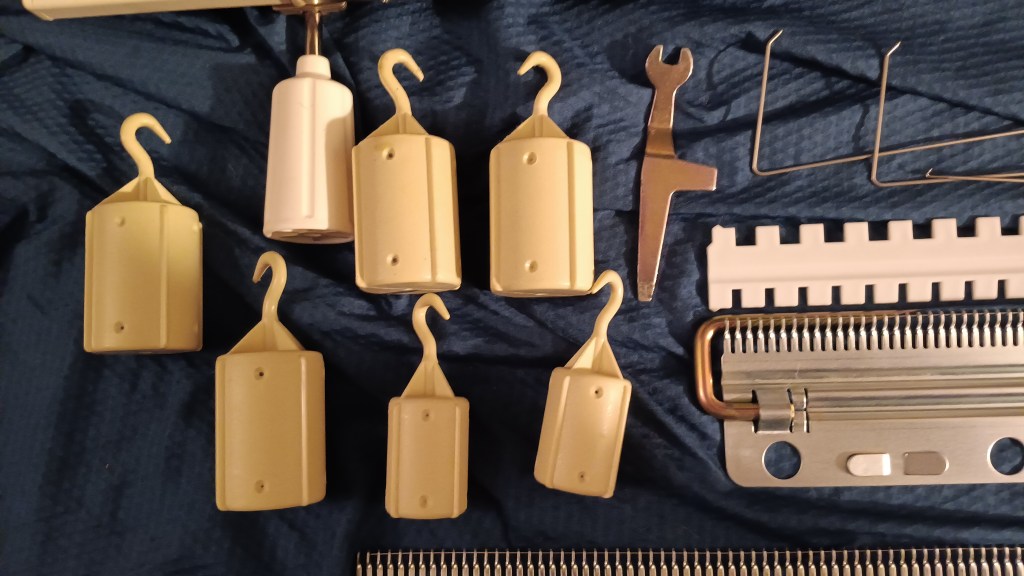
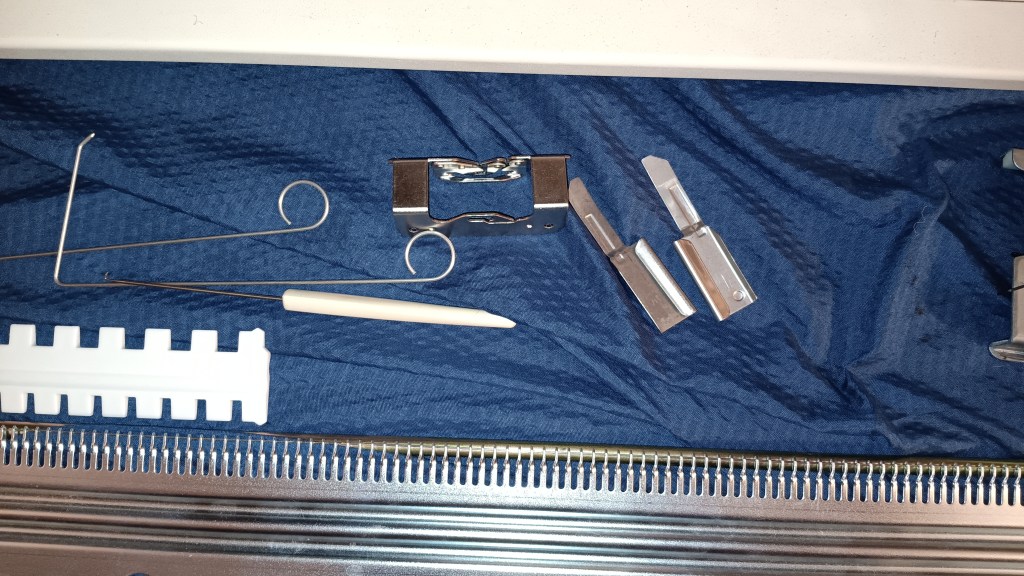
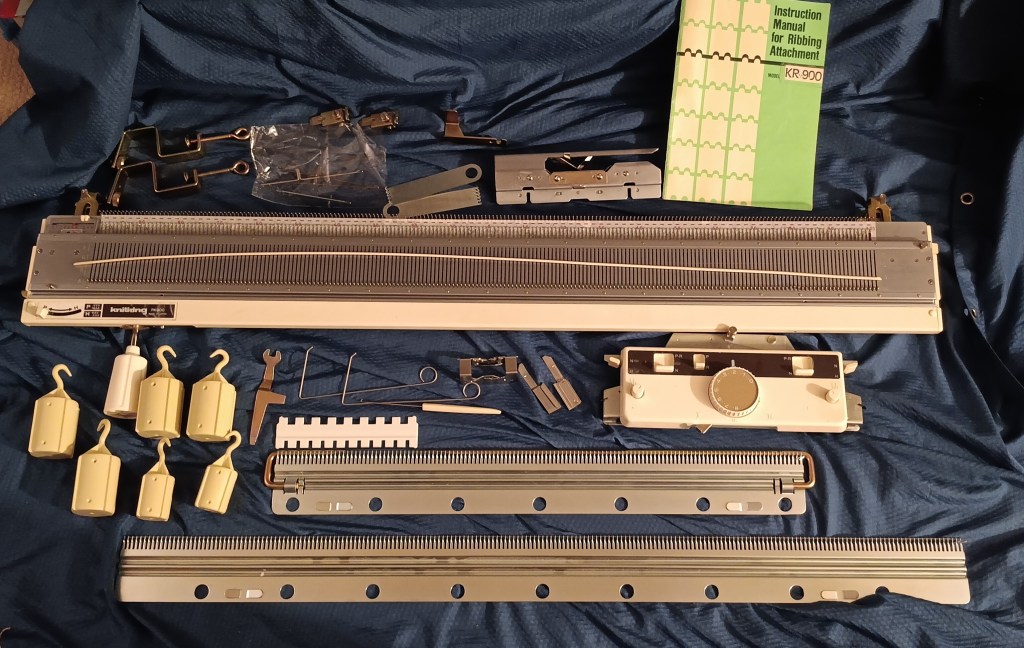
The machine came without many accessories, but I collected a nice, almost all-new stock of accessories.

The missing items are: oil (use Hope’s oil, available on Amazon); a tapestry needle (any needle of your choice will work); and wax.

Brand new (new stock) Brother row counter. Because it is new, its color is lighter than the plastic panels of the needle bed (they show yellowish discoloration due to the sunlight, which is typically seen with these machines).

The cast-on combs are in good shape, too.


New tension mast (new stock). A tension mast that came with this machine did not include a slot for the wax and a slot for the garter carriage sensor. The only “original” accessory is probably the carriage lock.

This KH860 does not include built-in garter carriage rails (in the past, I worked with some KH860 that indeed include those).


Imperfections:
- Overall, the machine is in great shape. The case and the case lid are in good shape. The lid has one medium-sized ben,t but overall is almost free from scratches and scuffs.


2. Carriage has some minor rust spots on the plate where the sinker plate attaches, which I treated but not painted with Rustoleum (it sometimes creates too thick of a layer and might prevent smooth gliding). No rust inside the carriage or on the undercarriage side.


3. The lace carriage has a superficial crack and some minor scuffs on the handle.

4. The retaining bar with a newly replaced sponge strip goes in with a bit of effort. This configuration is the only one out of several I tested (I had to reglue several different sponges) that provides 100% accurate patterning on the whole bed. If the tape on the ends wears out (which happens if you remove the retaining bar often to replace needles, etc.), just tape with very thin medical tape with just one (non-overlapping) layer. Medical tape is the best because if it comes off, it is not as gluey as other tapes (like electrical tape).
Despite all the imperfections and a couple of missing minor accessories, the machine works great (see the video). The carriage slides on all needles (without yarn) very easily, with just one hand, with different carriage settings. Even with the yarn, it glides easily.

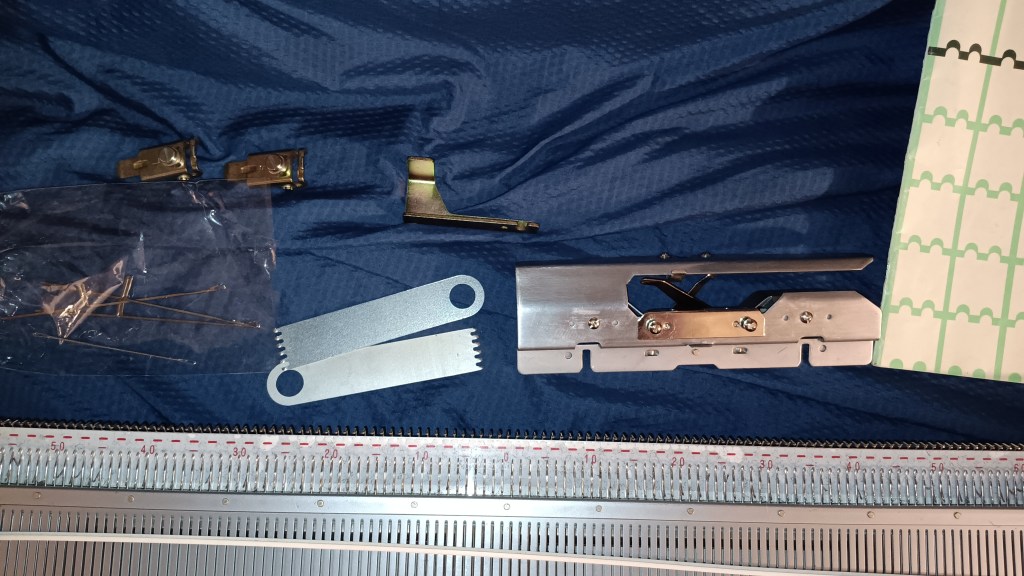
RIBBER:
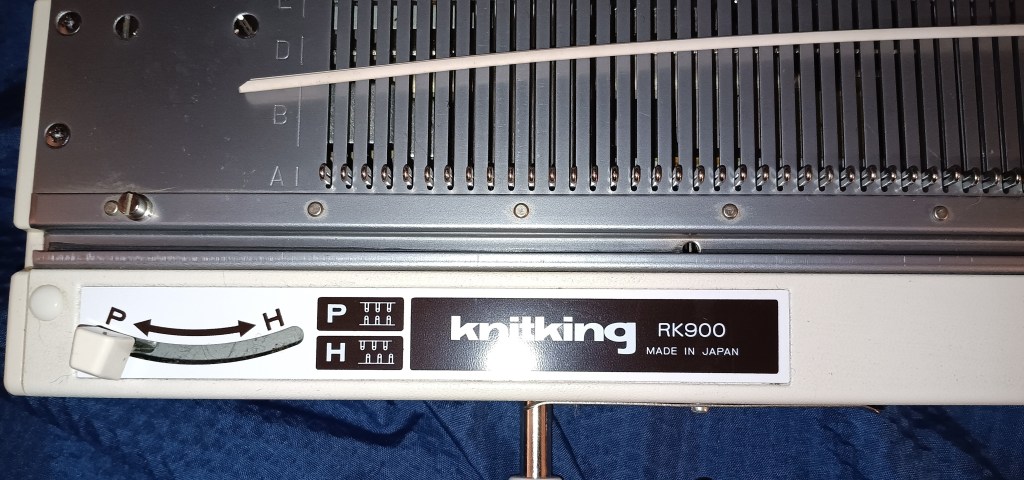
The ribber bed is KR830 model but the carrigae is for the KR850 (the lili buttons are a give-away).

The carriage was deep-cleaned and inspected. All buttons, levers, and pressers work and move smoothly (see the video).

The ribber brackets were cleaned of old grease to ensure smooth movement (but you don’t want it too smooth to prevent the ribber from unplanned sliding down).


The machine comes with all accessories (including a hard copy of KR850 manual; KR830 can be found online). When attaching the needlebed, refer to the KR830 manual. When operating the carriage, refer to the KR850 manual. I do not have a plating feeder at the moment; that is an accessory to the KR850 carriage. Nor do I have the pressers (when I knitted, I did not use them at all). My understanding is that these are not all that critical. Most knitters do not get that advanced in choosing plating.


The ribber was tested using two different combinations of every other needle (it is easier to knit on every other needle than on all needles: problems associated with yarn and tension selection are less pronounced) to ensure that all needles form the correct stitches. I used two separate yarns but they are only different by color.

BTW, I am including the yarn I used while testing the ribber (the bluish one) for you to practice with a knwon-to-work thread

I am also including a manual for the KR850 for the carriage functions. I do not have a spare manual for the KR830 but it is available online for free. The only difference between KR830 and KR850 beds is the brackets: how they are inserted and attached to he main bed. All other settings and functions are the same. As a result, some of the accessories that typically come with the KR850 ribber bed will not be included with this KR830 bed.
Imperfections of the ribber:
- The cast-on combs are not as smooth as I wished, but the yarn does not get pulled. So I left them alone.
- The knob for the I-II change lever (at the bottom of the carriage) is in a bit rough shape. But it sits pretty tightly, so I left it along.
- When attaching the connecting arm to the main carriage, sometimes the plastic from the oister screw-on knobs comes off as small shavings (the metal screws rub against the thread on the oister knobs). It is pretty typical for these old machines.
These imperfections are mostly cosmetical. They still did not interfere with me knitting several pieces of fabric that I converted into the items below.

Hat:


Ear warmer/head band: